Automate Your Facebook Posts with SmartlyQ and Zapier/Pabbly
Introduction
In this article, we will show you how to post a Facebook post generated by SmartlyQ's Smart Editor, via the Zapier / Pabbly Webhooks feature.
The use case below will cover both Zapier and Pabbly:
- how to make a workflow in each platform.
- how to add your webhook URL for both platforms in SmartlyQ.
- how to generate a Facebook post and share it to the platforms via the webhook feature.
- how to finally post on Facebook.
Zapier Use Case
Note: You will need to have at least a Zapier Pro Subscription in order to use the webhook trigger.
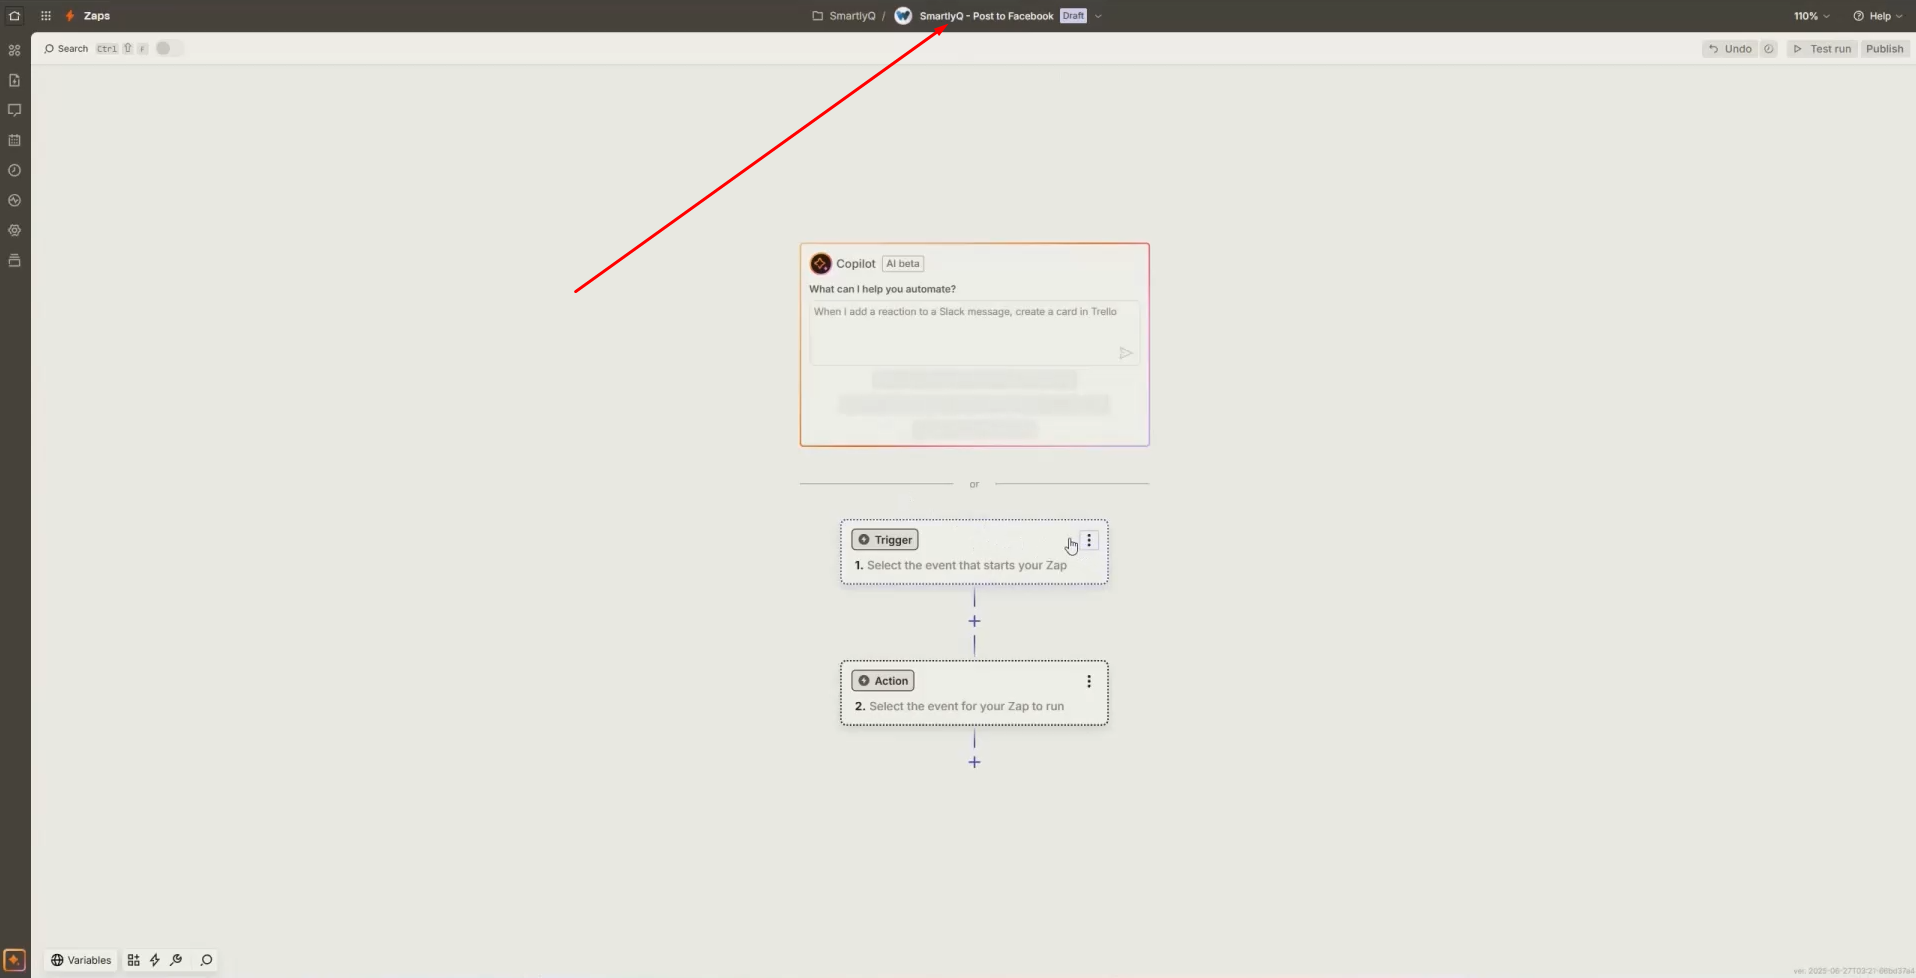
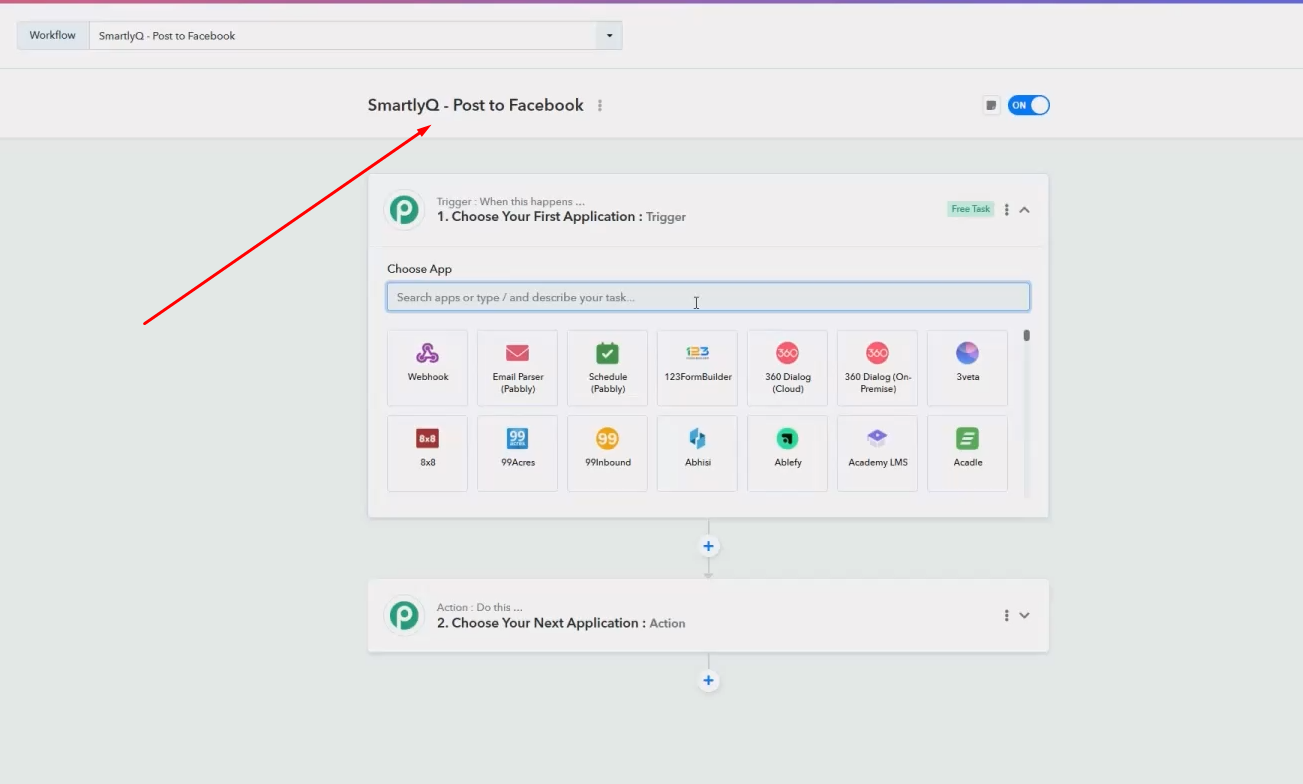
1. Log in to your Zapier account and create a zap
- Create a new zap and give it a meaningful name.
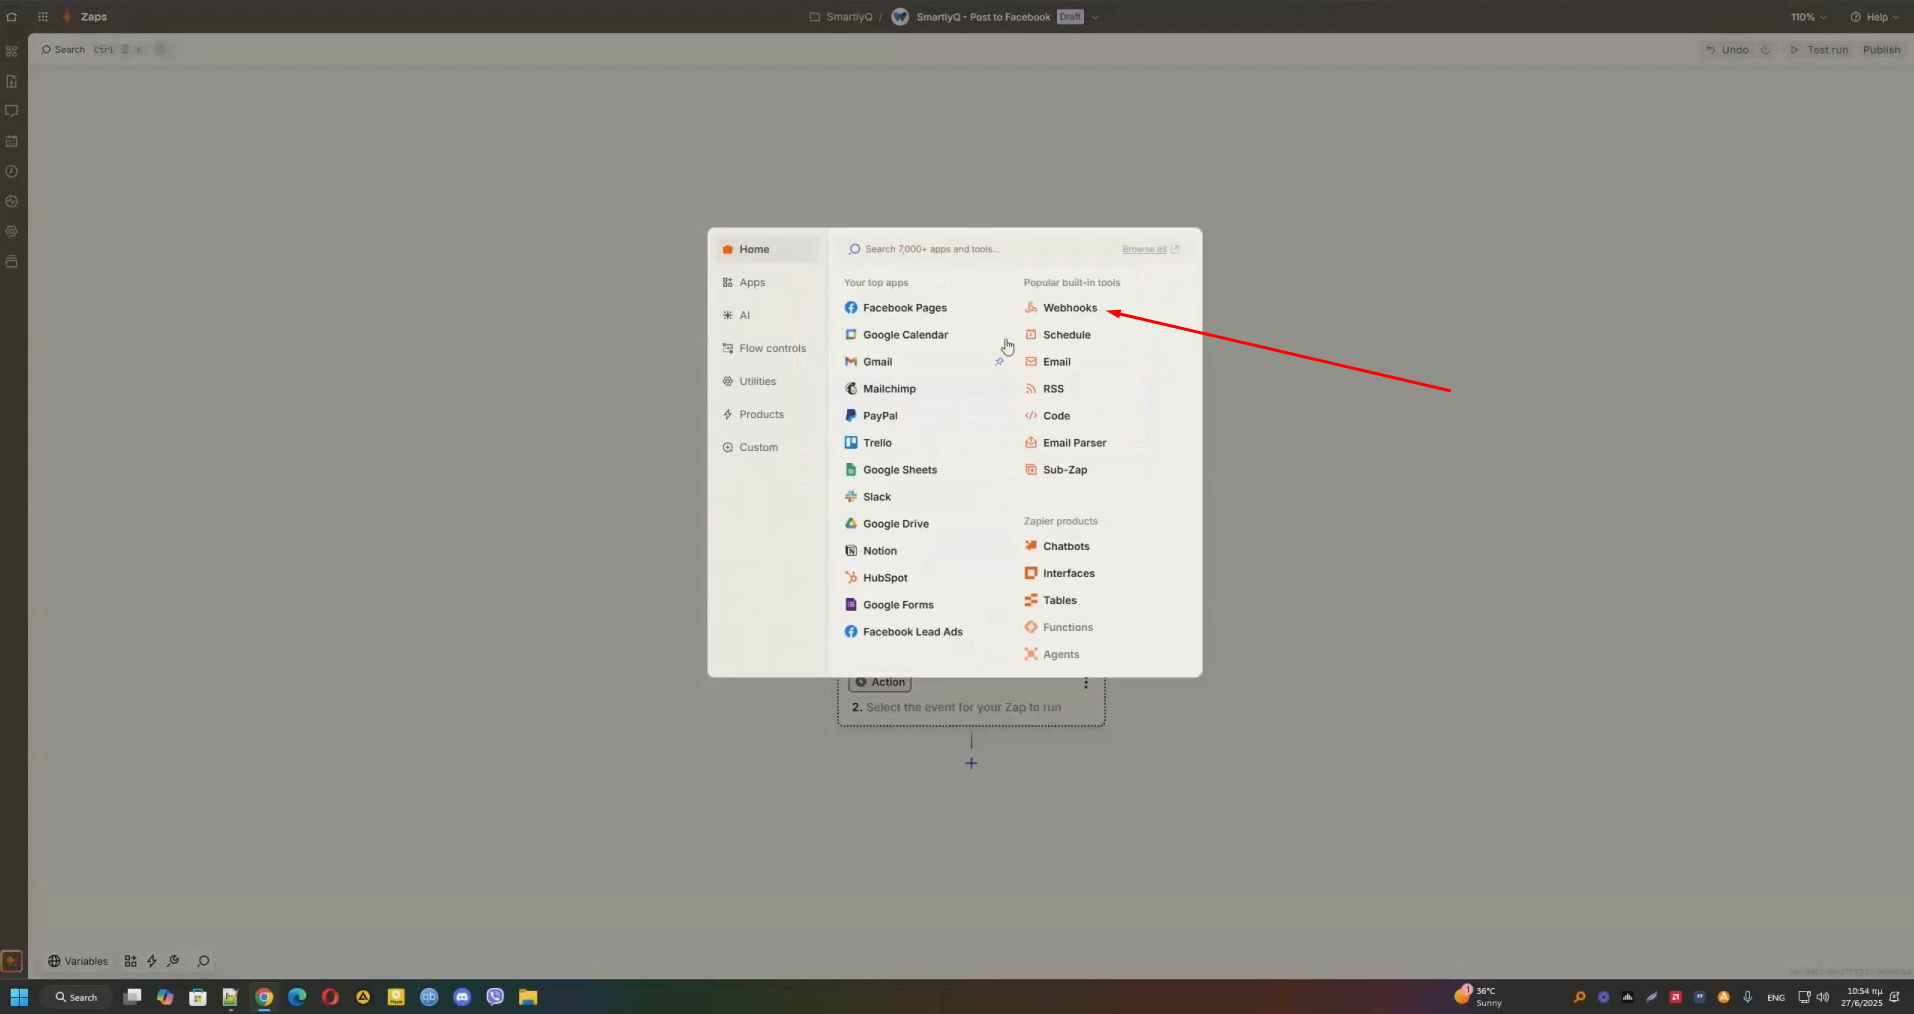
2. Add a webhook trigger
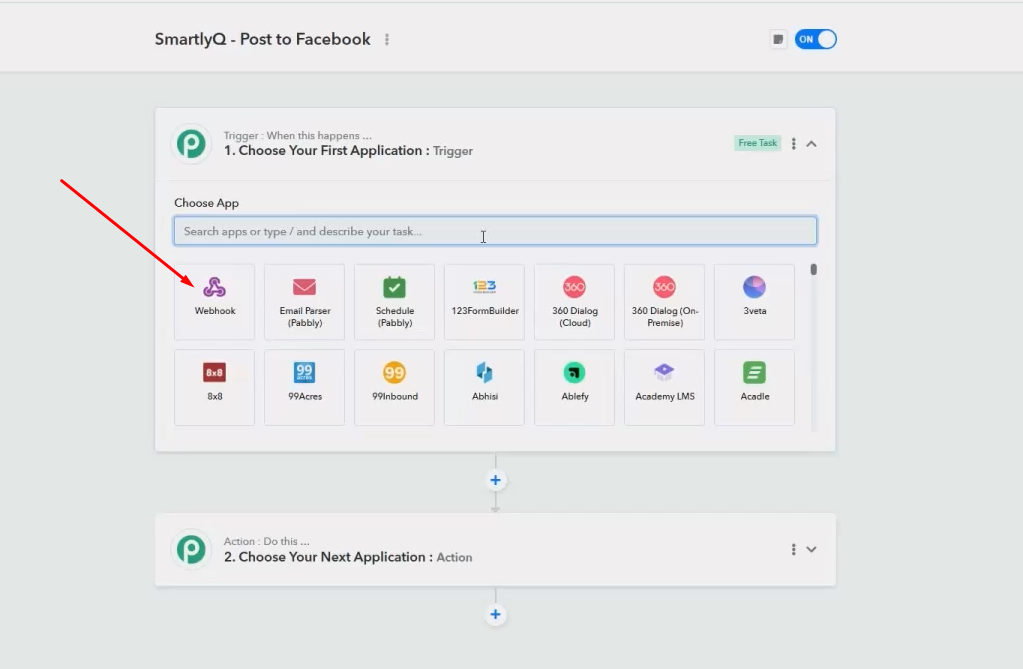
- Press on the trigger step and select zapier's built-in "Webhooks" tool. If you can't see it straight away, use the search bar to search for it.
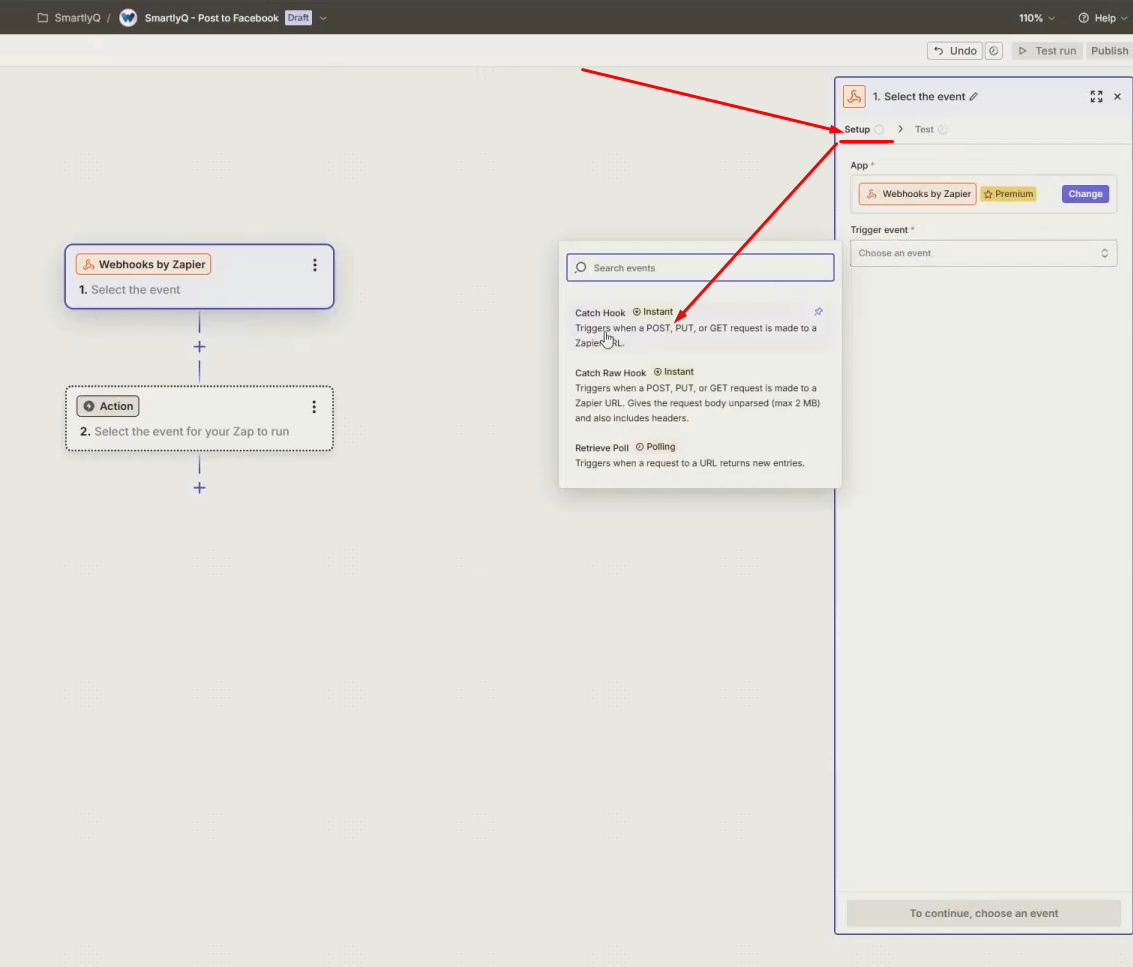
- On the right side bar, on the "Setup" step, choose "Catch Hook (Instant)" as the trigger event. Then press "Continue" at the bottom.
- On the "Configure" step, leave as is and press "Continue" at the bottom.
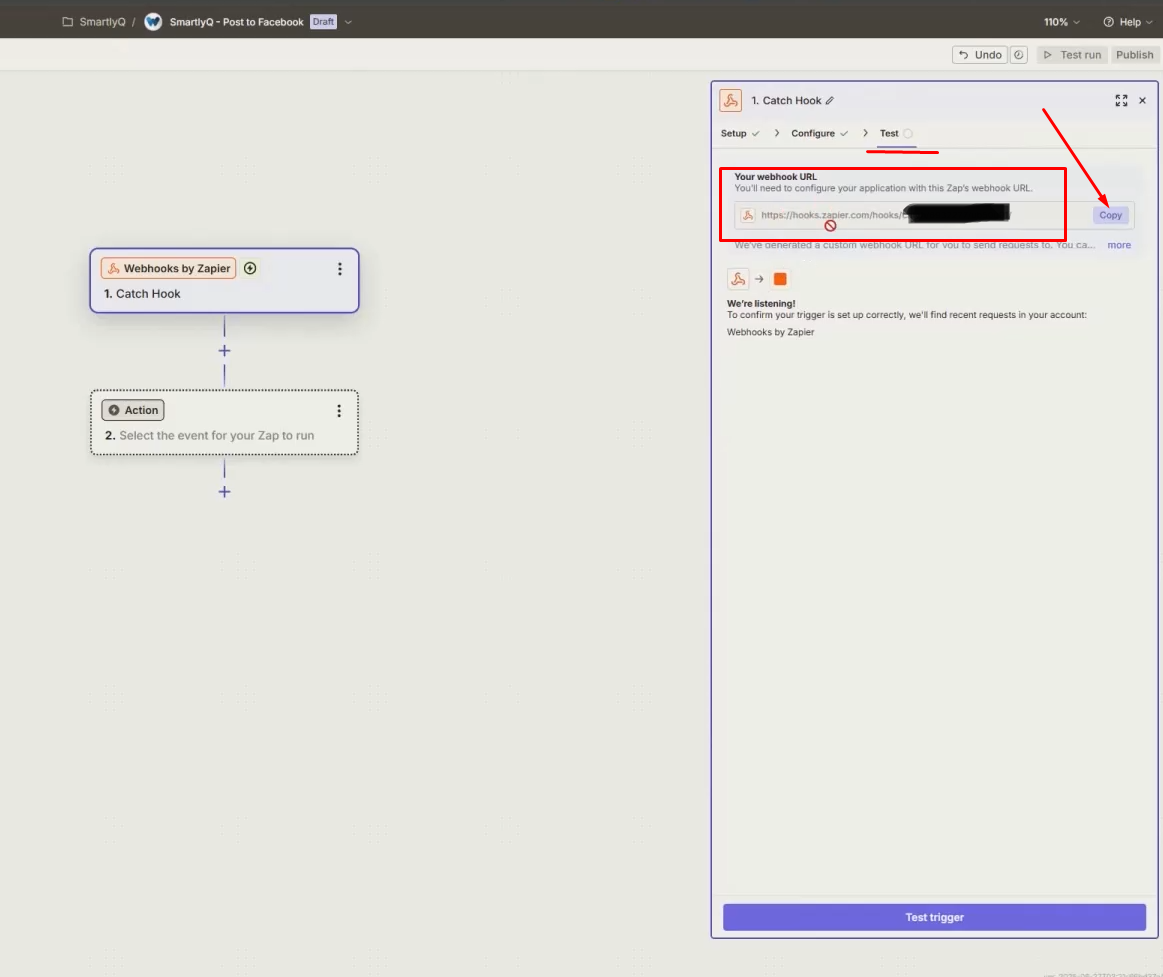
- On the final "Test" step, a webhook URL will be generated for you. Press the Copy button to copy this URL into your clipboard.
3. Add your Zapier webhook URL into SmartlyQ
1. Log into SmartlyQ:
- Go to SmartlyQ and log in to your account.
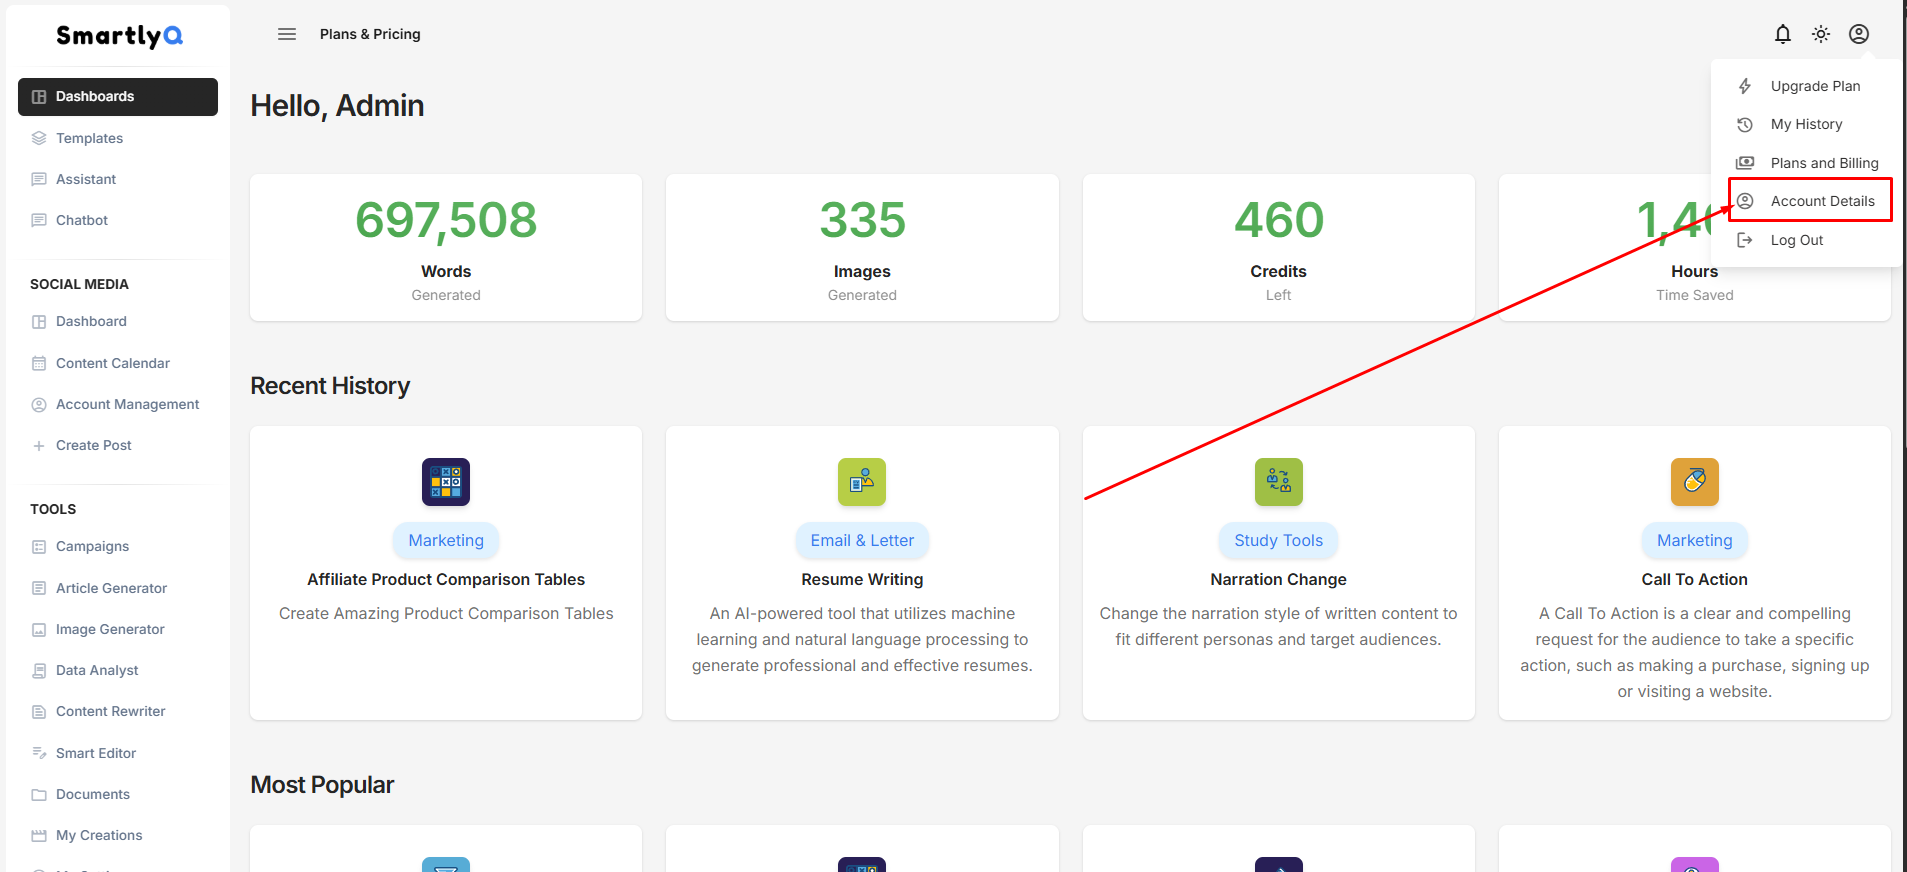
2. Navigate to Avatar Icon > Account Details**:**
- Look for the Avatar icon on the top right corner. Click on it and select the "Account Details" option..
3. Find the Webhook menu item:
- In the next screen select “Webhook” from the left hand menu.
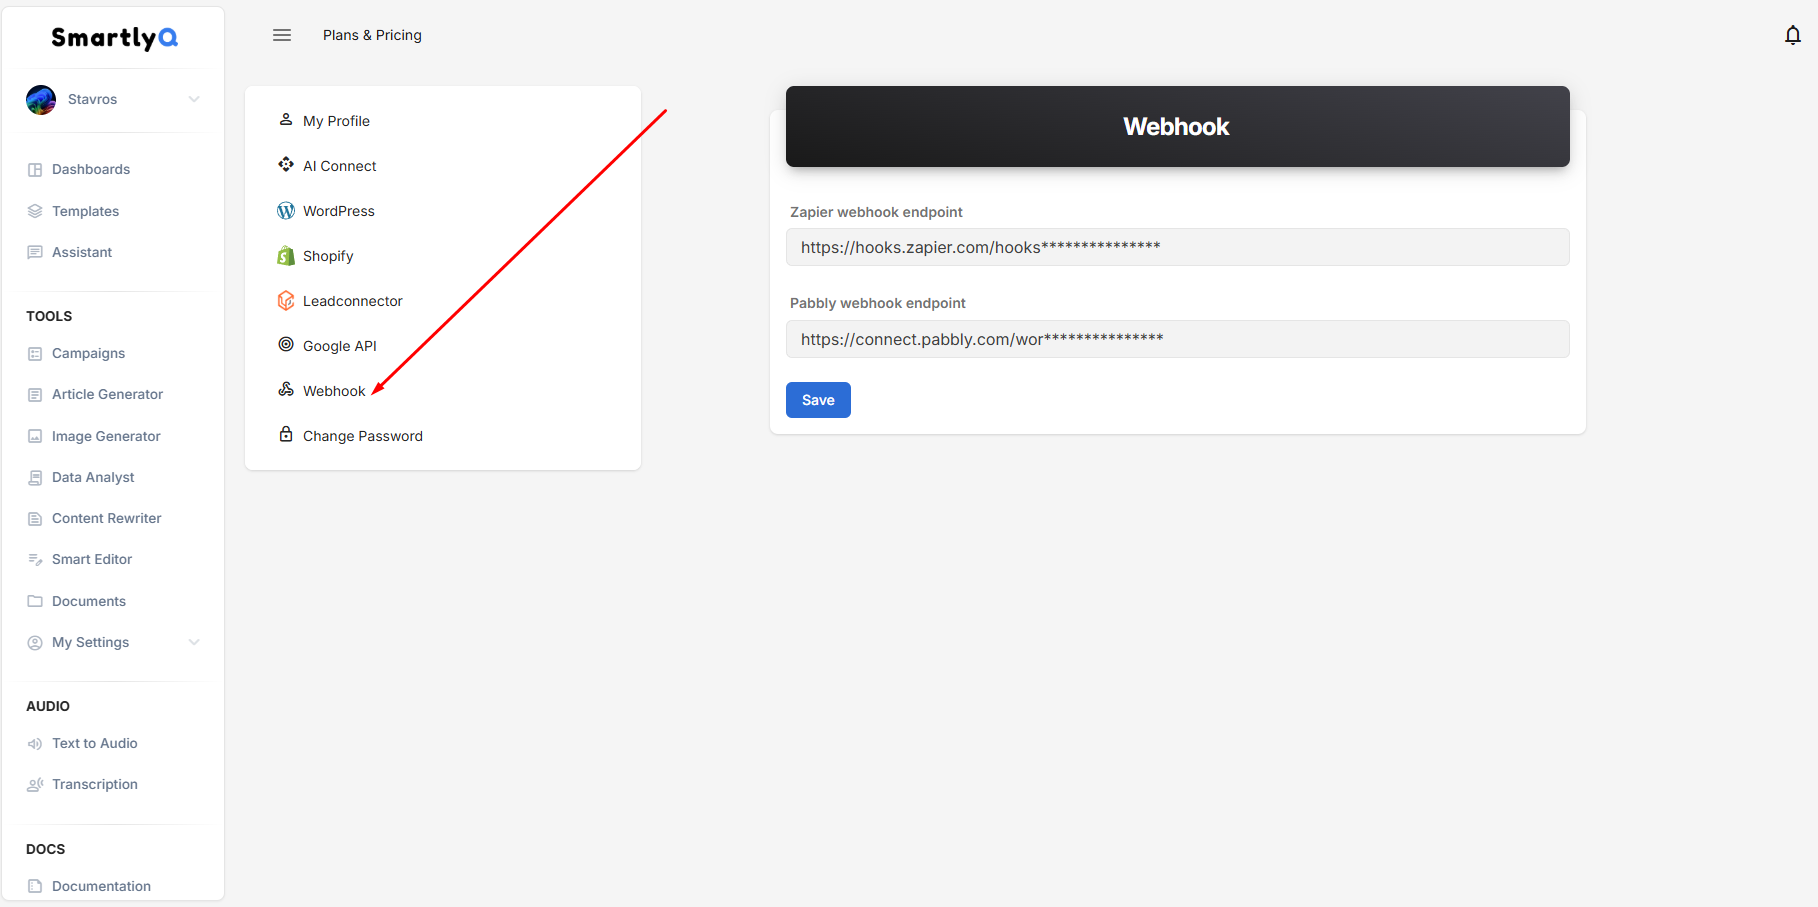
4. Paste Your Zapier Webhook:
- In the provided field for Zapier, paste the Zapier Webhook URL you copied earlier.
- Make sure there are no extra spaces before or after the URL when pasting.
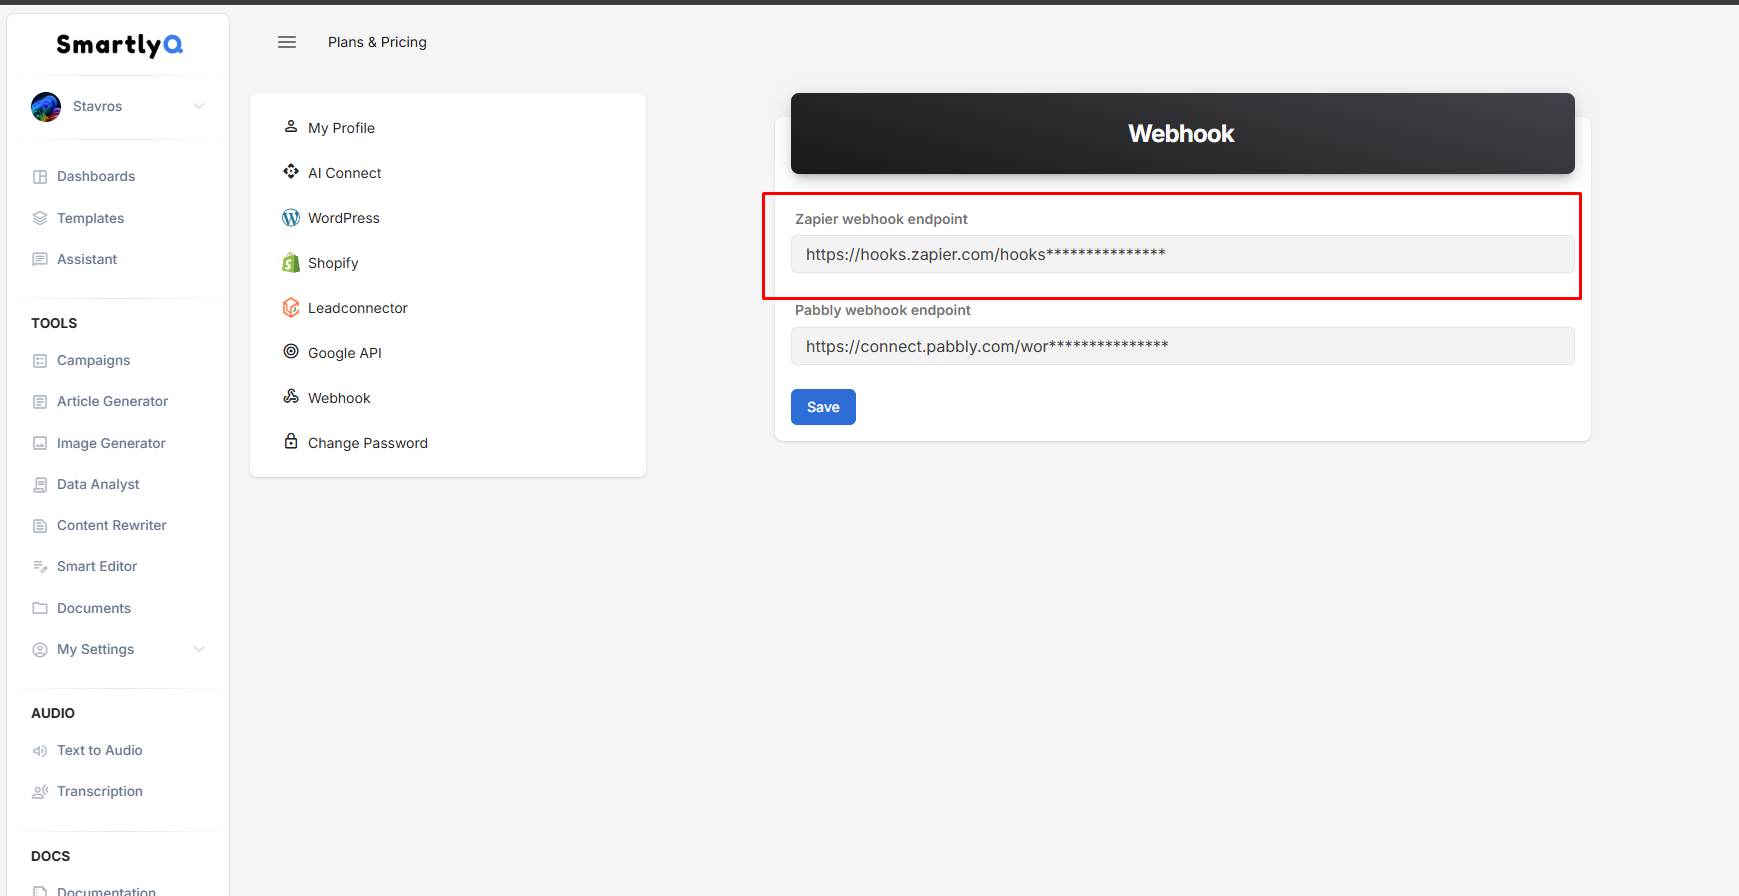
5. Save Changes:
- Ensure you click on “Save” at the very bottom to store your changes.
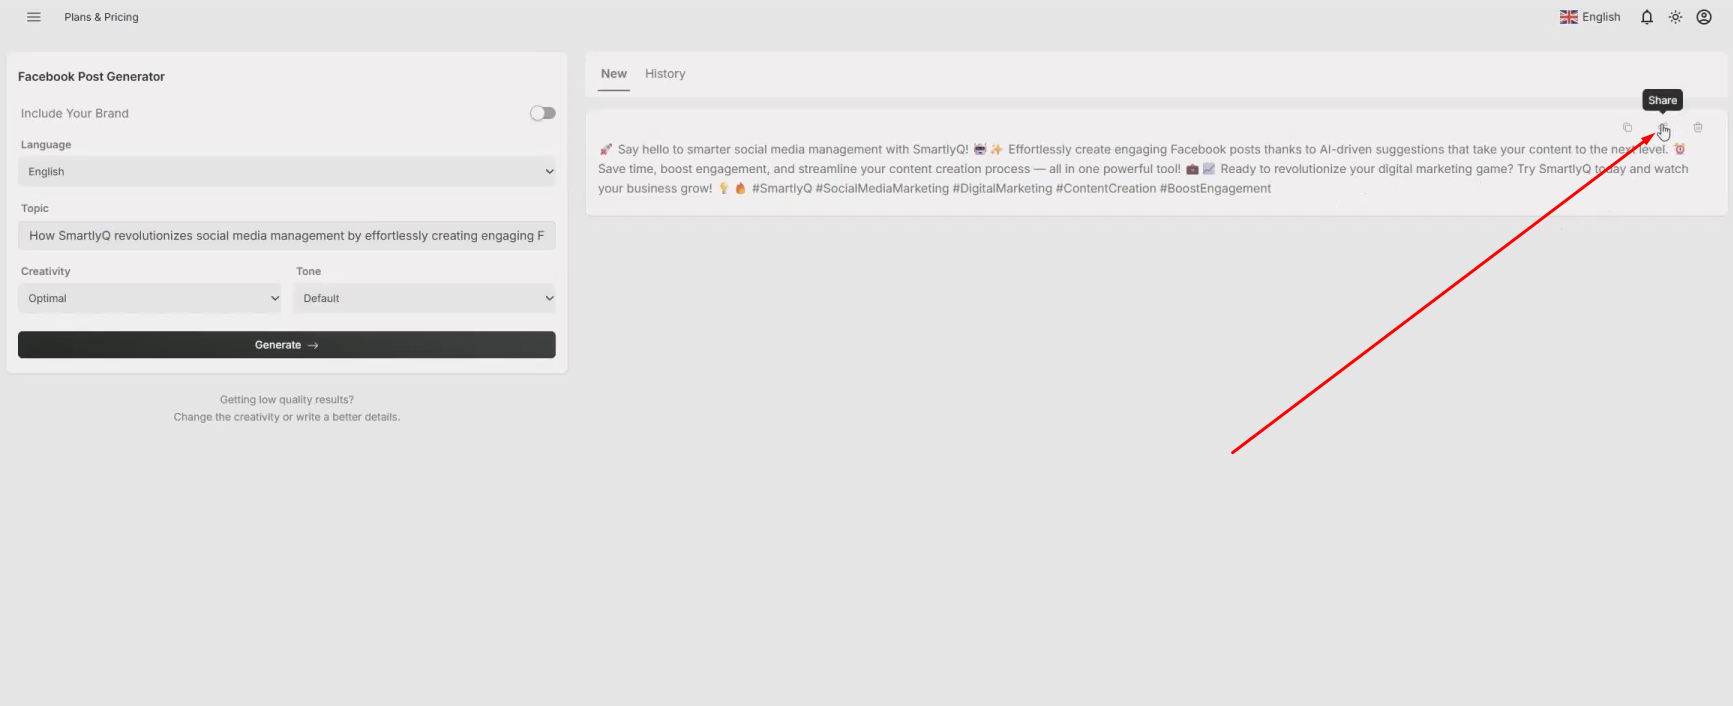
4. Generate a Facebook Post
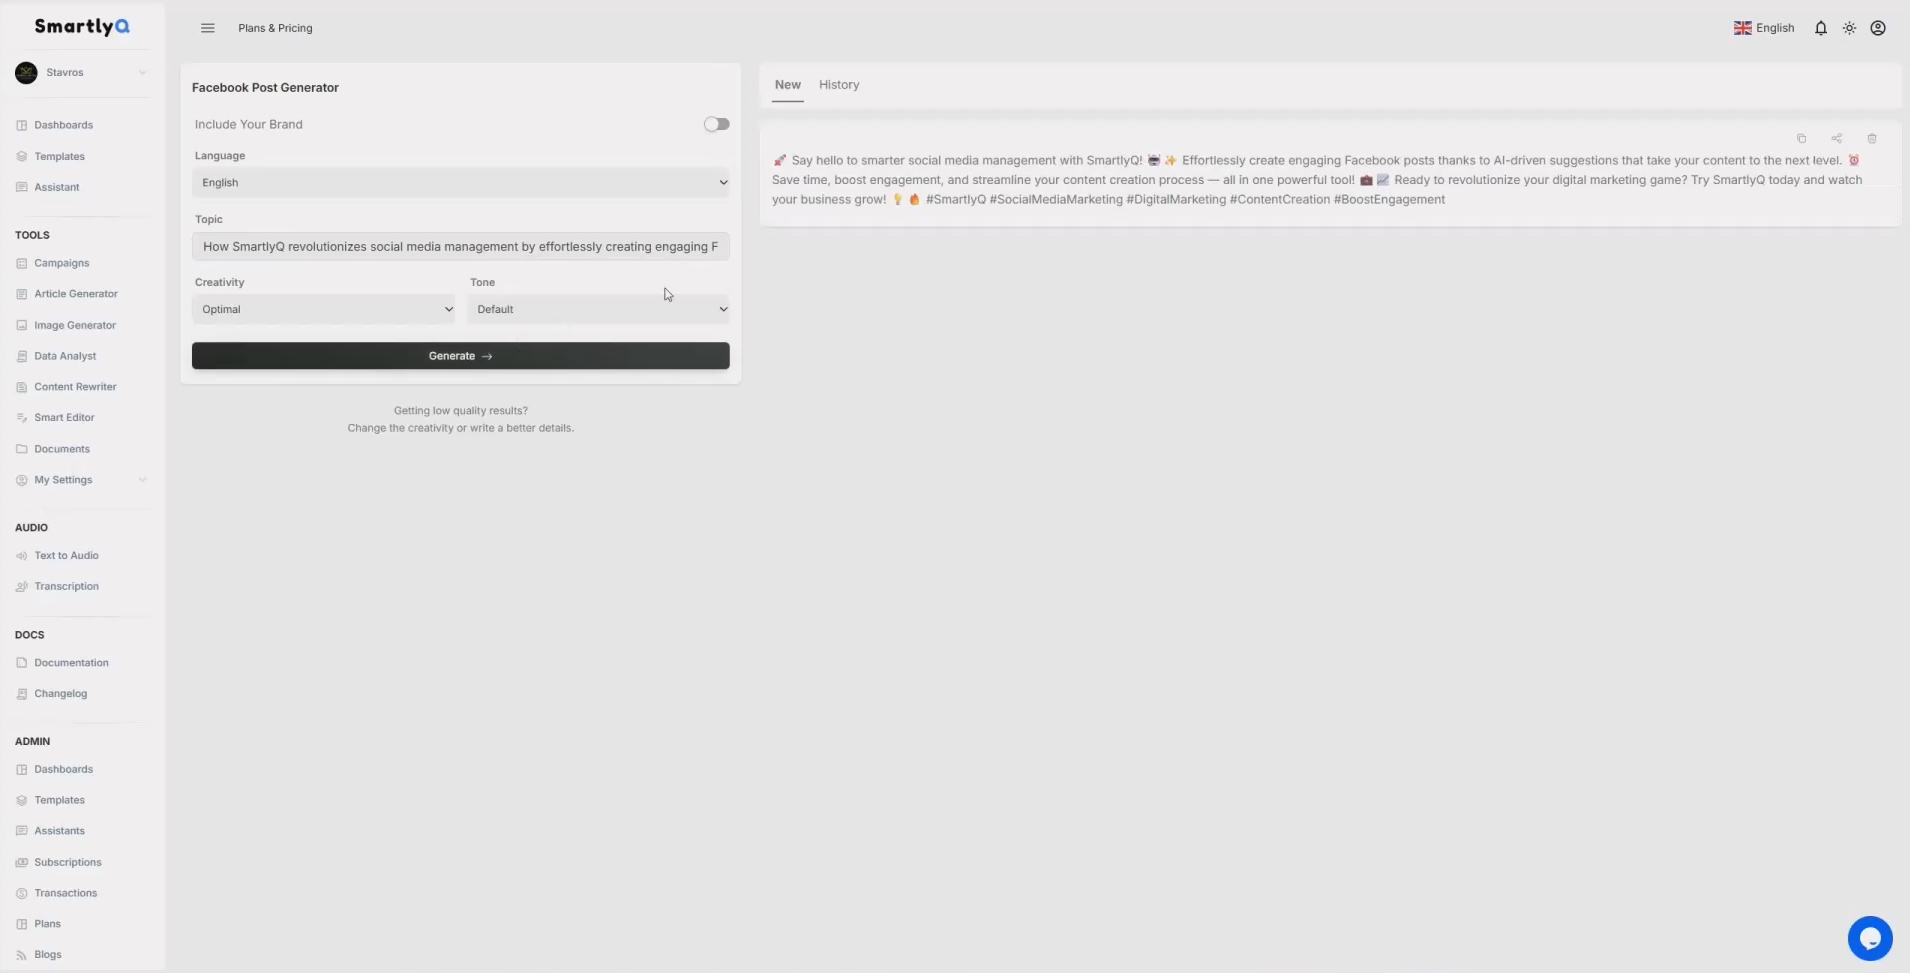
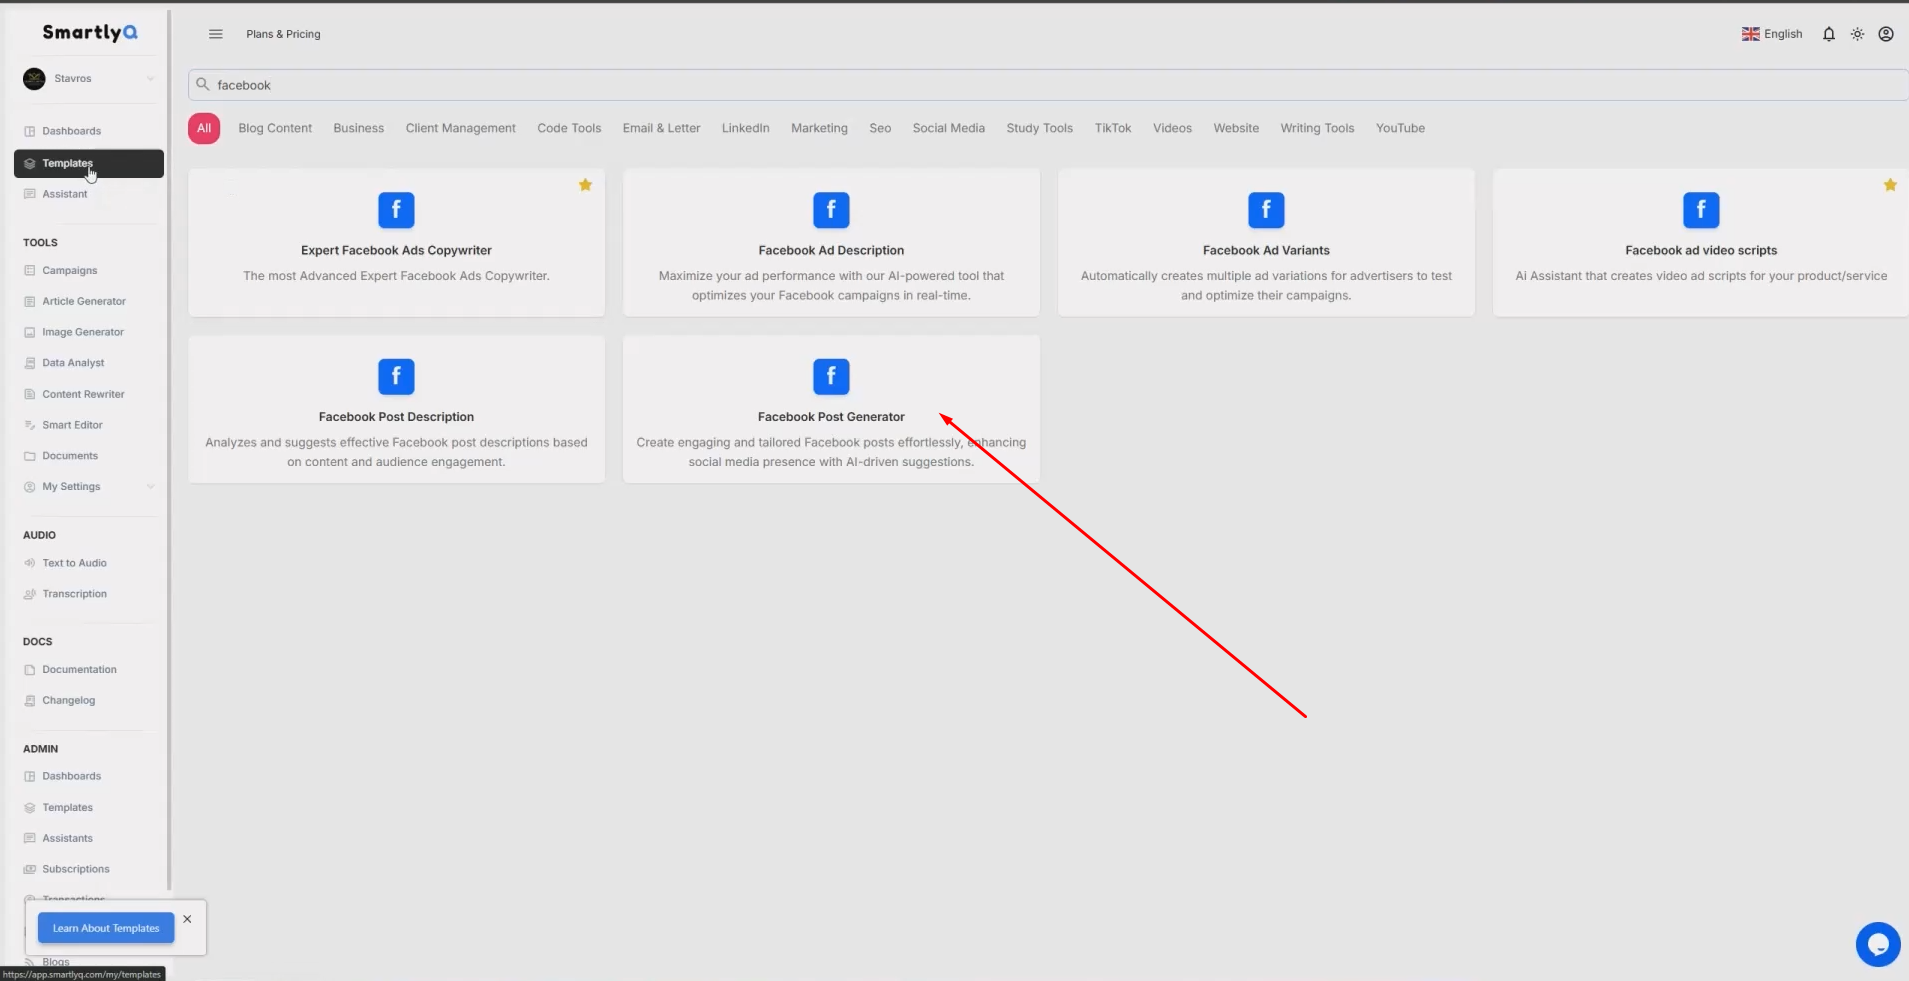
1**. Navigate to the Templates:**
- Look for the Templates on the top left in the left side menu.
- Search for the "Facebook Post Generator".

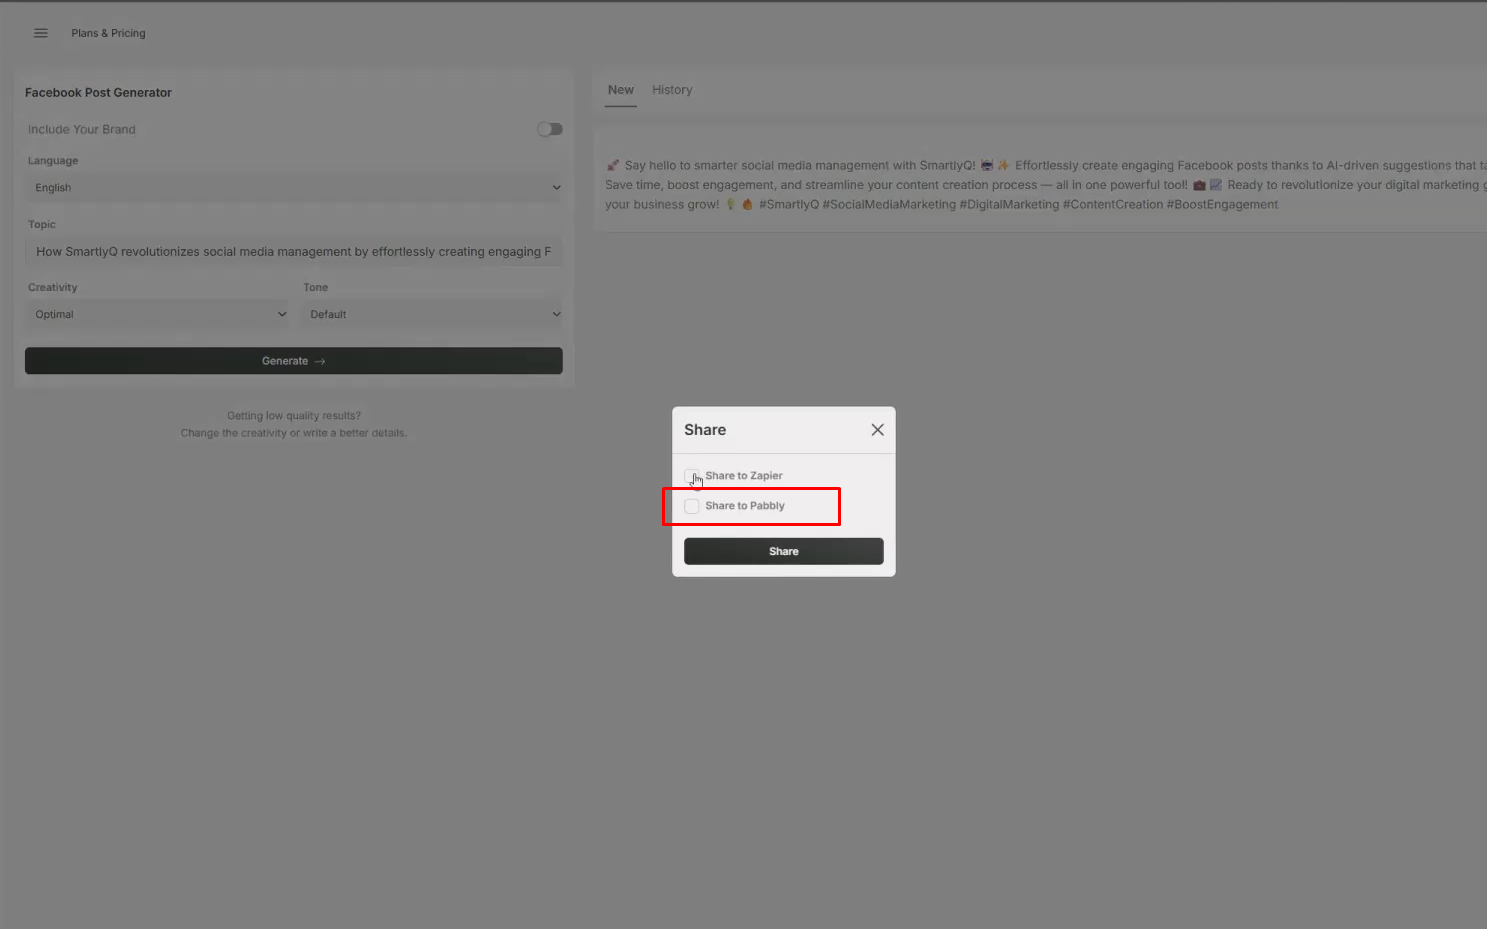
2**. Enter Topic and write your post:**
- Enter a topic in the template input and generate your post.
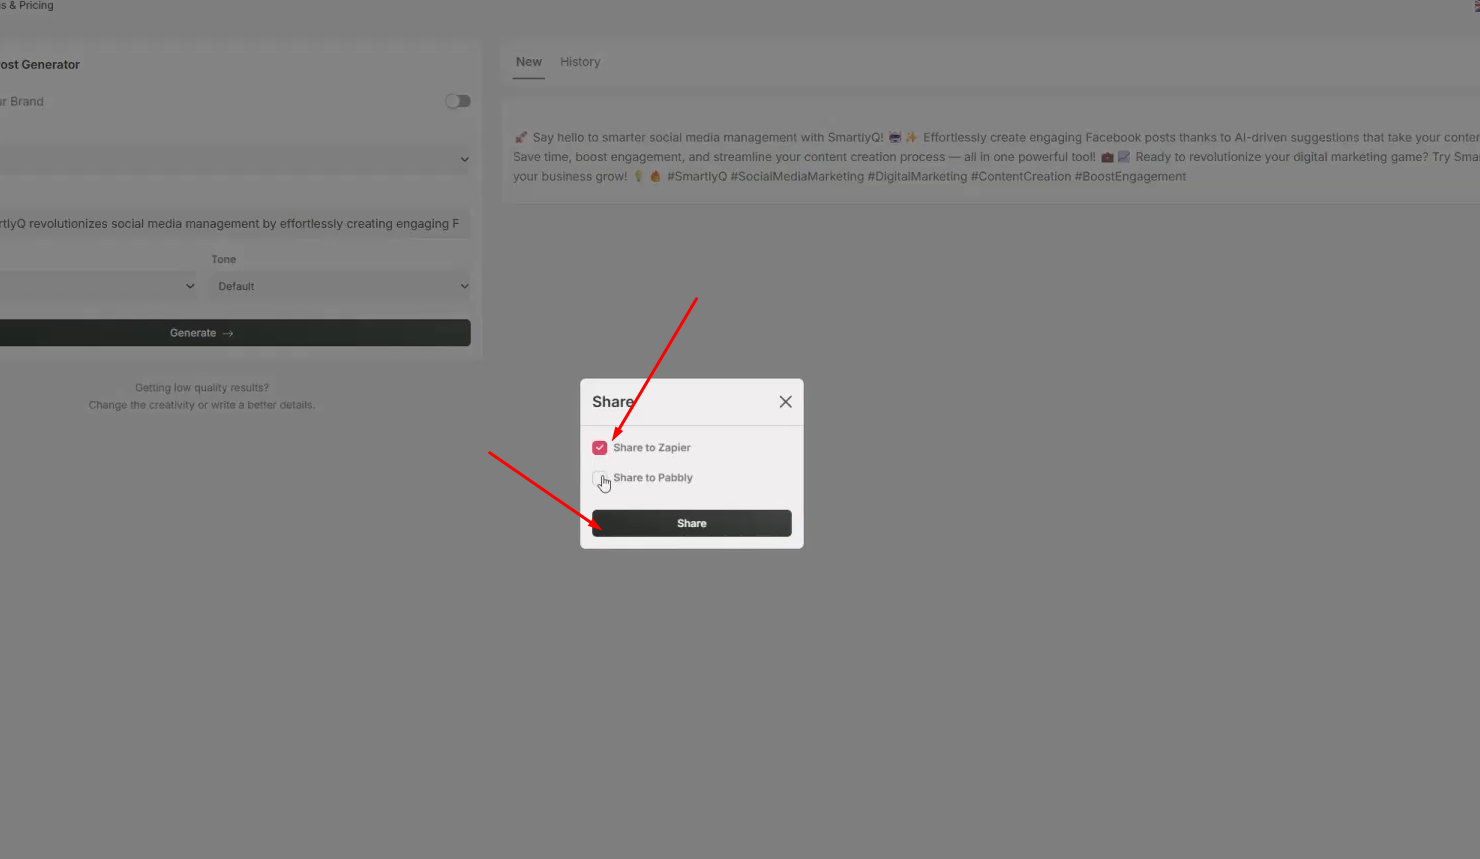
3**. Share the content to the Zapier Webhook:**
- Press the share icon and then check the "Share to Zapier" checkbox and then press "Share".
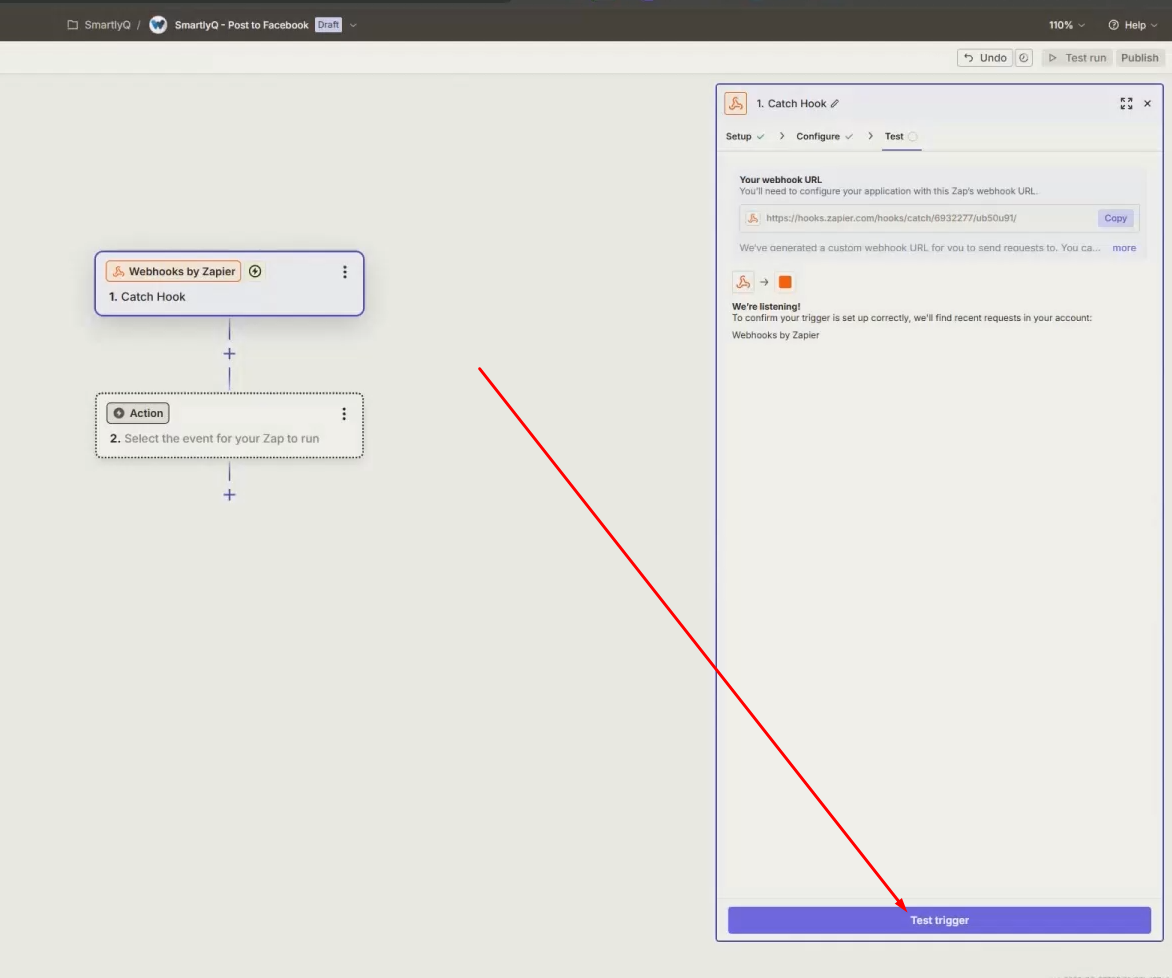
5. Return to the Zapier workflow
1. Complete the next zap action steps:
- Now that we've sent the data to Zapier, we need to complete the flow.
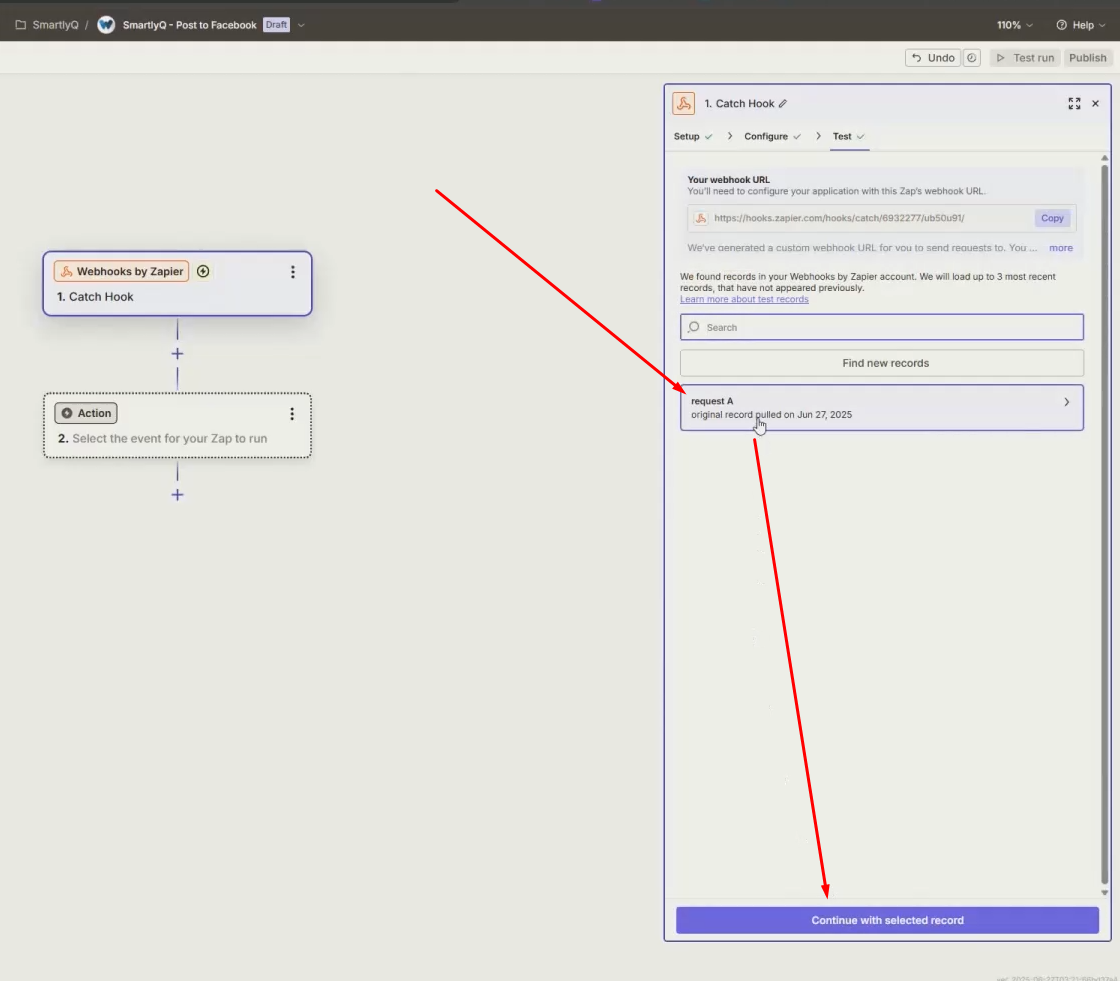
- In the first trigger step, press "Test Trigger" to draw the post we just sent to the Zapier webhook.
- You will see that the record has been fetched. Select it and then press "Continue with selected record".
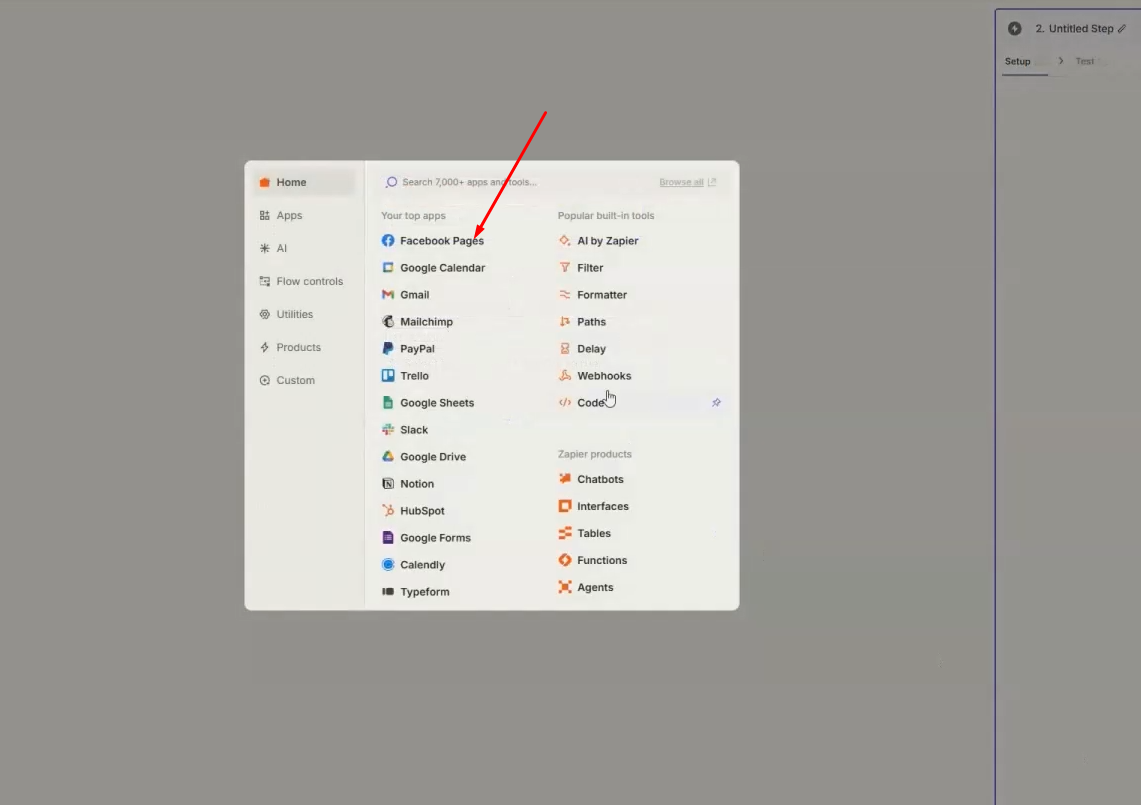
2. Add a Facebook action step:
- It will ask to create an action. Select the "Facebook Pages" from the list, otherwise search for it if not visible.
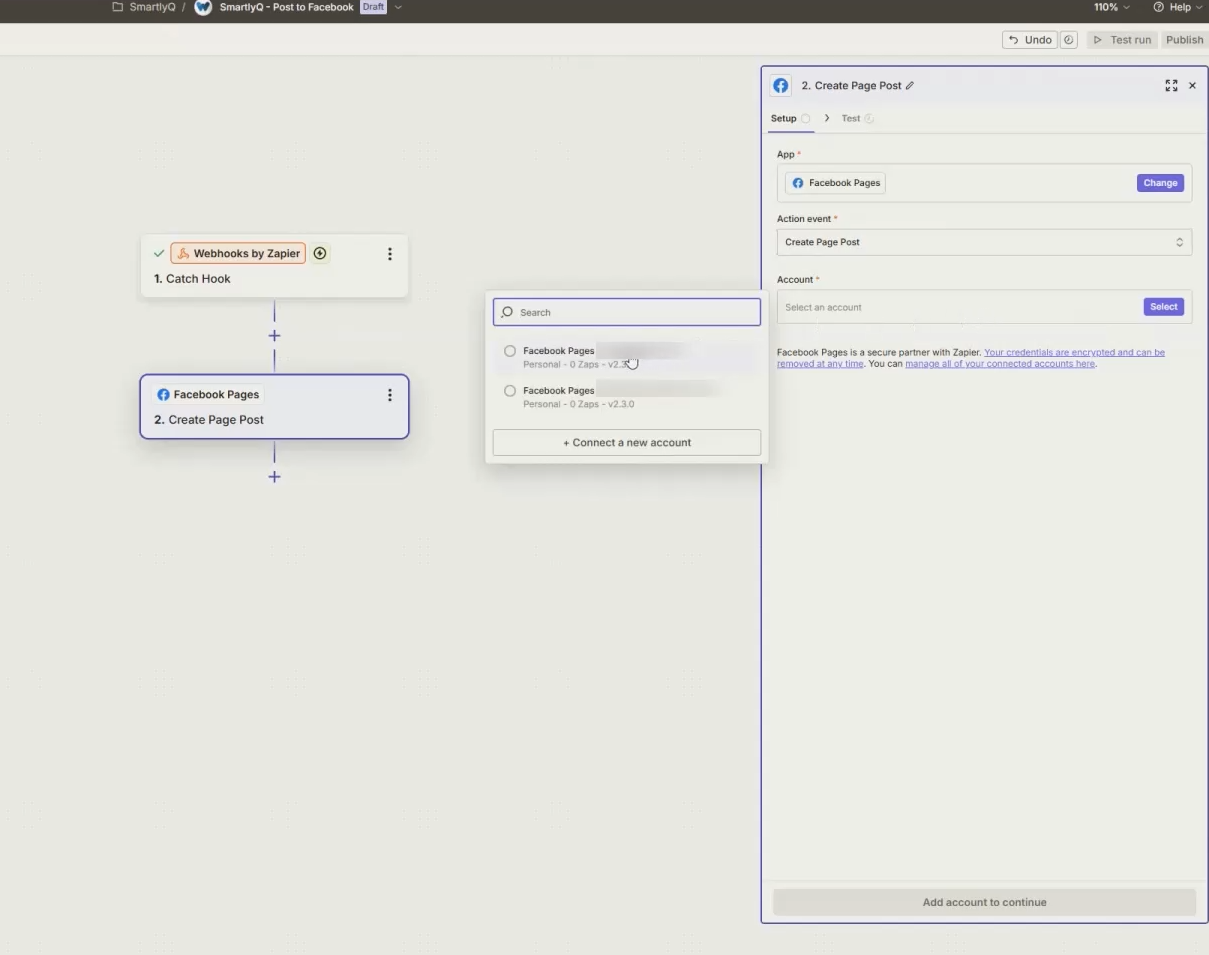
- For the action event, select "Create Page Post" from the list and on the next box select your Facebook Account. If not connected yet you must go through the process of connecting it. Make sure to select the proper page you wish to post to, if you have more than one pages in your account.
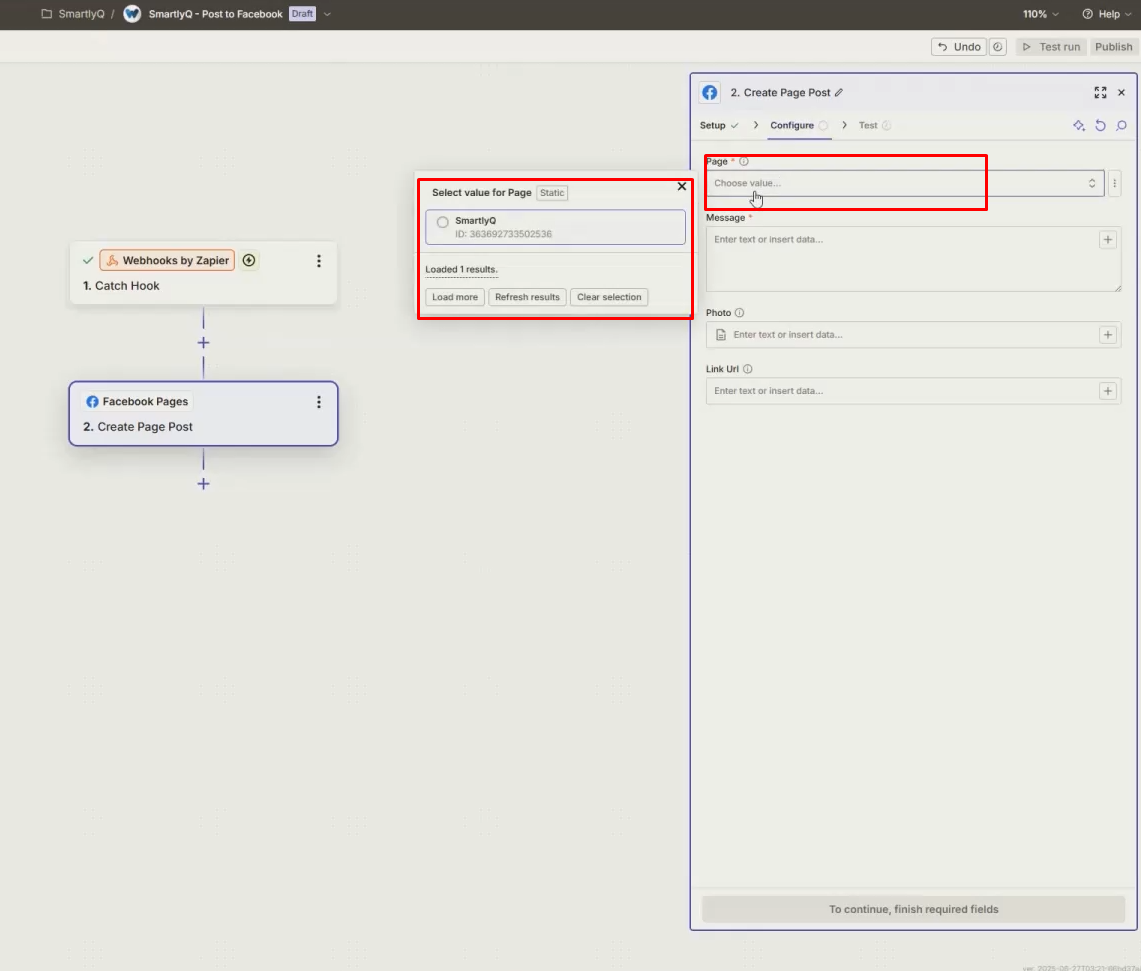
- Next, select the page:
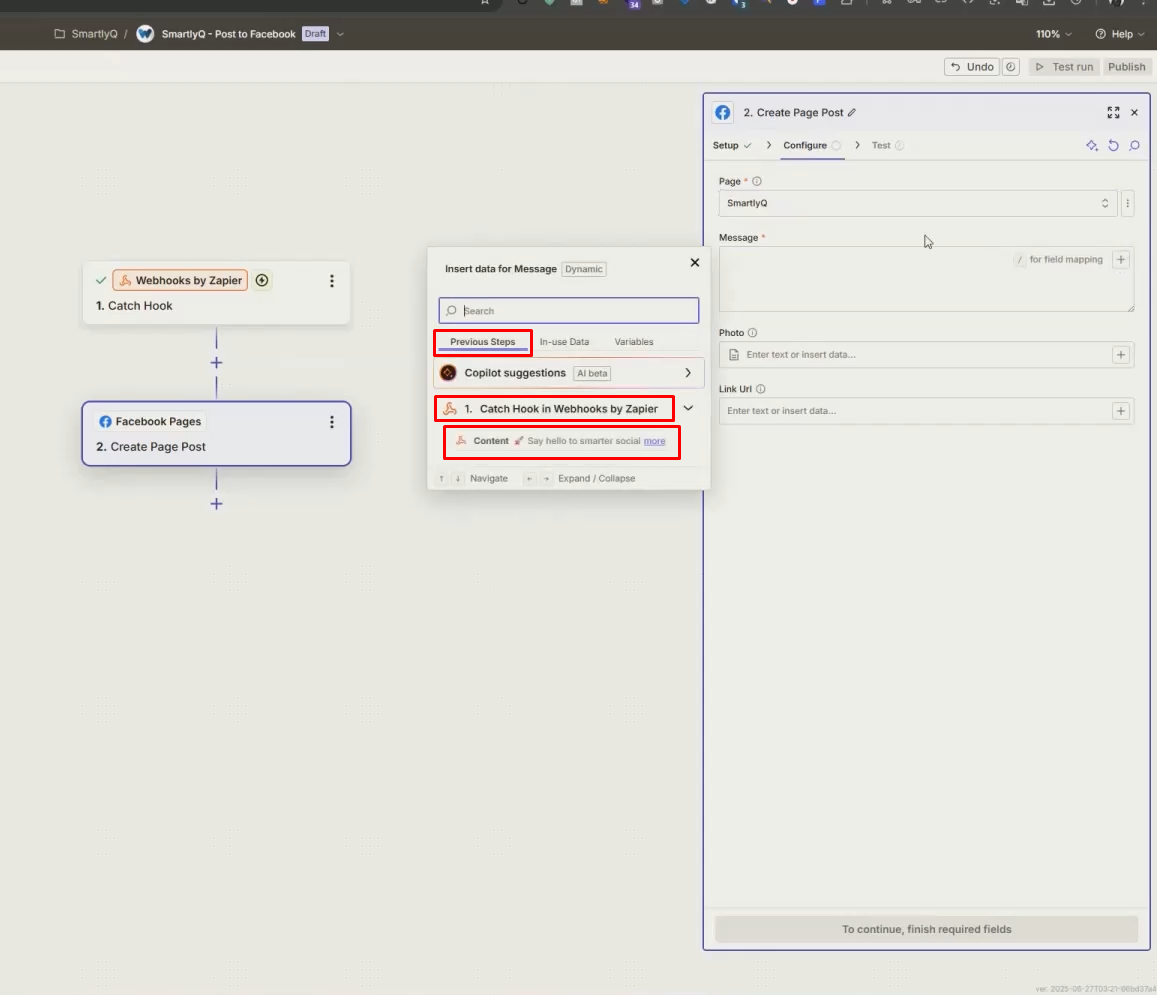
- In the "Message" textarea, click on the cross icon and select the content from the previous trigger step (webhook):
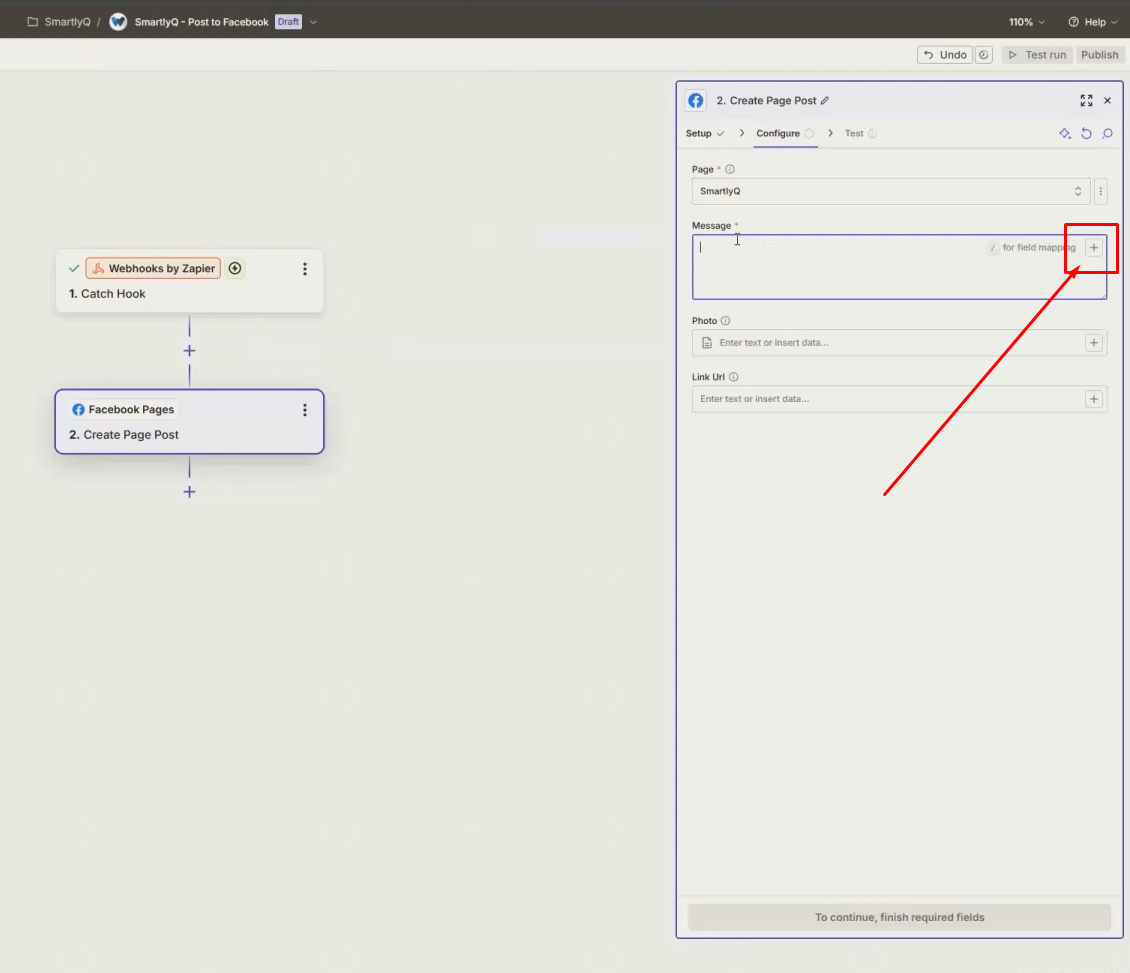
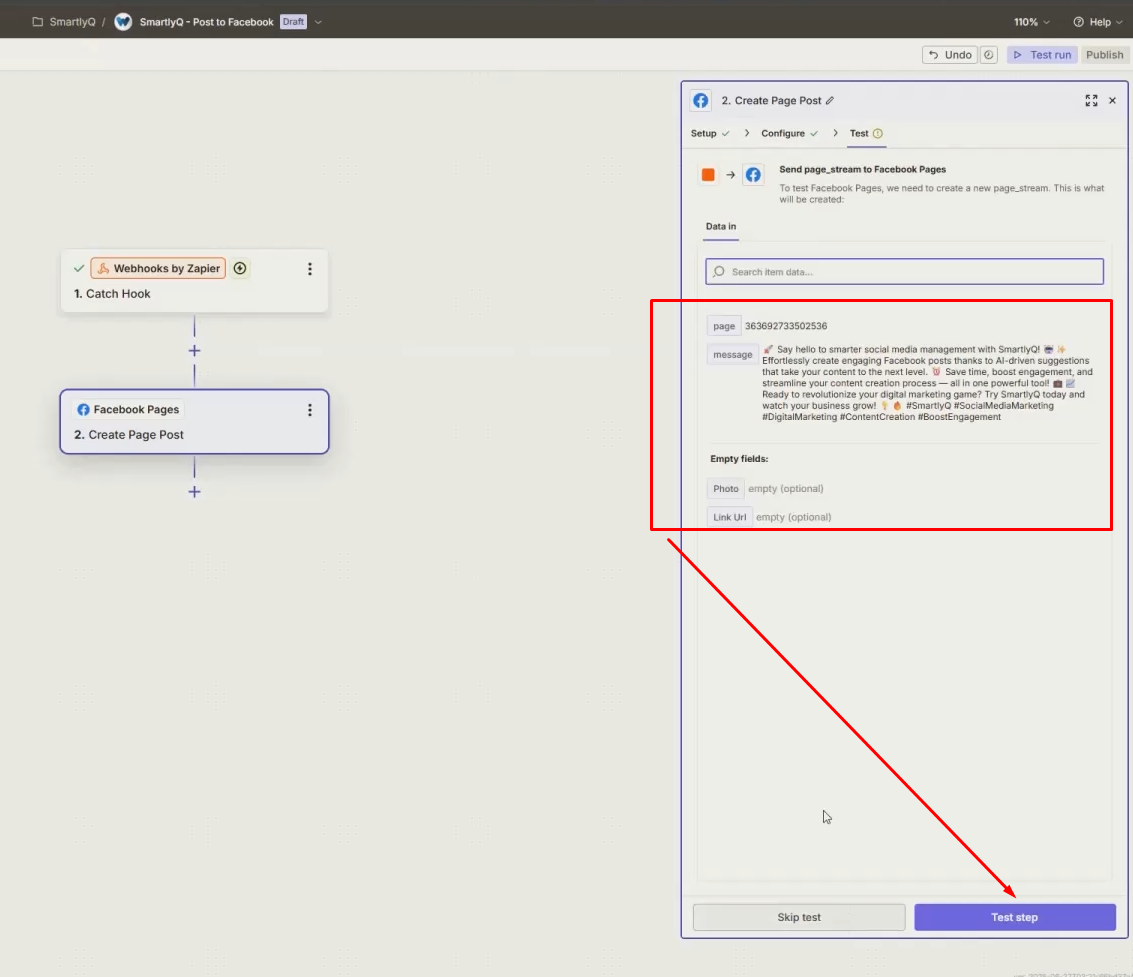
- Optionally add a Photo and link URL. When ready, press "Continue". You will get a preview and then yuo can press on the Test step button to test the step.
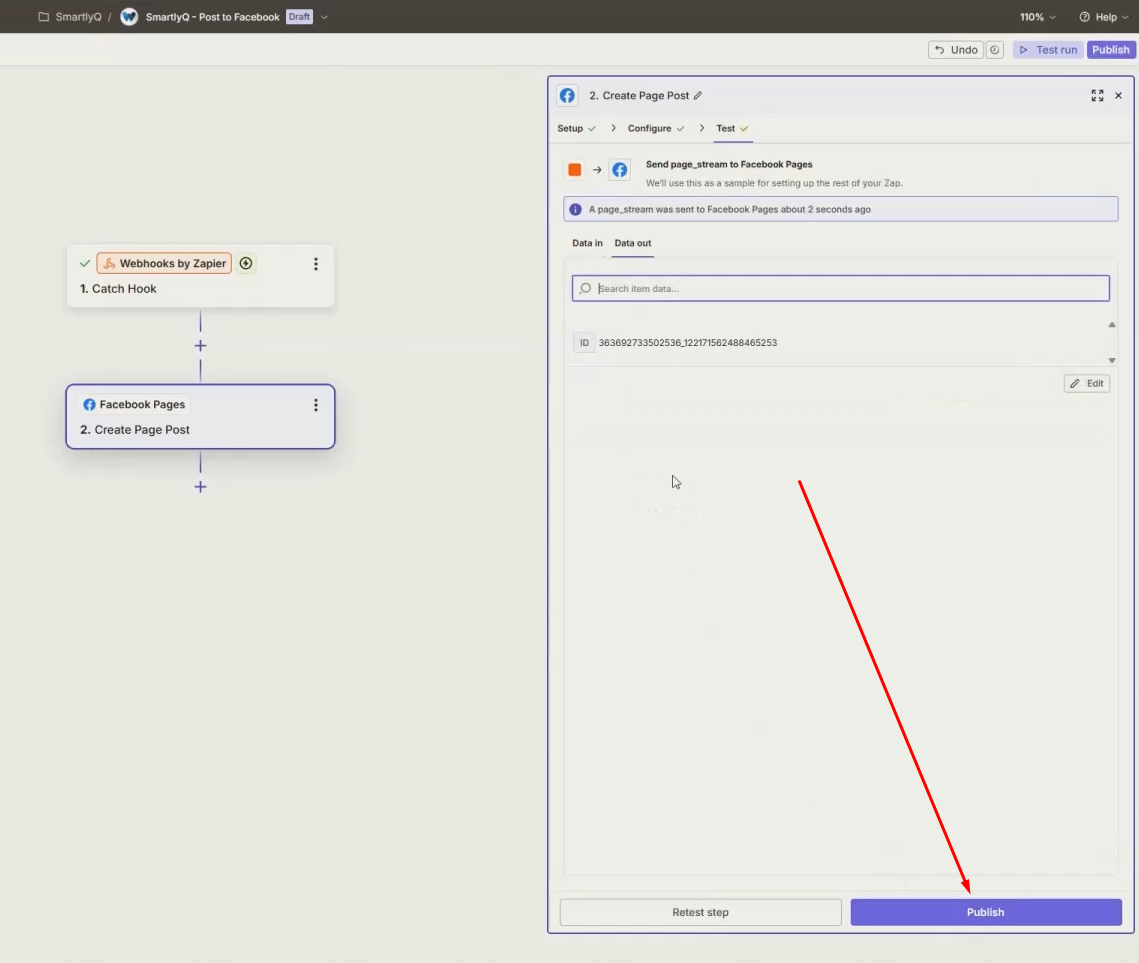
- Your content is now published!

- If you're happy with this zap, press "Publish" so that the zap goes live.
Pabbly Use Case
1. Log in to your Pabbly account and create a workflow
- Create a new workflow and give it a meaningful name.
2. Add a webhook trigger
- Choose the "Webhooks" app from the list. If you can't see it straight away, use the search bar to search for it.
- For the Trigger Event, choose "Catch Webhook (Preferred)".

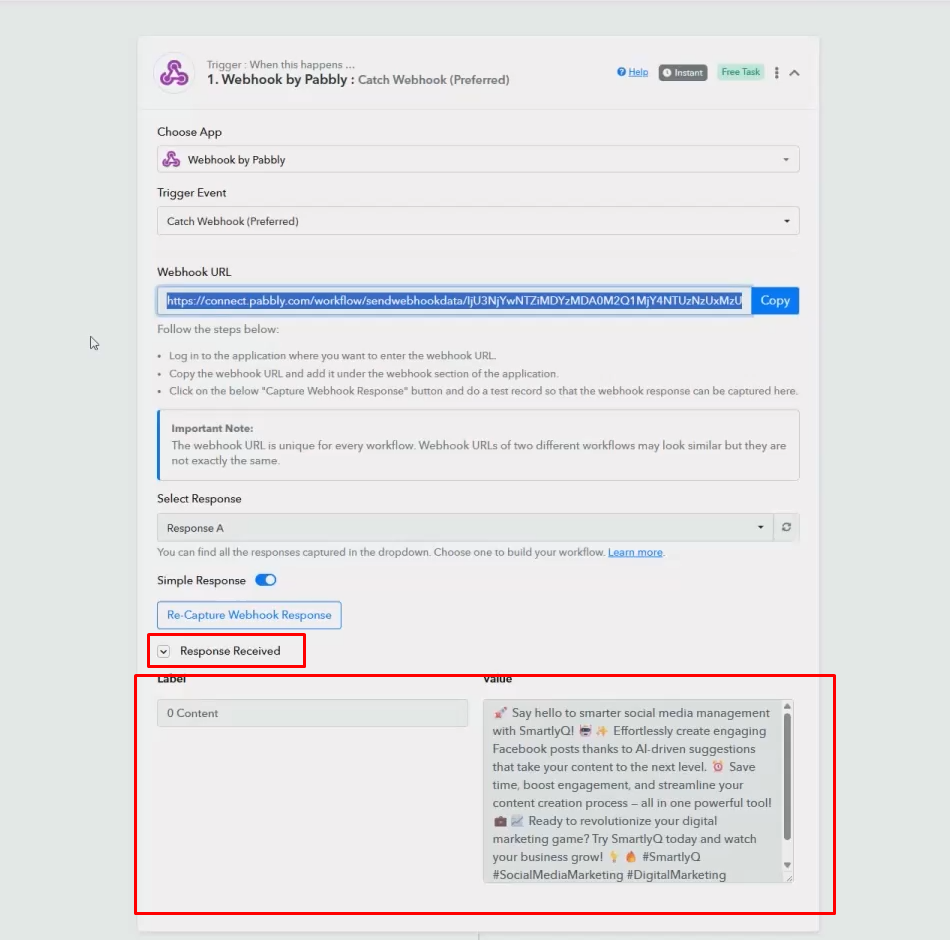
A webhook URL will be generated for you. Press the Copy button to copy this URL into your clipboard.

3. Add your Pabbly webhook URL into SmartlyQ
1. Log into SmartlyQ:
- Go to SmartlyQ and log in to your account.
2. Navigate to Avatar Icon > Account Details**:**
- Look for the Avatar icon on the top right corner. Click on it and select the "Account Details" option..
3. Find the Webhook menu item:
- In the next screen select “Webhook” from the left hand menu.

4. Paste Your Pabbly Webhook:
- In the provided field for Pabbly, paste the Pabbly Webhook URL you copied earlier.
- Make sure there are no extra spaces before or after the URL when pasting.
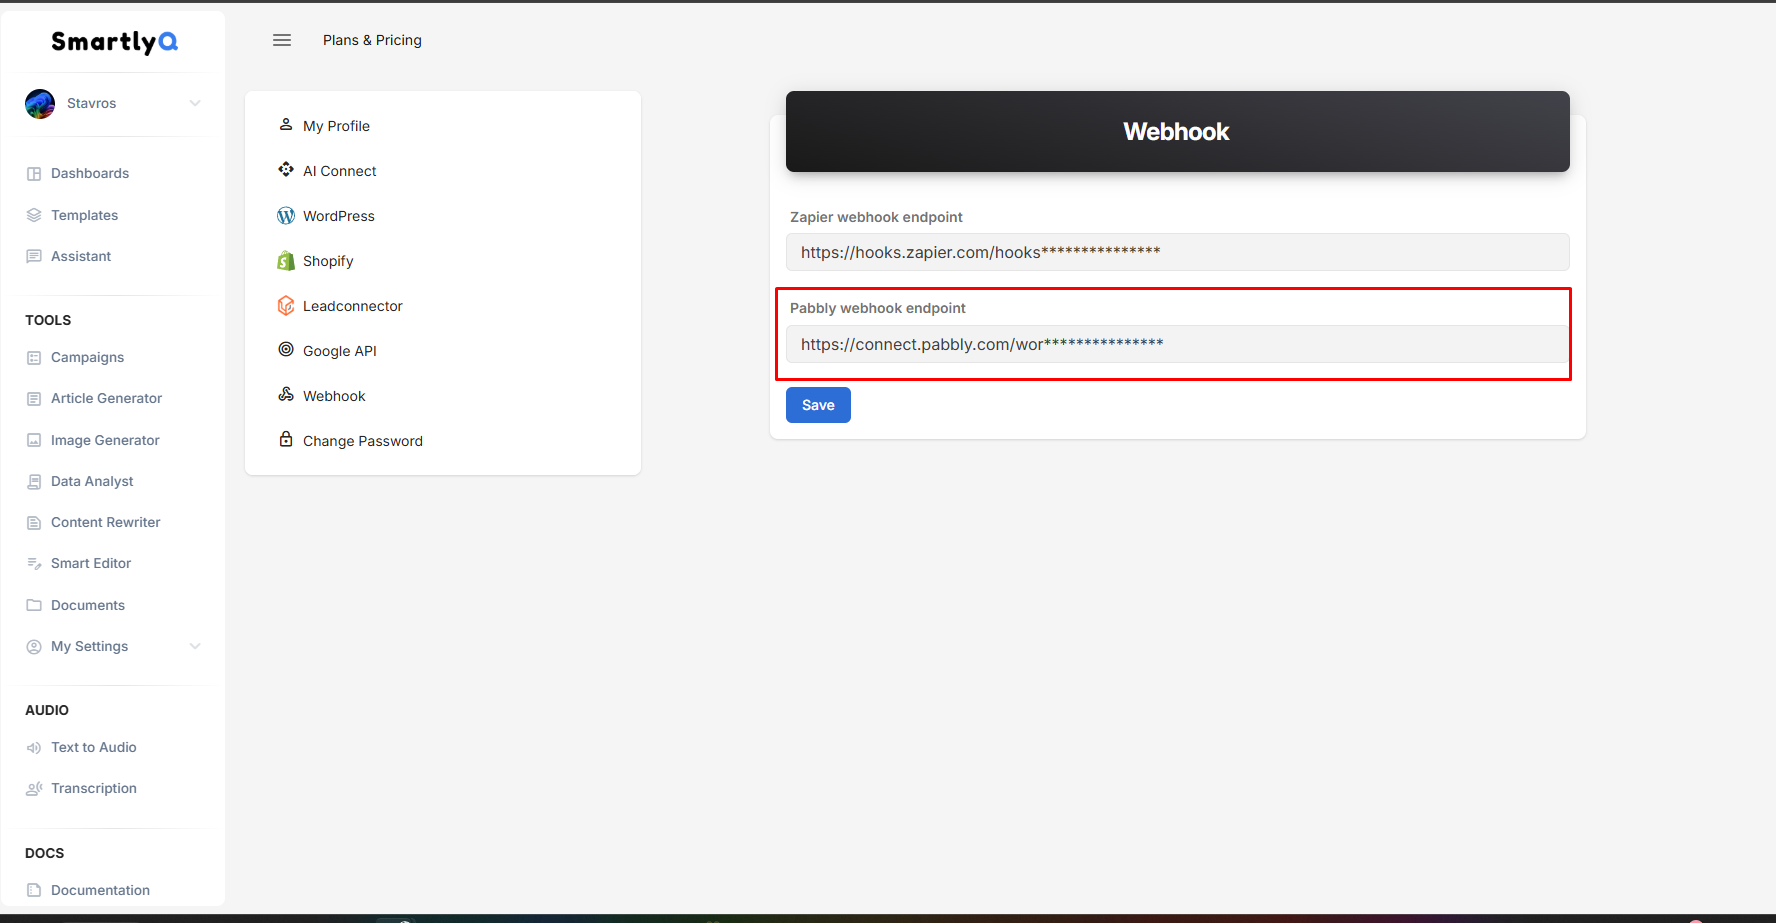
5. Save Changes:
- Ensure you click on “Save” at the very bottom to store your changes.
4. Generate a Facebook Post
1**. Navigate to the Templates:**
- Look for the Templates on the top left in the left side menu.
- Search for the "Facebook Post Generator".
2**. Enter Topic and write your post:**
- Enter a topic in the template input and generate your post.

3**. Share the content to the Pabbly Webhook:**
- Press the share icon and then check the "Share to Pabbly" checkbox and then press "Share".

5. Return to the Pabbly workflow
1. Complete the next action steps:
- Now that we've sent the data to the Pabbly webhook, we need to complete the flow.
- You should be able to see within a few seconds that a new response has been received.
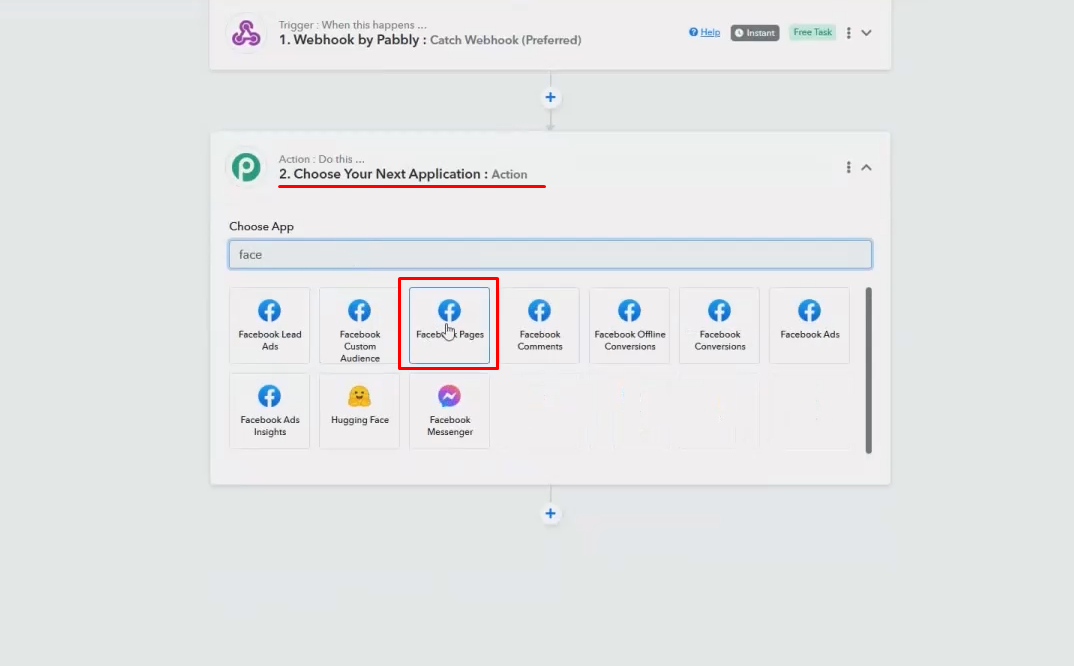
2. Add a Facebook action step:
- It will ask to create an action. Select the "Facebook Pages" from the list, otherwise search for it if not visible.
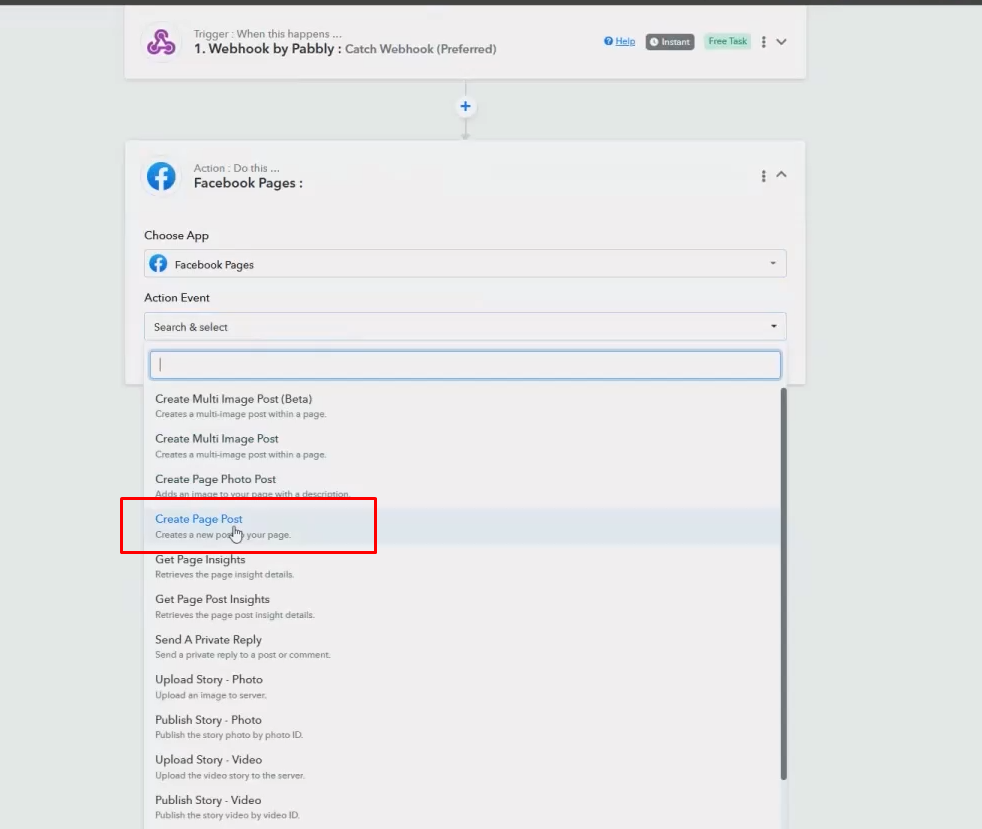
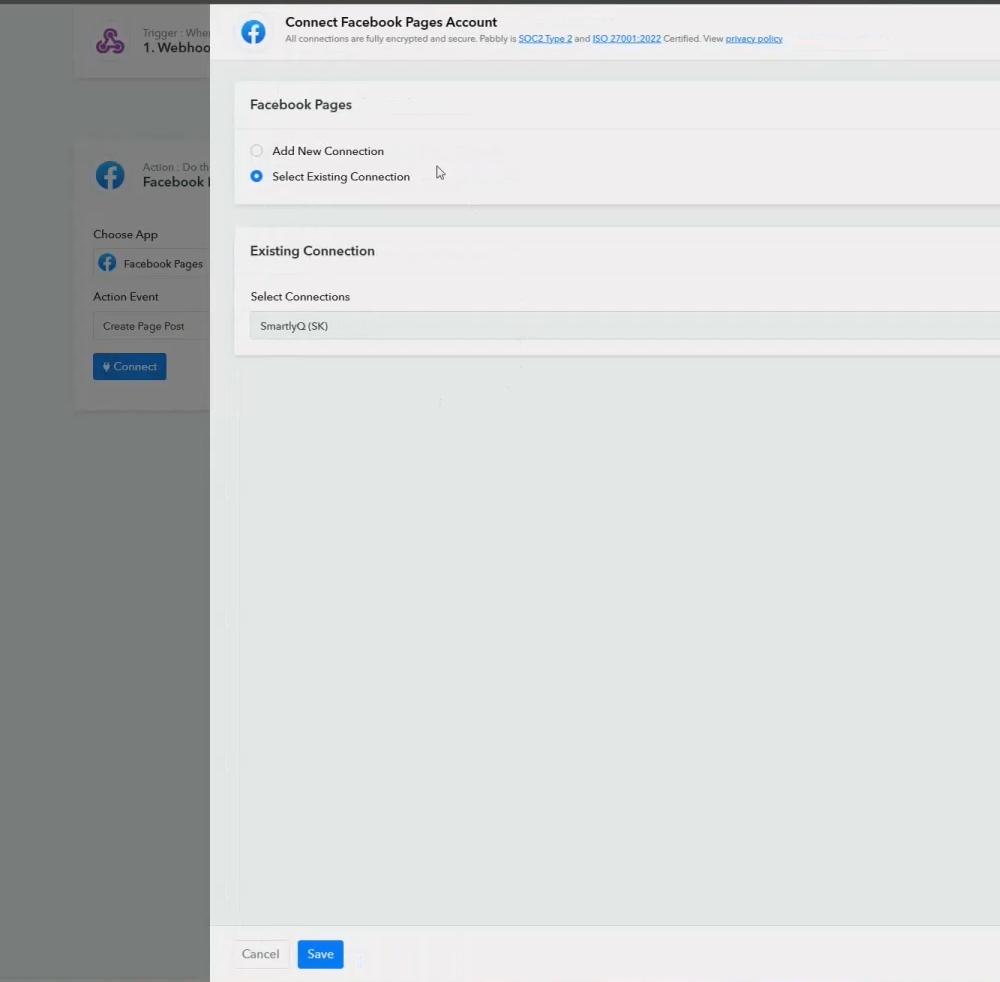
- For the action event, select "Create Page Post" from the list then press "Connect". If you haven't connected your account, choose "Add new connection" and follow the instructions to connect your account and page. Otherwise choose "Select existing connection" and pick the account you wish.
- Choose the page and select the content we received from the webhook step to add it to the "Message" field. You can optionally add a Link URL as well.
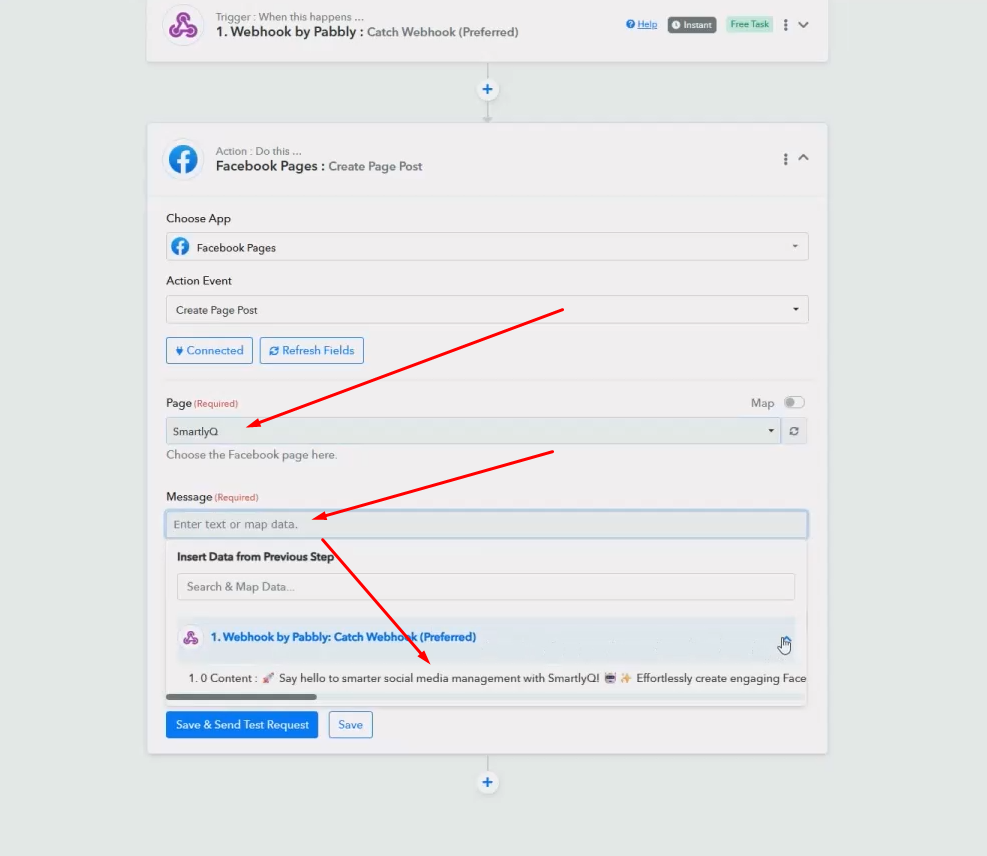
-
Press "Save & Send Test Request" to test the flow.
-
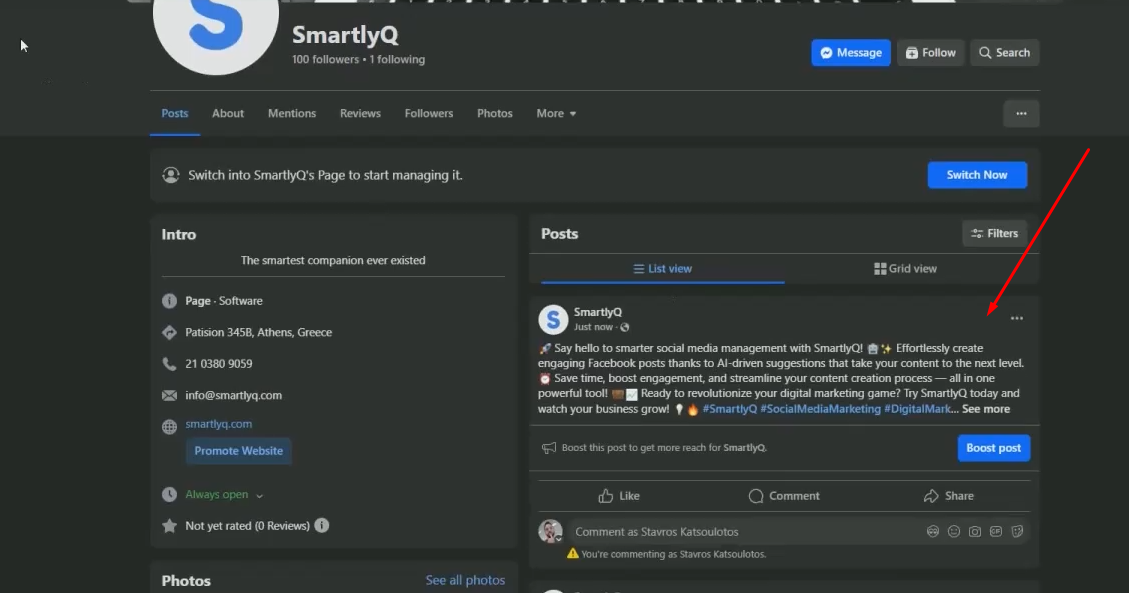
You should now see your post published on your page!
You can also view the video version of the above tutorial here: