How to add your ReCraft API Key to SmartlyQ
Customize Your Experience by Using Your Own Recraft API Key
Introduction
To enhance your experience and utilize your own Recraft API key in SmartlyQ, follow these simple steps. This guide will walk you through creating and retrieving your Recraft API key, as well as adding it to the SmartlyQ platform.
Step 1: Creating Your Recraft API Key
1. Sign Up or Log In:
- Go to the Recraft platform.
- If you don’t have an account, sign up for a new account. If you already have one, simply log in.
2. Access the API Section:
- Once logged in, navigate to the API section of your account dashboard.
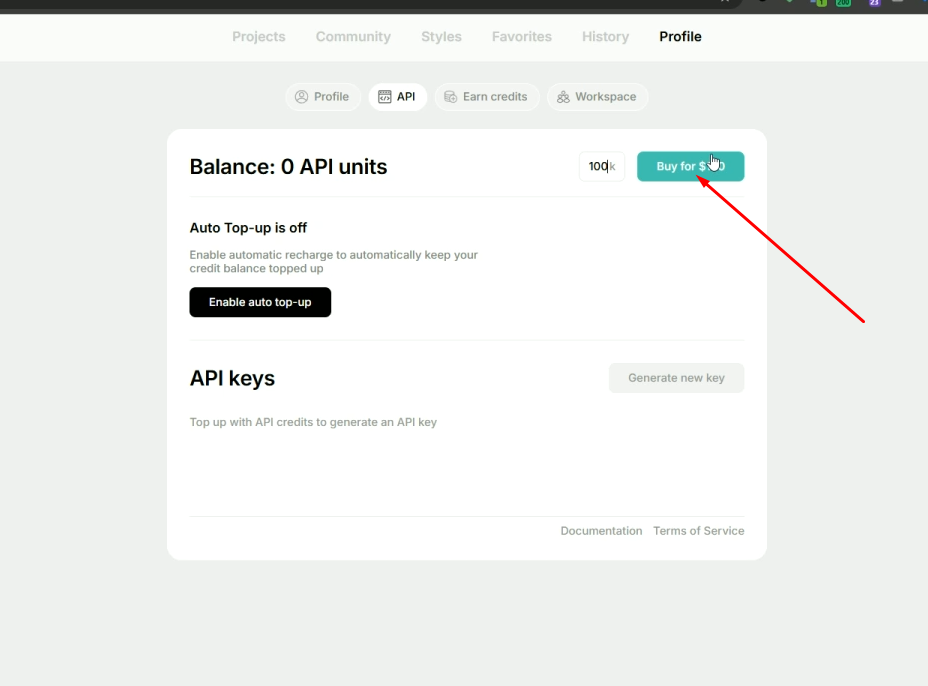
3. Purchade API Credits:
- You need to have credits in your account in order to generate an API key.
- Set your desired ammount and then press the buy button to add credits to your account
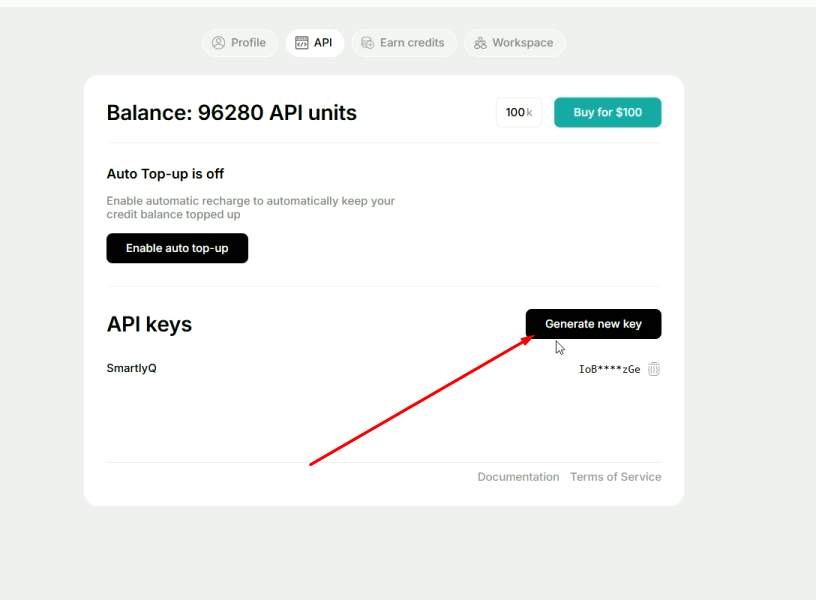
- Once you've topped up your account, press the "Generate new key" button:
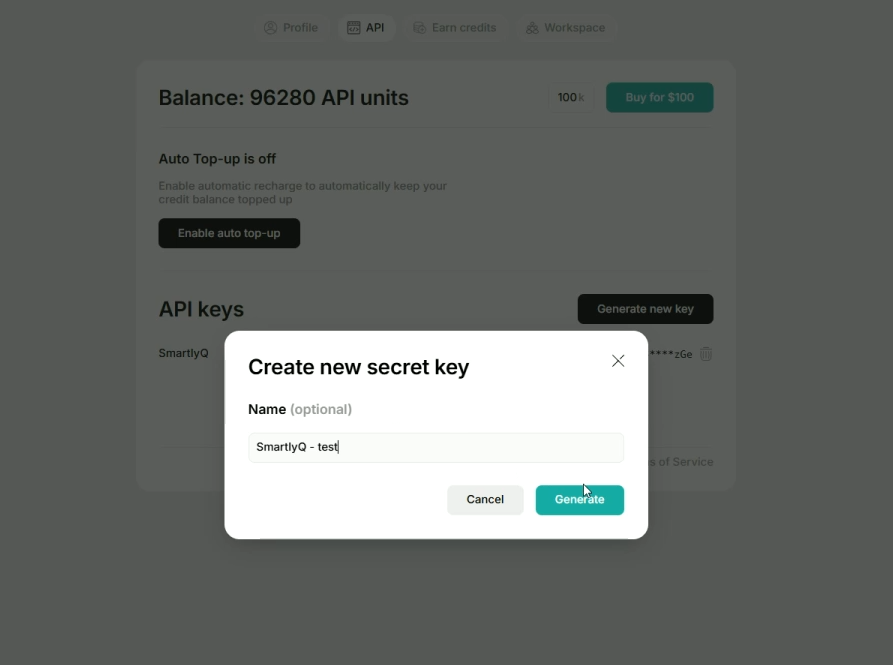
- Give it a meaningful name:
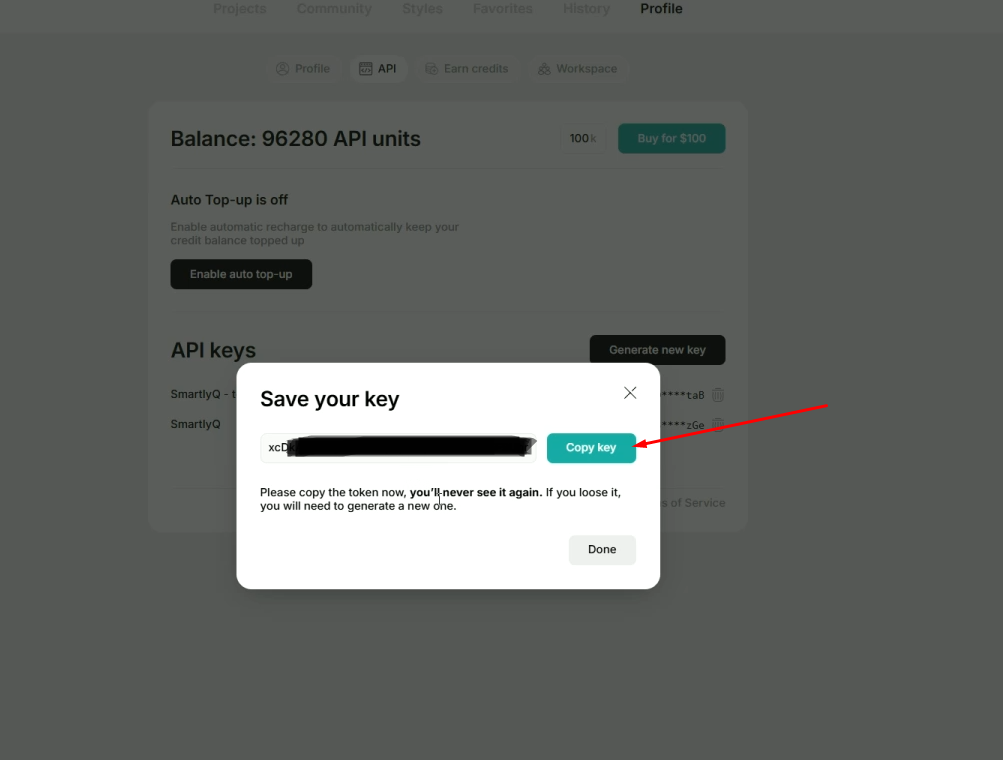
- Once the key is generated, you'll need to copy it using the "Copy key" button and store it somewhere safe, as you will only see it once.
Step 2: Adding Your Recraft API Key to SmartlyQ
1. Log into SmartlyQ:
- Go to the SmartlyQ app and log in to your account.
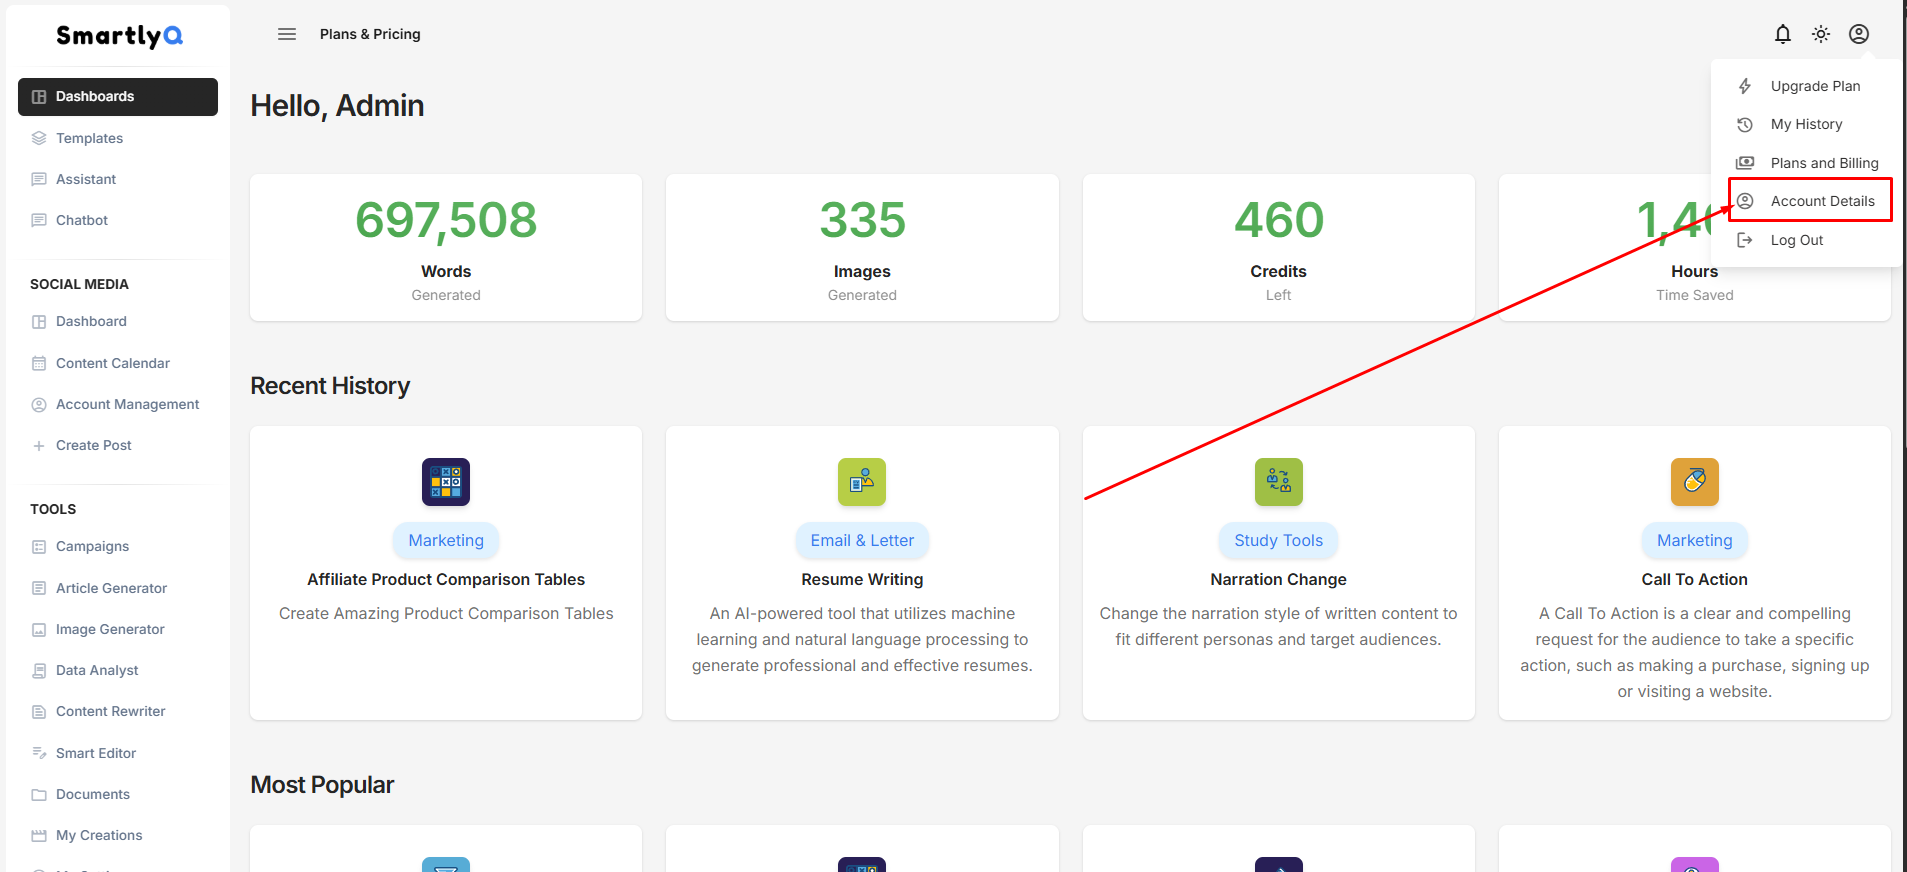
2. Navigate to Avatar Icon > Account Details**:**
- Look for the Avatar icon on the top right corner. Click on it and select the "Account Details" option..
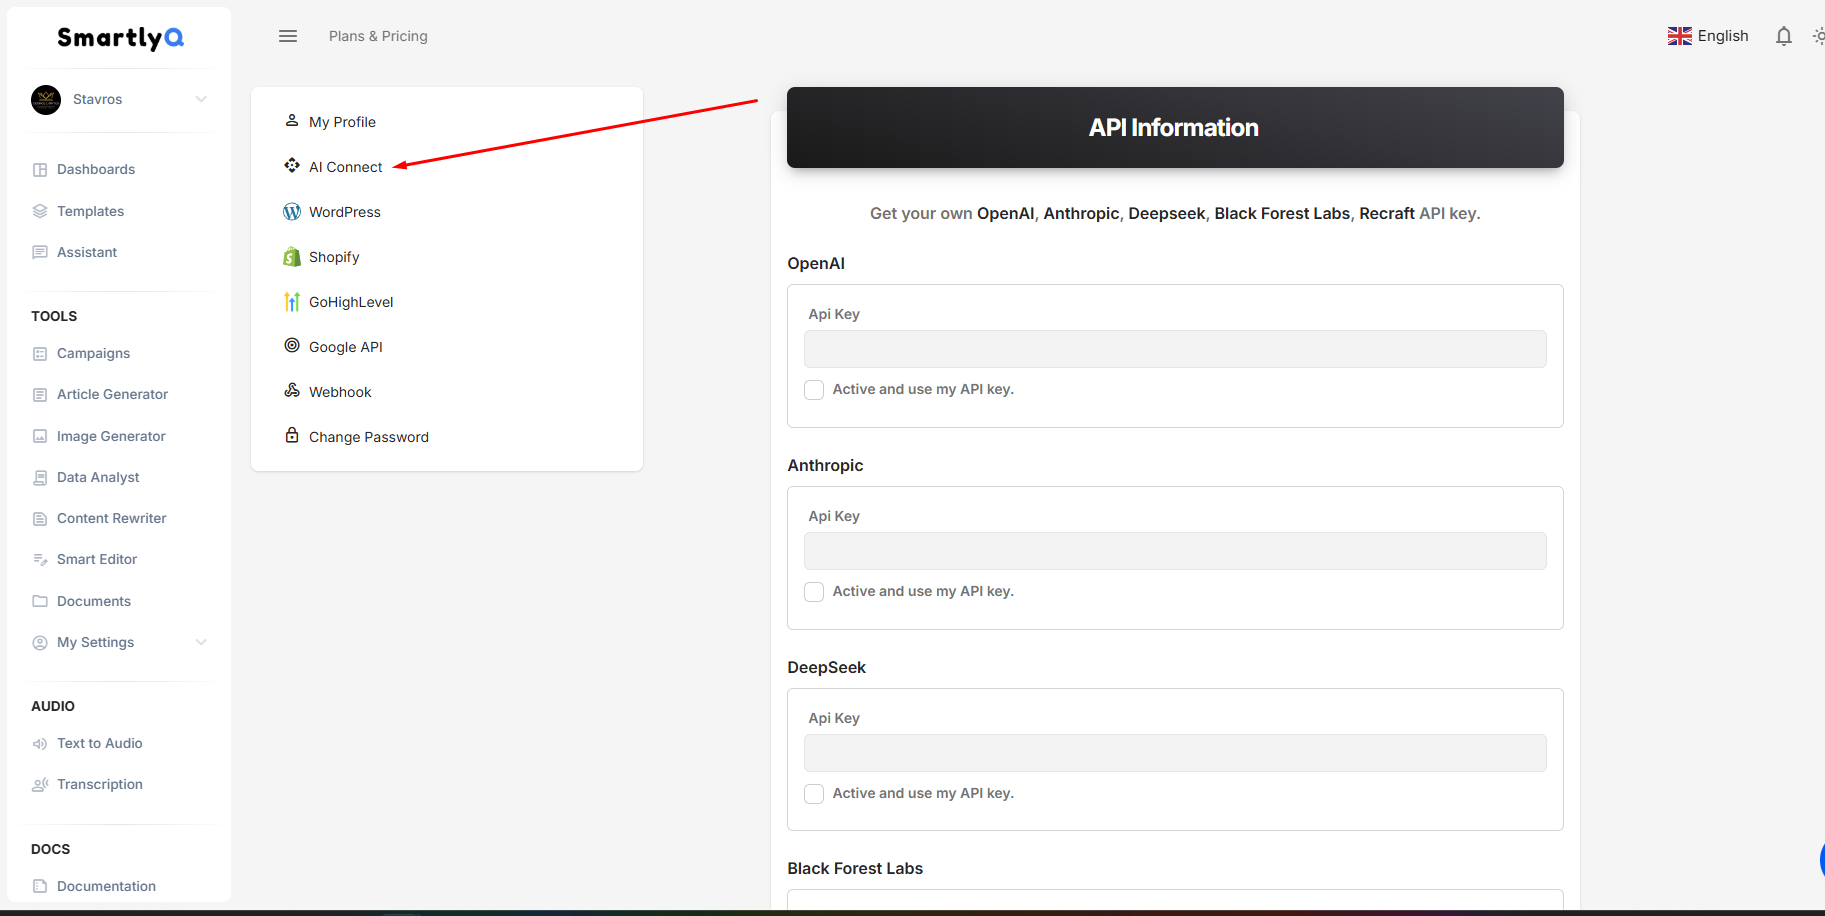
3. Find API Key Configuration:
- In the next screen select “AI Connect” from the left hand menu.
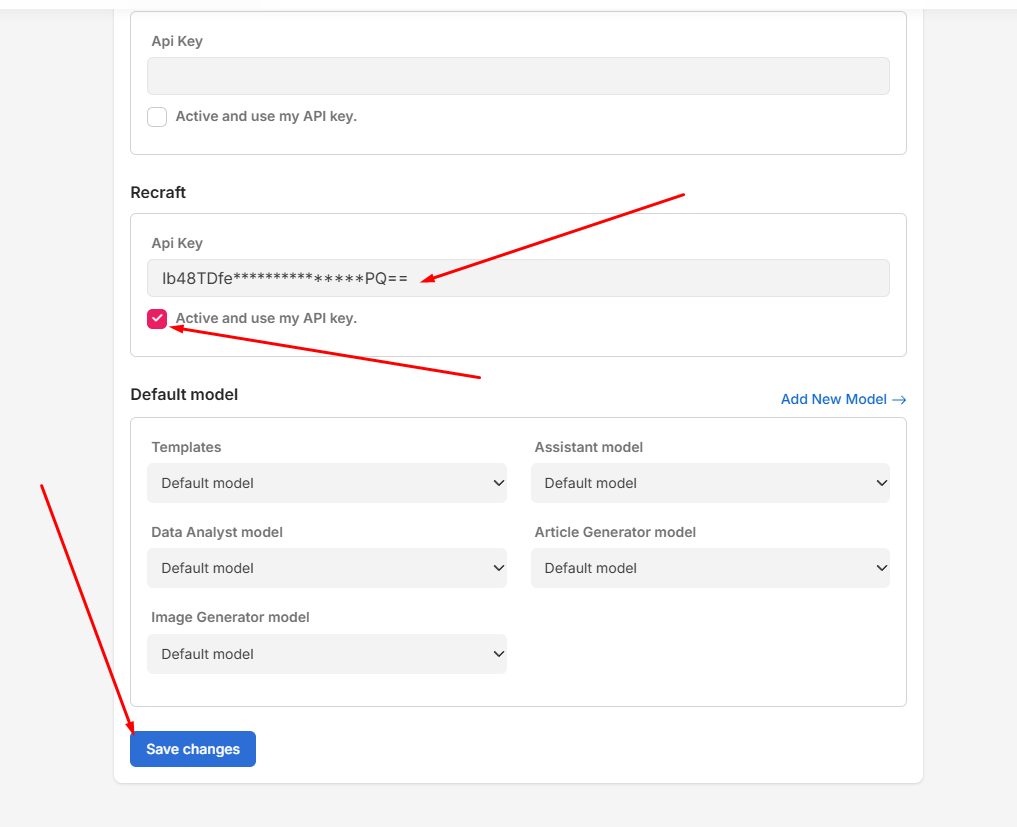
4. Paste Your API Key:
- In the provided field, paste the Recraft API key you copied earlier.
- Make sure there are no extra spaces before or after the key when pasting.
6. Save Changes:
- Check the box "Active and use my API key.".
- Ensure you click on “Save Changes” at the very bottom to store your changes.
Once you have saved your key, try generating content (eg. Image Generator or Article Generator) with SmartlyQ to ensure that it is using your own Recraft API key.
If you encounter any errors, double-check that your API key is correct and that you have enough credits in your Recraft Account.
By following these steps, you can easily integrate your own Recraft API key into SmartlyQ, allowing you to customize the content generation experience to fit your needs.
You can also view the video version of the above tutorial here: