How to Add Your Own Template in SmartlyQ
Customize Your Content Creation Process with Personalized Templates
Introduction
At SmartlyQ, we empower users to create content efficiently with our suite of promptless templates. However, to enhance your content creation even further, you can add your own custom templates tailored to your specific needs. This guide will walk you through the process of adding your own template step-by-step.
How to Add Your Own Template
1. Log Into Your SmartlyQ Account
- Start by navigating to smartlyq.com and logging into your account using your credentials.
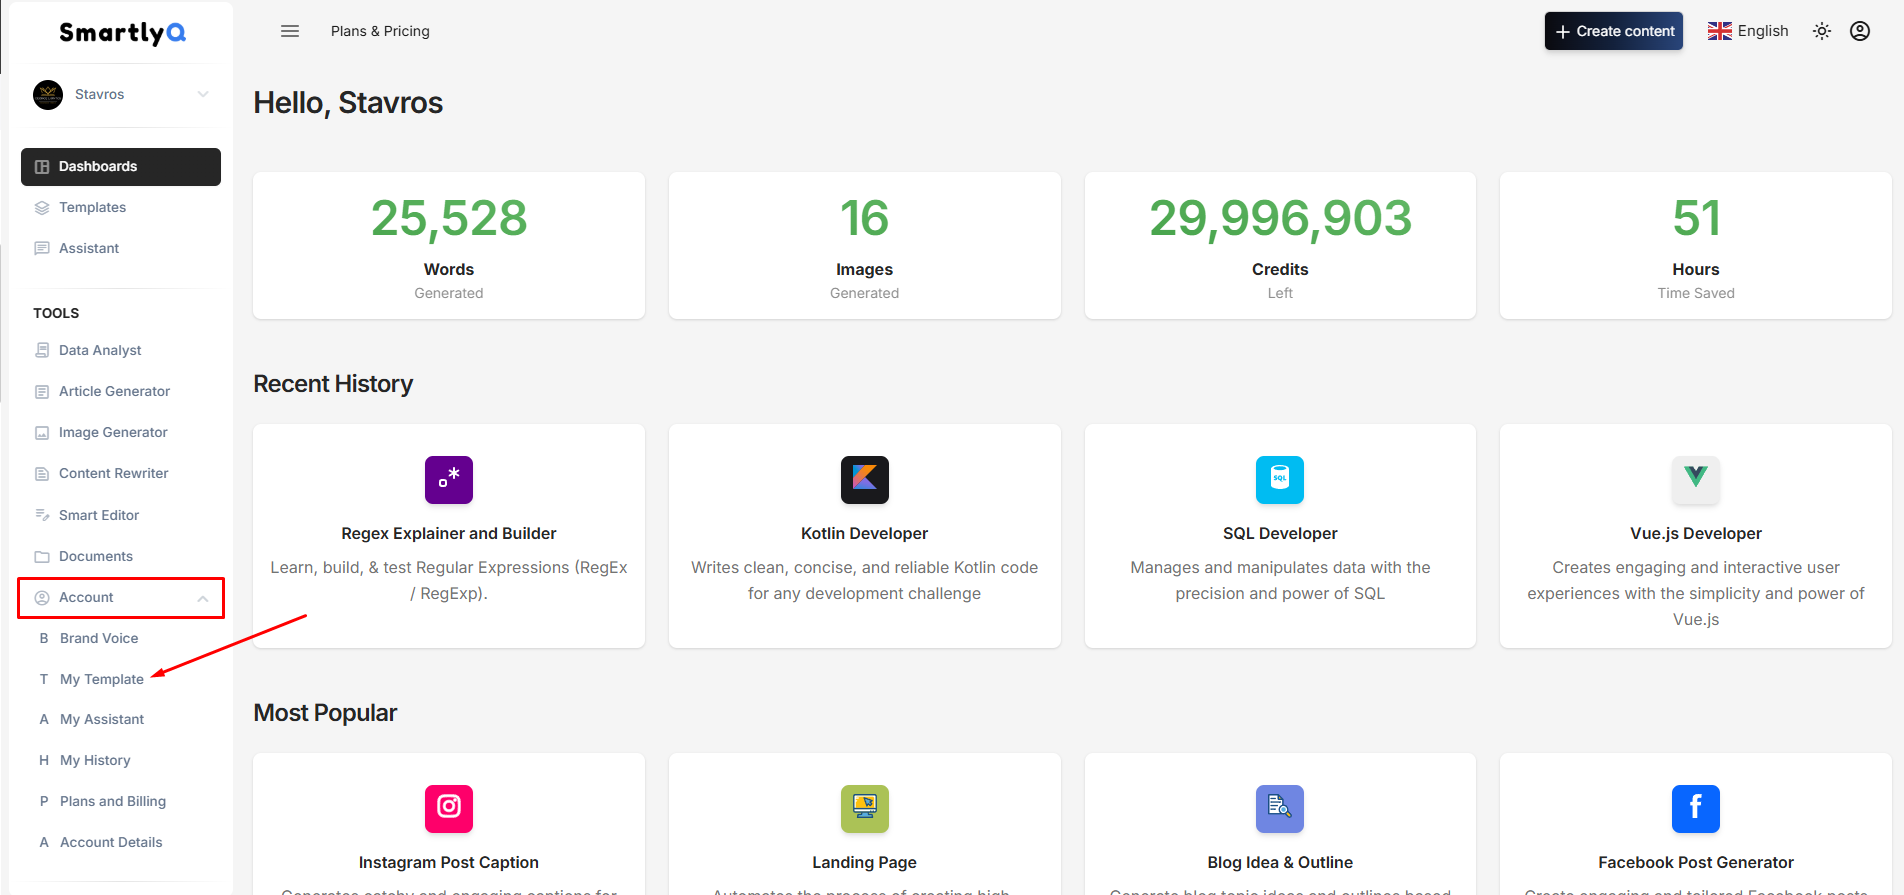
2. Access the Templates Section
- Once you are on your dashboard, locate the left-hand menu. Under the TOOLS section, expand the "Account" menu item and click on the "My Template" option.
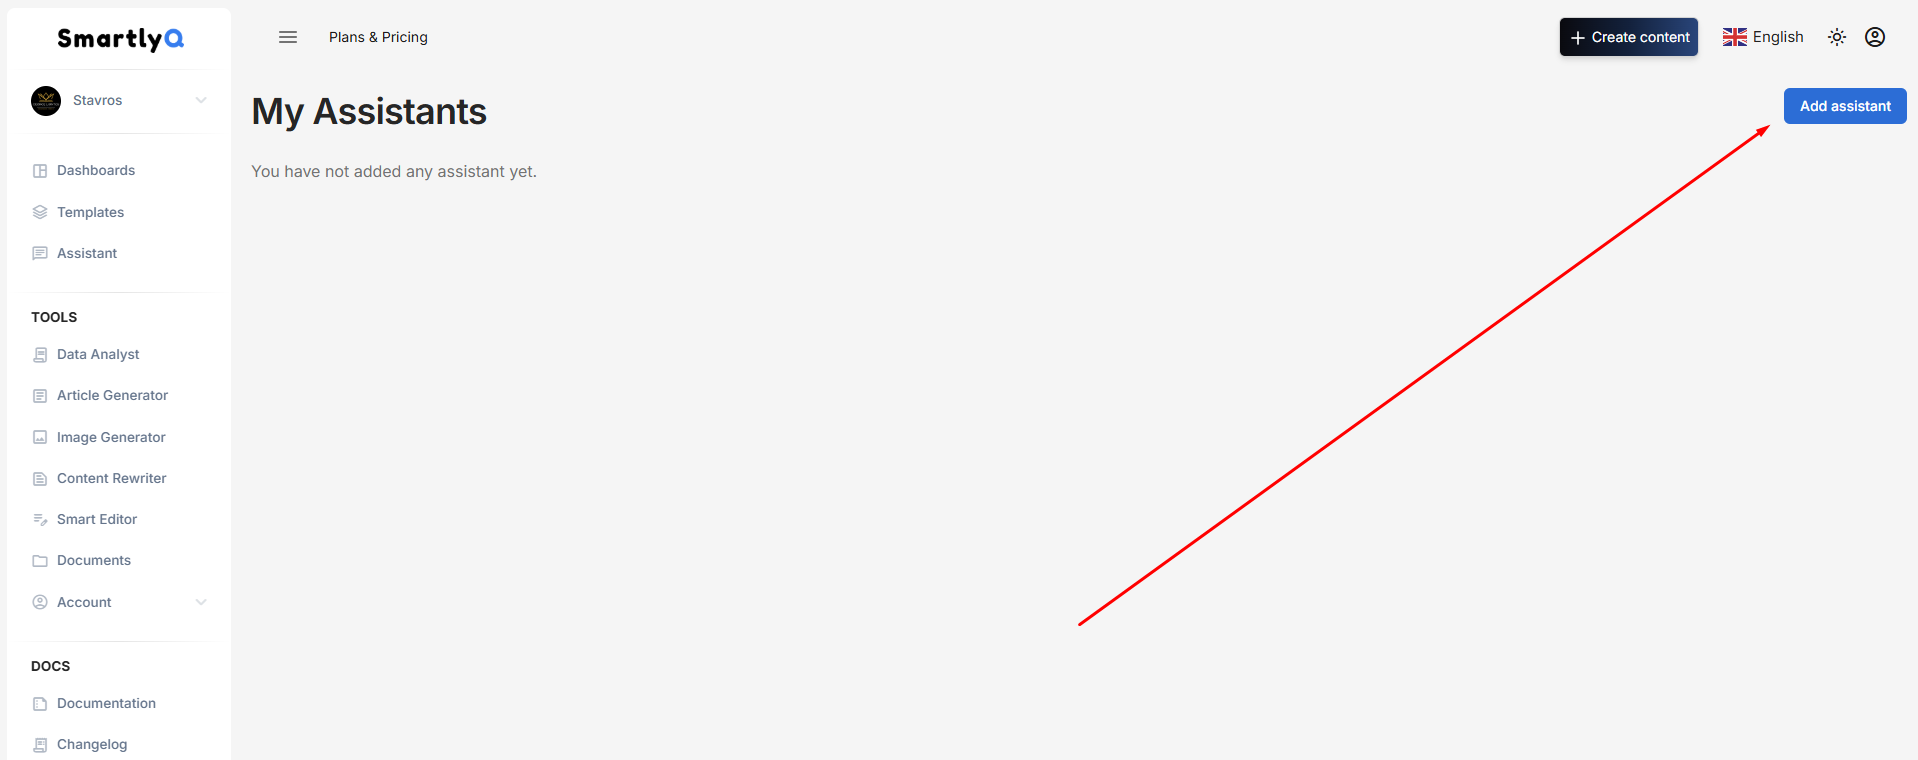
3. Select the 'Add Template' Option
- Inside the My Templates section, look for a button labeled "Add Template". Click on it to begin creating your custom template.
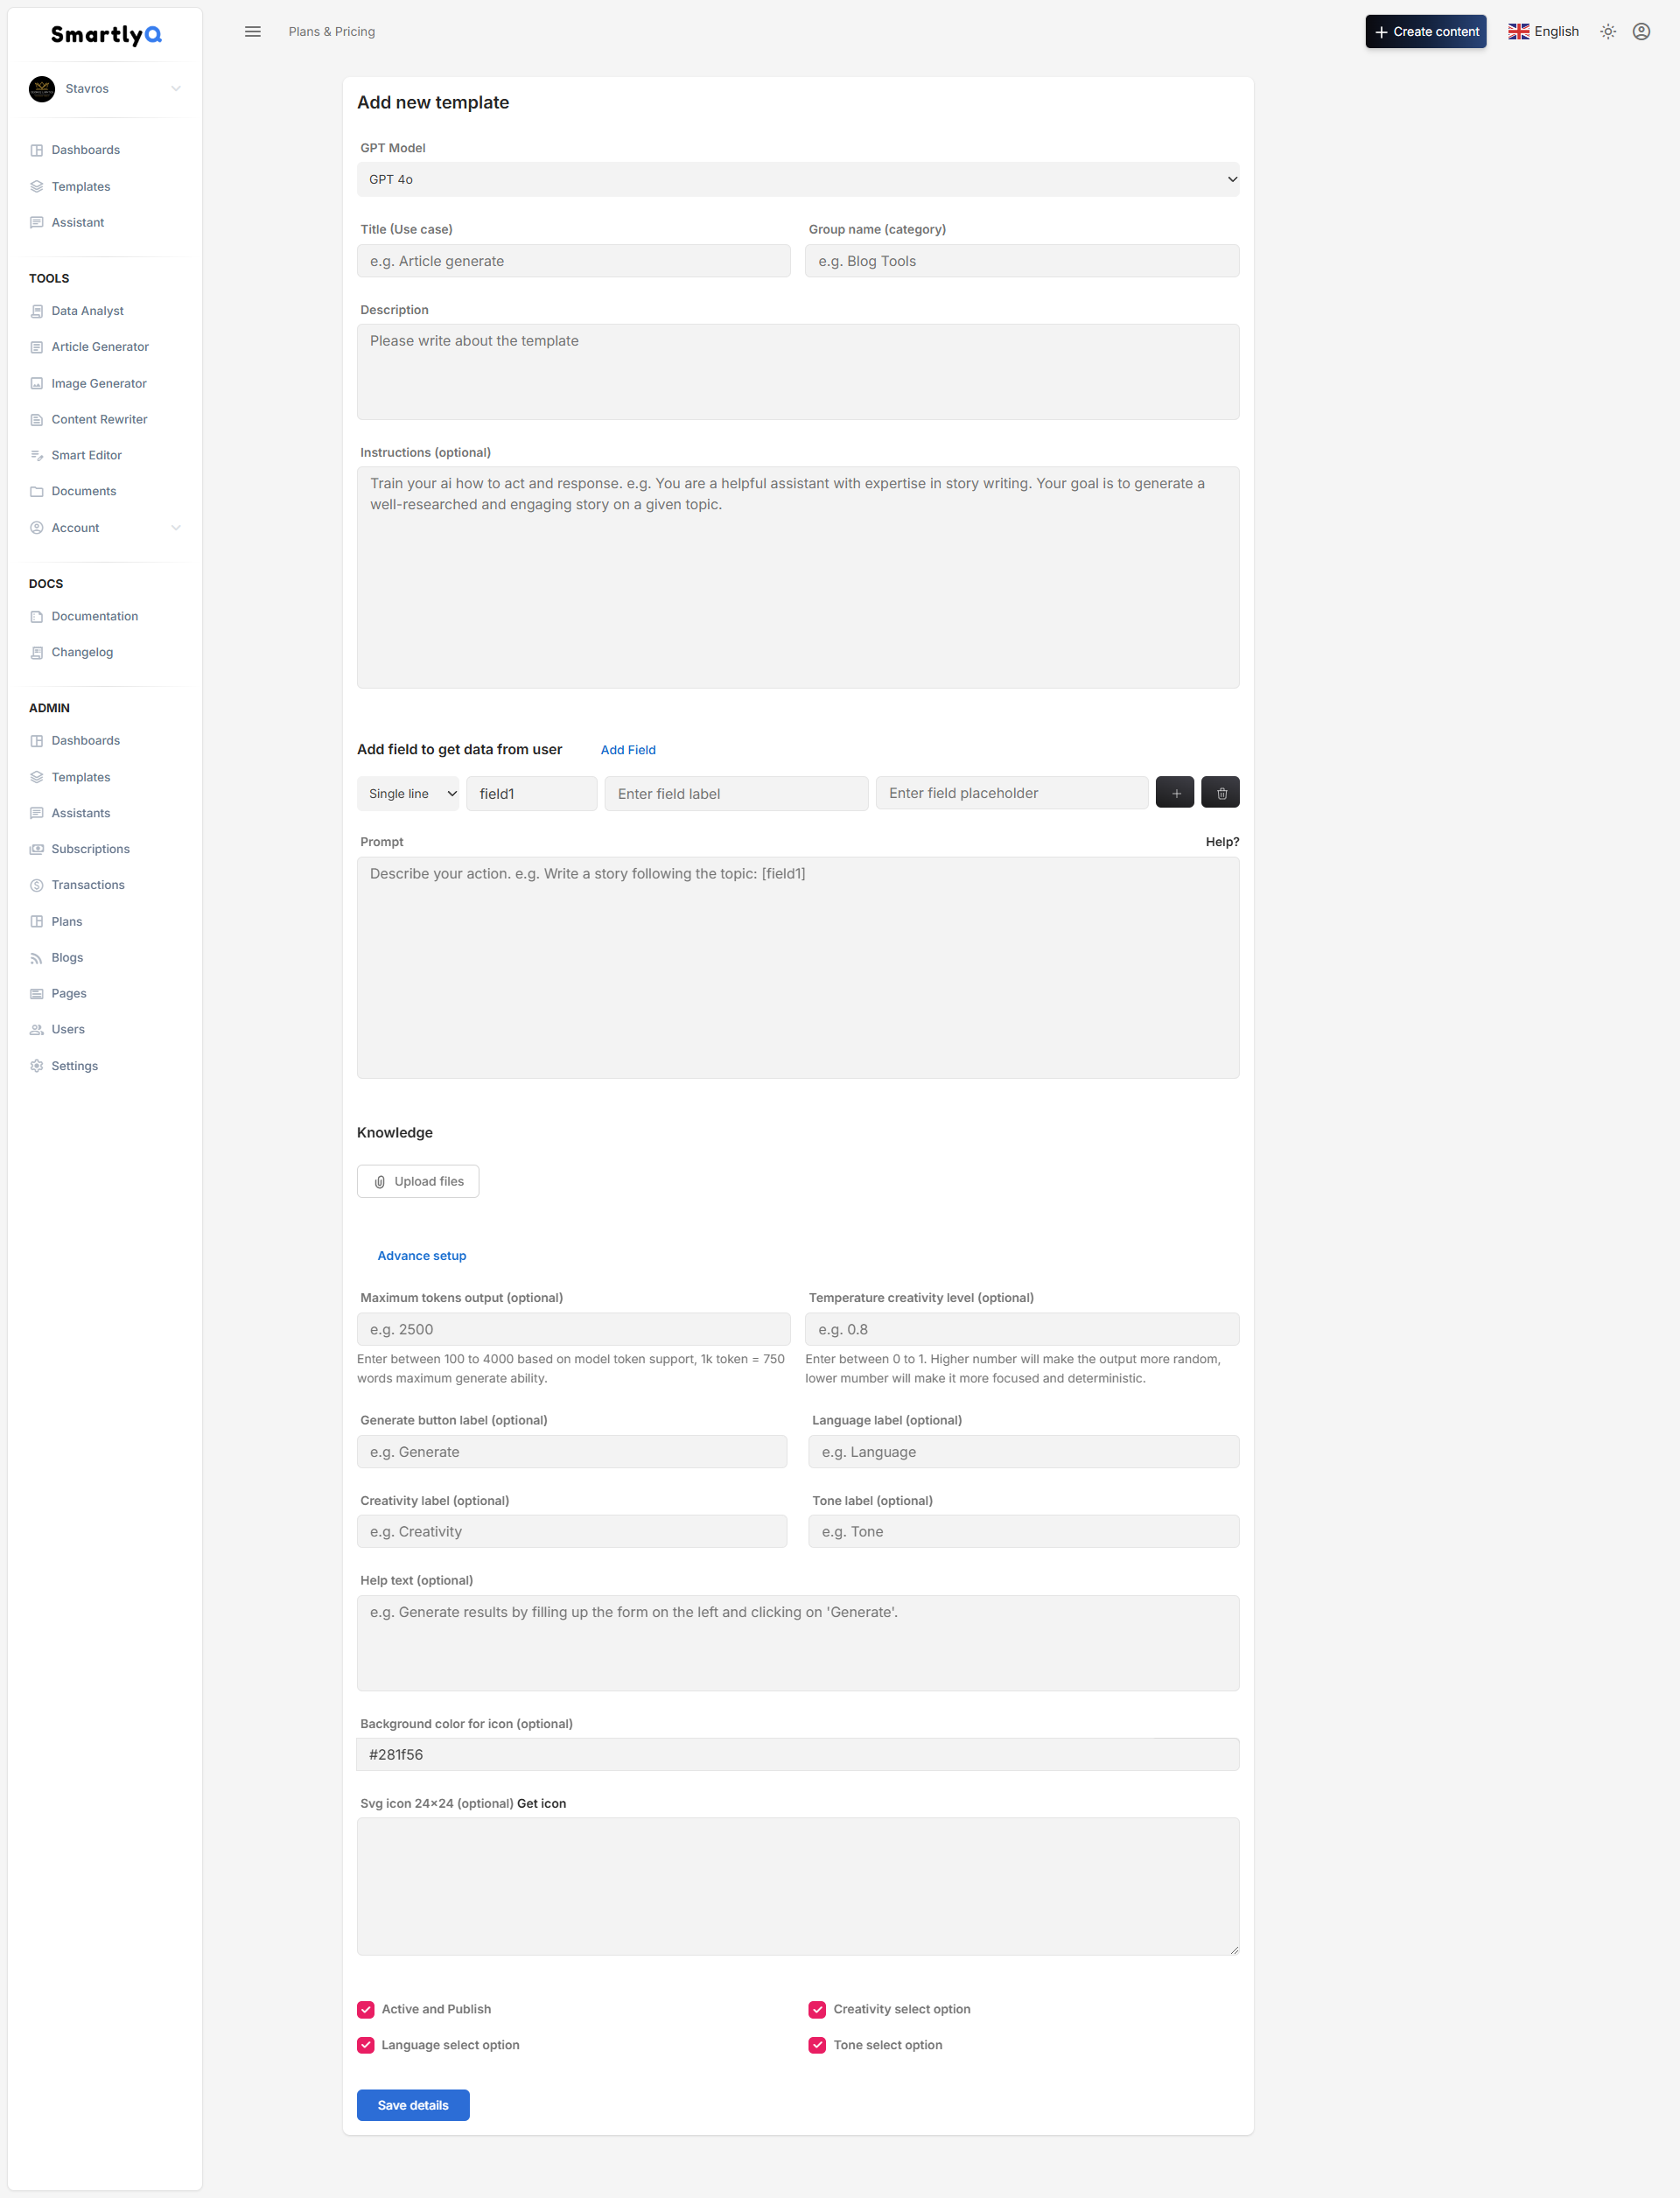
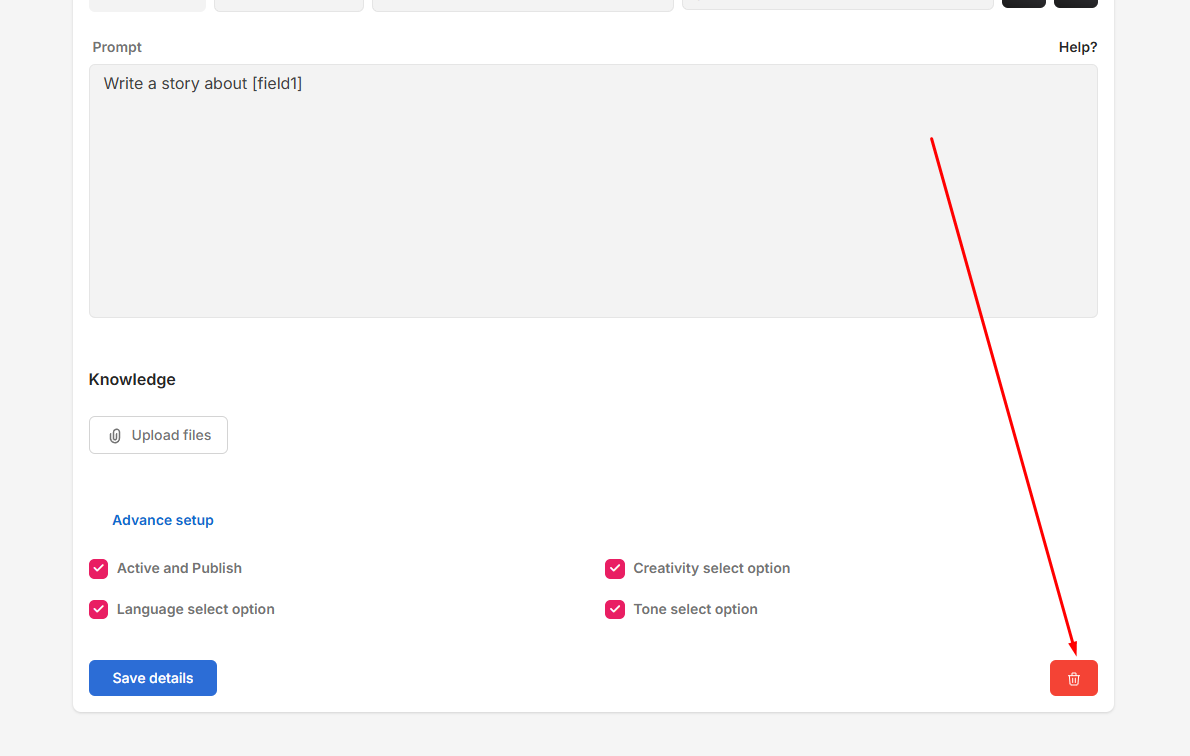
4. Define Your Template Settings
-
You will be prompted to fill out various fields to define your template, for example:
-
GPT Model: Choose your desired AI model that will generate content for you.
-
Title: Give your template a title that will tell it what it will do.
-
Description: Provide a brief description of what the template will be used for.
-
Instructions: Train your ai how to act and response. e.g. You are a helpful assistant with expertise in story writing. Your goal is to generate a well-researched and engaging story on a given topic.
-
You can also add custom fields to get input data from the user
-
Upload your own knowledgebase if desired.
-
There are also some optional advanced options to edit, such as "Maximum tokens output", "Temperature creativity level", etc.
5. Save Your Template
- After filling in all necessary information and customizing your template, click the Save details button to store your new template in the system.
6. Test Your Custom Template
- Once saved, you can now utilize your newly created template. Navigate back to the Templates section, select your custom template, and test it to ensure it generates content as expected.
7. Edit or Delete Templates as Needed
- If you need to make adjustments to your template in the future, you can do so by selecting the template from the list, pressing the dropdown arrow on the right and choosing the Edit option.
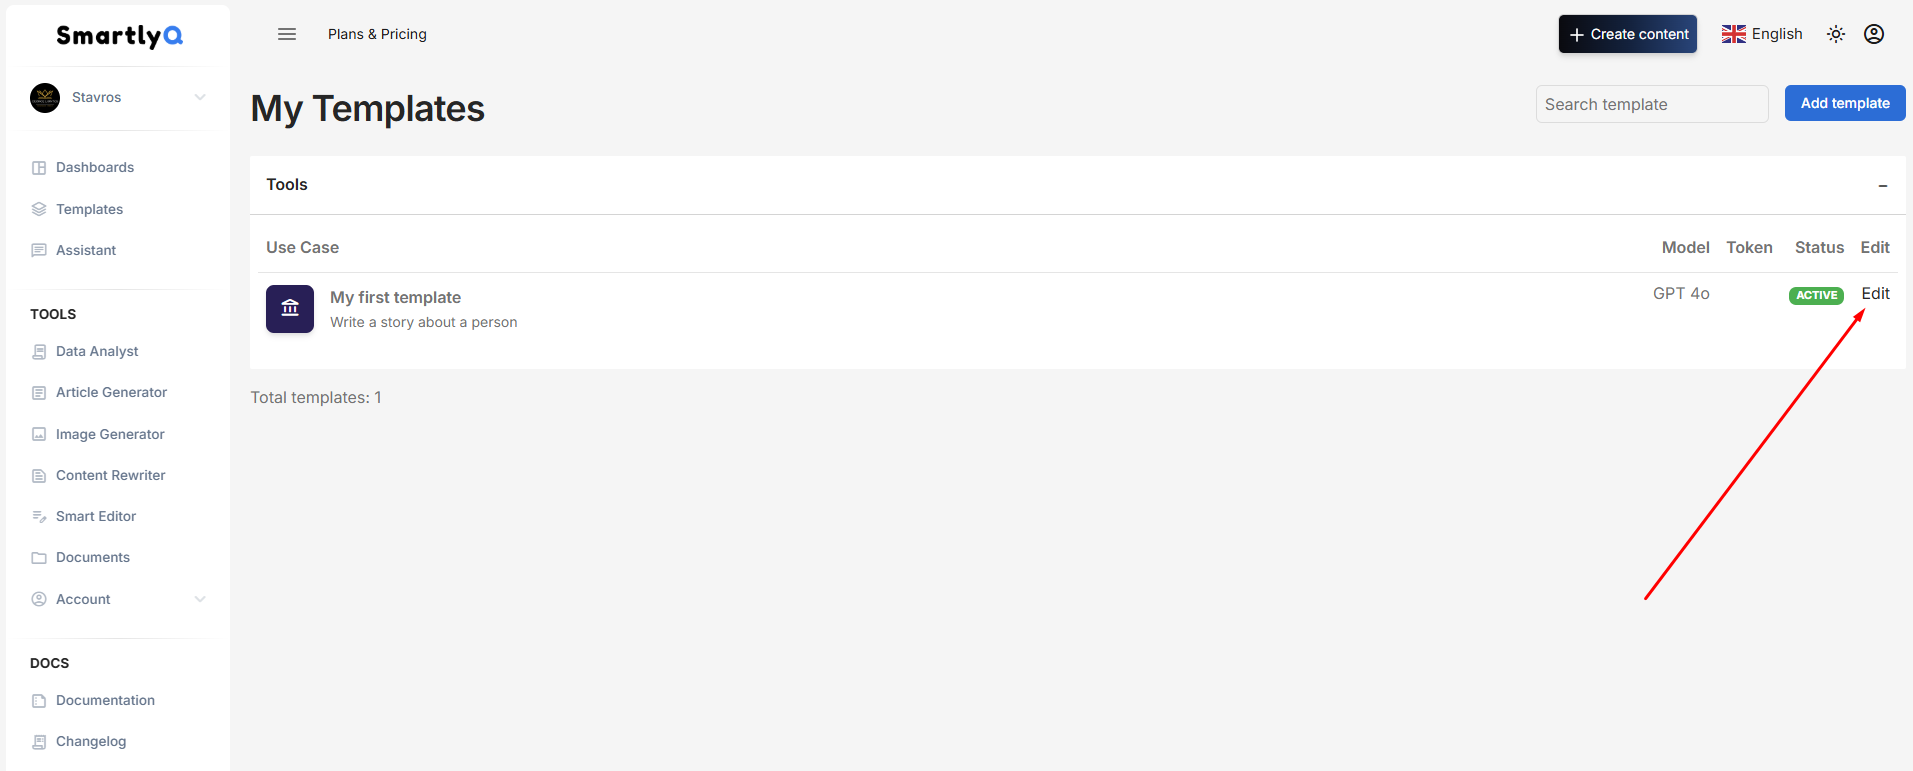
Similarly, from the same edit menu, you can delete any templates you no longer need by scrolling down and clicking on the red trash can icon
By following these steps, you can easily add your own custom templates to SmartlyQ, further streamlining your content creation process. Personalizing your templates allows you to maintain consistency and efficiency across all your projects. Happy content creating!
For any further questions or assistance, please refer to our support resources or contact our helpdesk.
You can also view the video version of the above tutorial here: