How to create a SmartlyQ WooCommerce Chatbot
One of the SmartlyQ Chatbot specializations is the WooCommerce Bot. You can use this bot and allow your visitors/customers to ask questions regarding your e-shop, inquire about the status of their order, and have the bot fetch related products from your e-shop that match their questions!
To find the Chatbot Module, navigate to the left-hand menu and select "Chatbot".
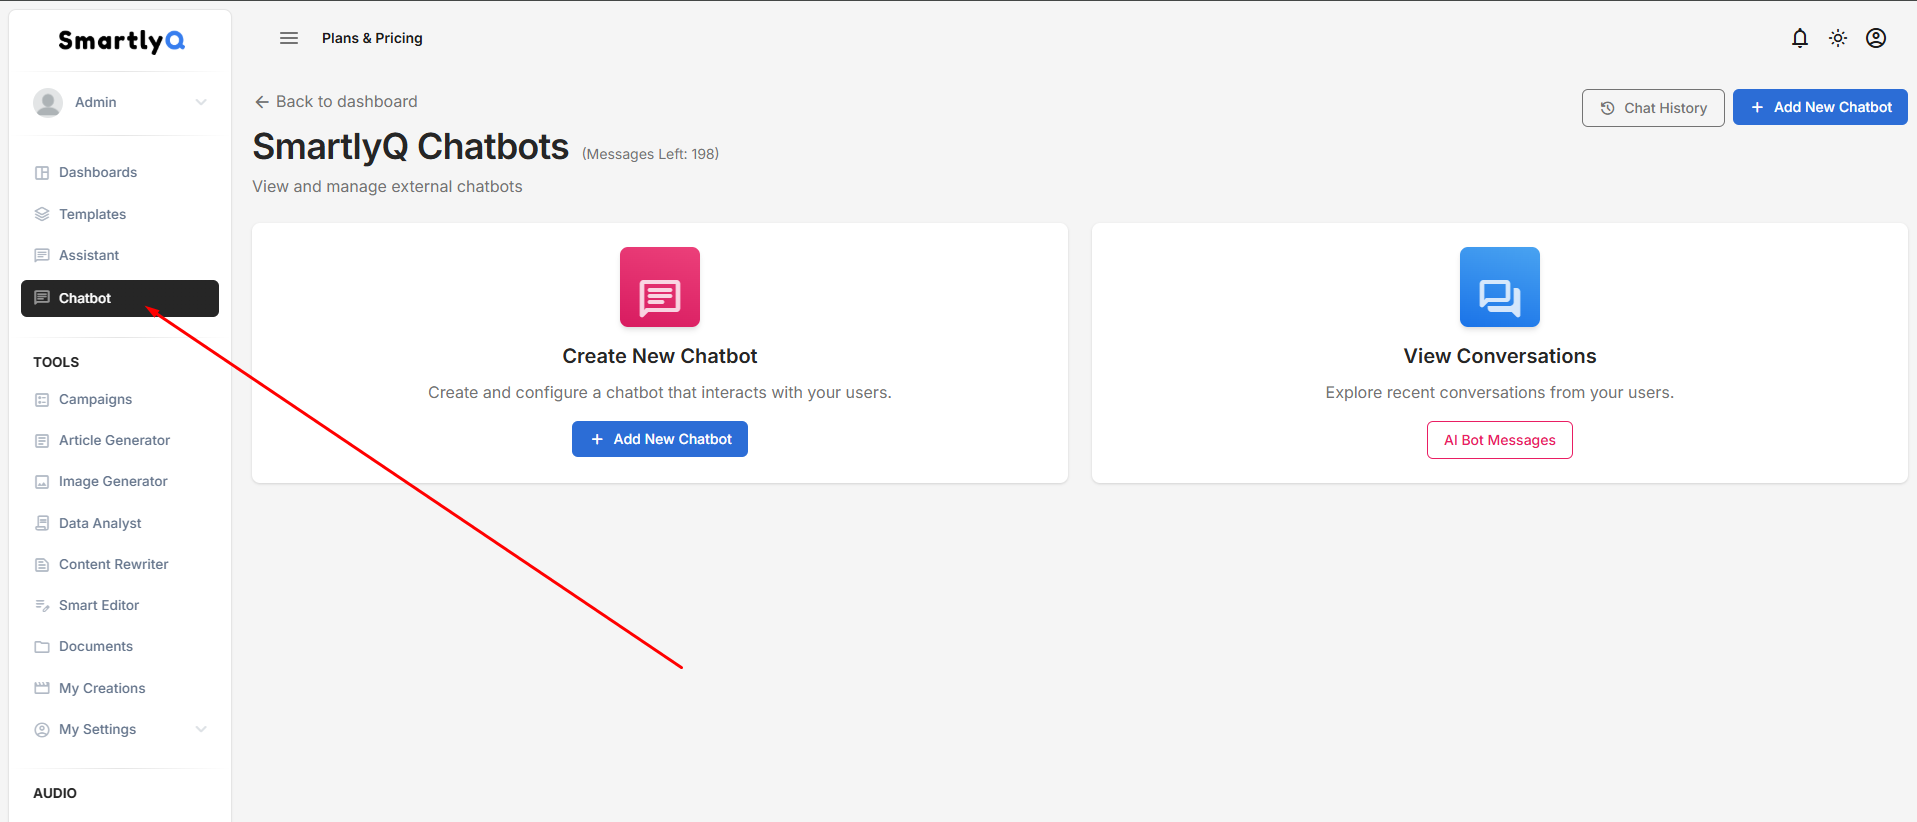
Once inside, you can:
- Create New Chatbot: Create and configure a chatbot that interacts with your users.
- View Conversations: Explore recent conversations from your users.
- View/Edit Existing Chatbots
Create a new chatbot
Click on the button "Add New Chatbot" to begin creating a new chatbot on your account.
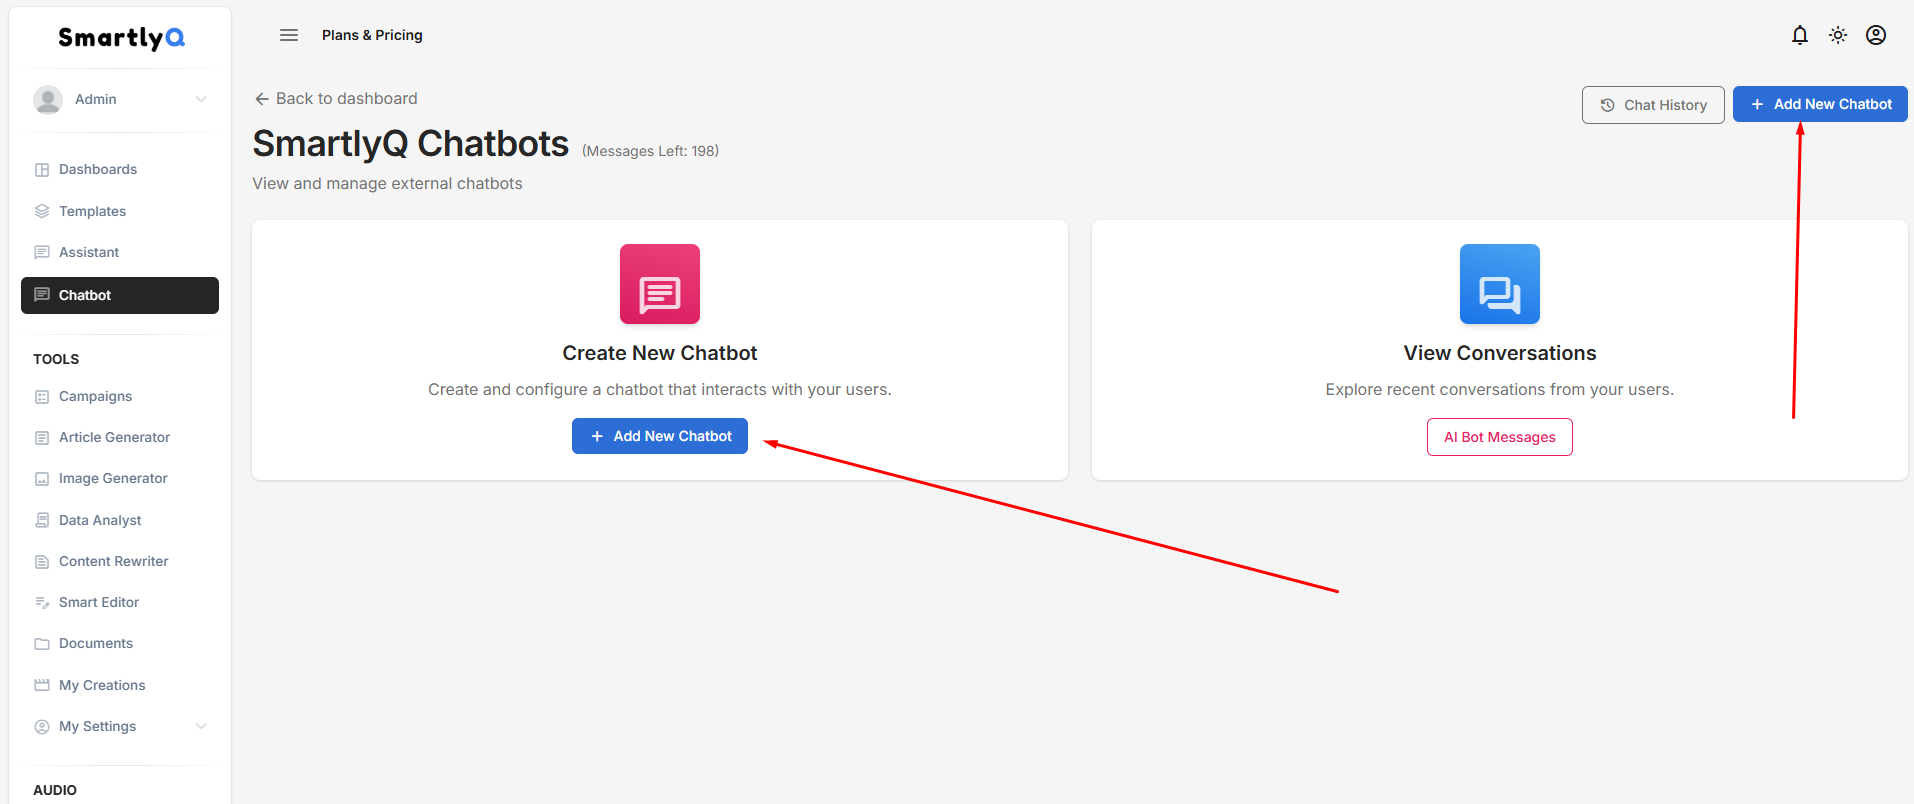
You will be taken to the Customizer screen, which consists of 5 steps:
Step 1: Configure
In the first step, you will Configure Your Chatbot.
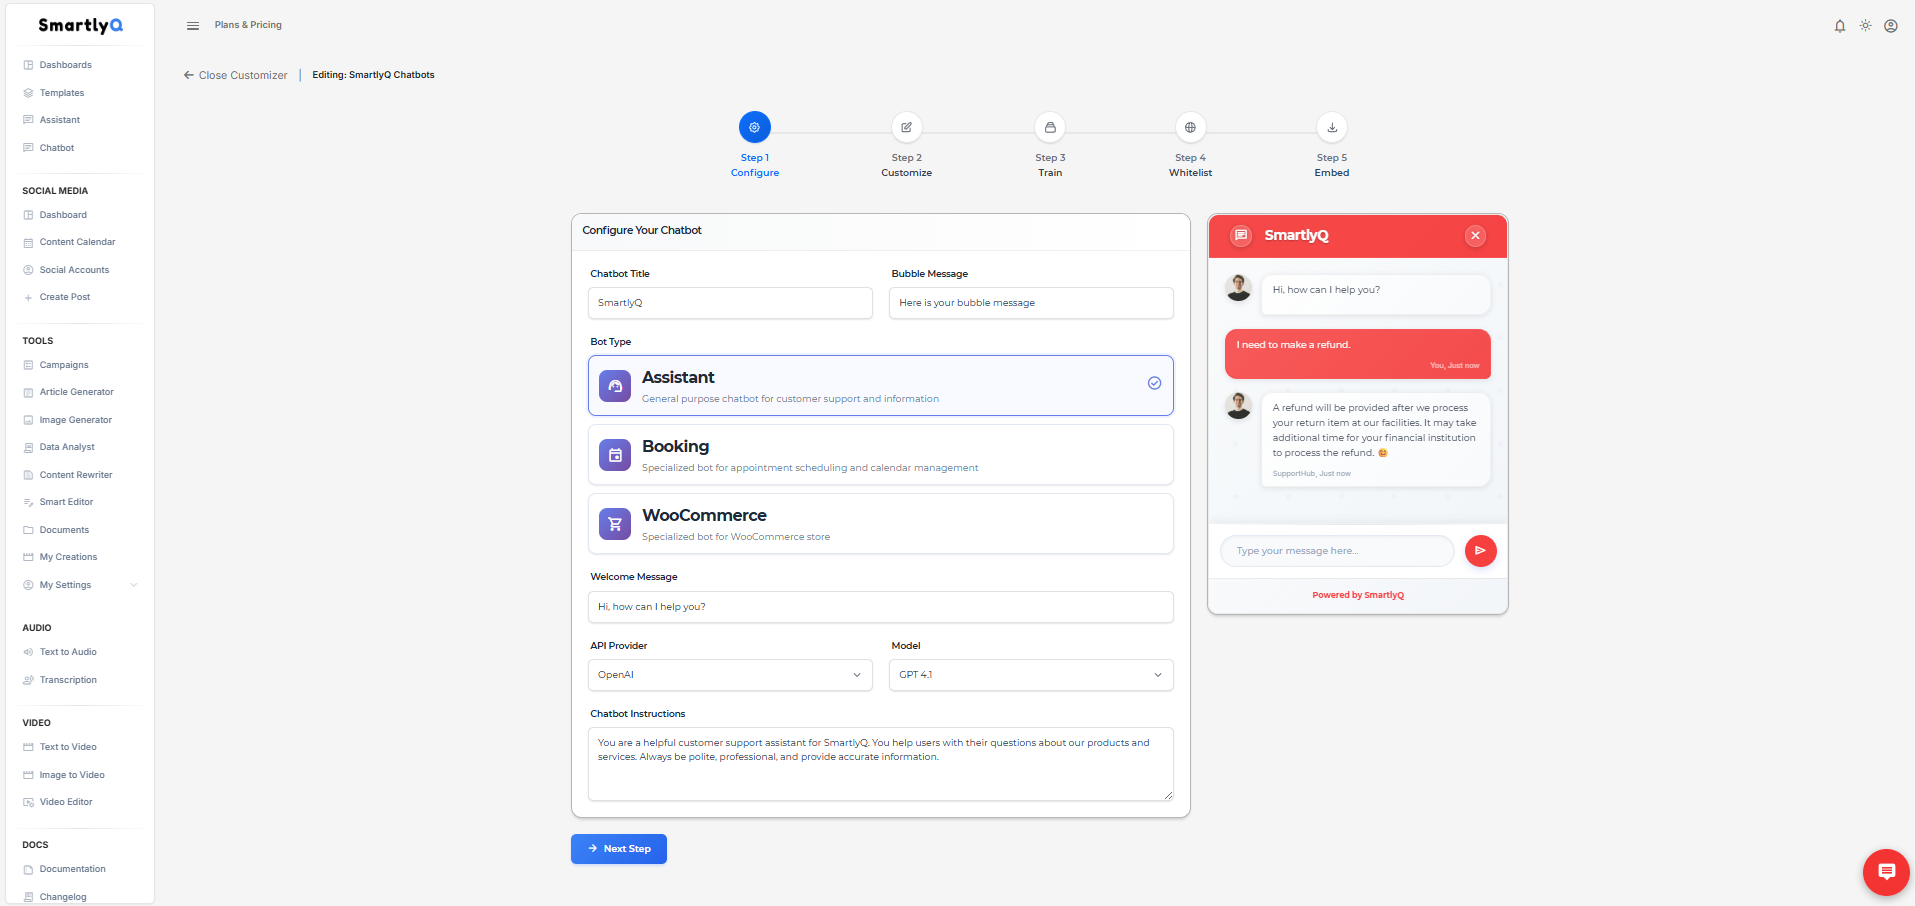
You can add a:
- Chatbot Title
- Bubble Message
- Welcome Message
- AI API Provider
- AI Model
- Chatbot Instructions
- Select the bot type that you want (Assistant, Booking, WooCommerce)
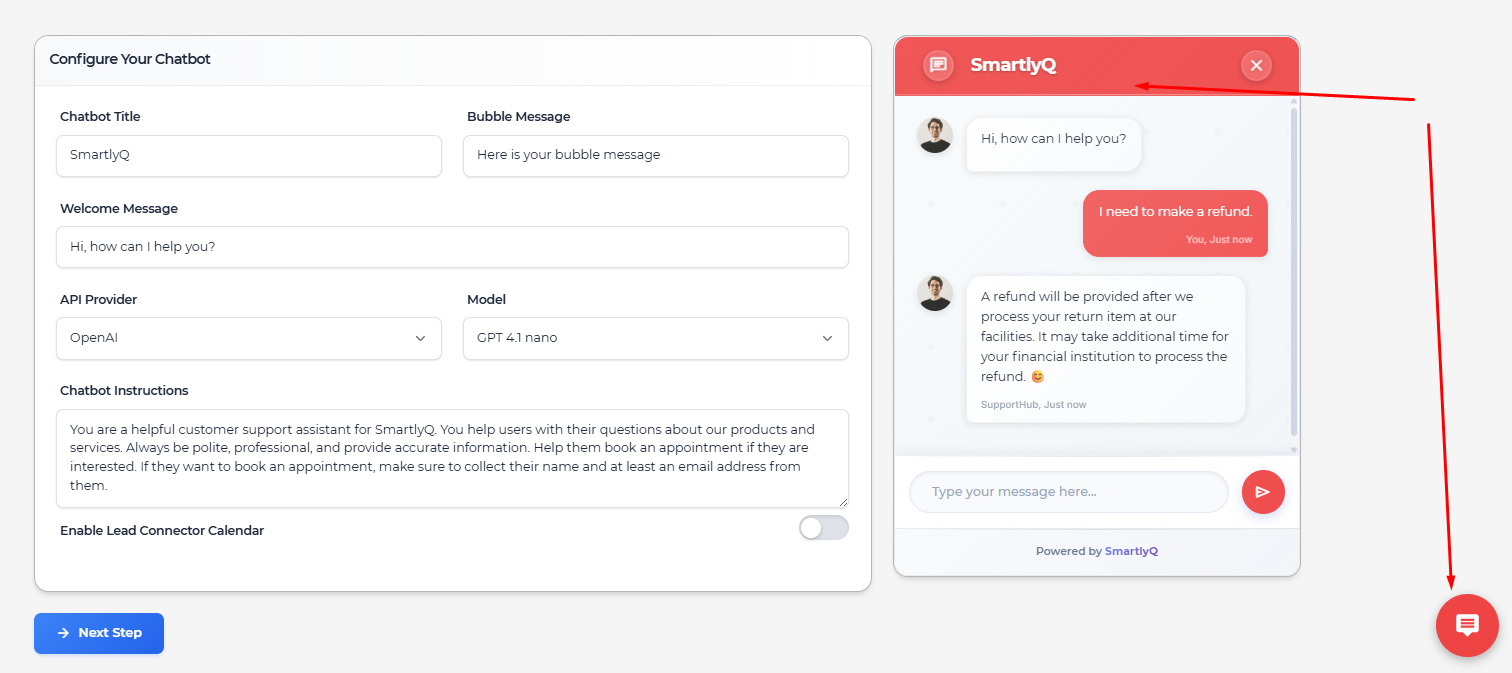
Note: On the right side, you can see a preview of your chatbot and can interact with the bubble to preview your changes in real time:
-Choose WooCommerce type bot
To create a WooCommerce specialized bot, make sure to select "WooCommerce" from the Bot Type options:
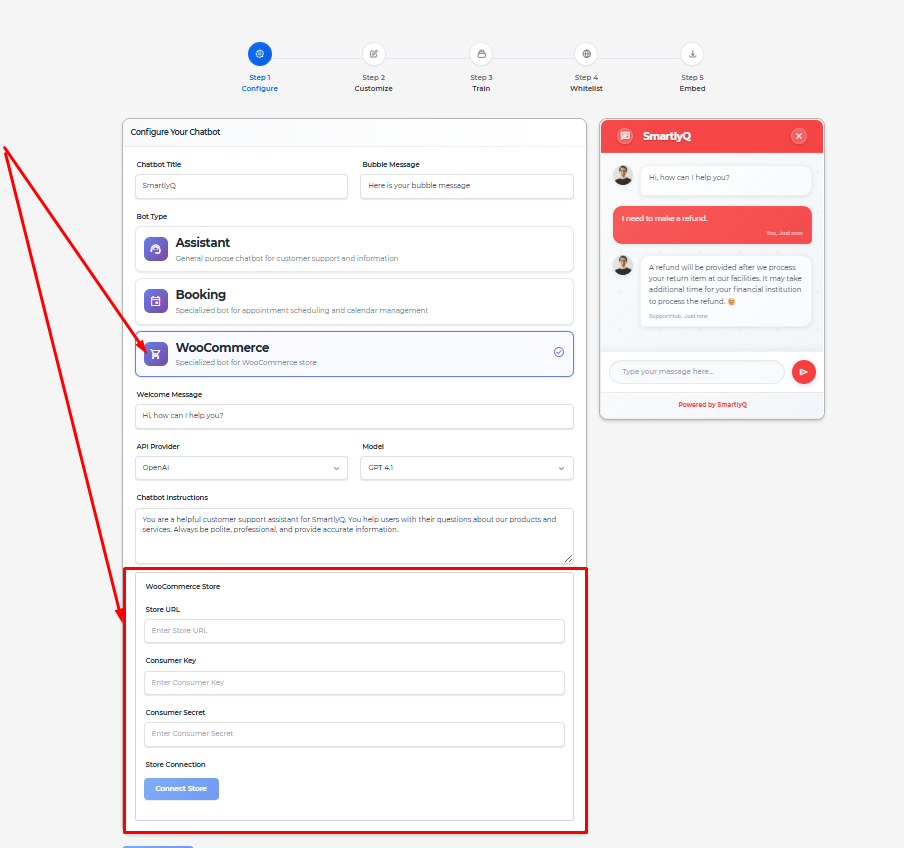
When you do so, you will notice a new box with inputs will appear at the bottom:
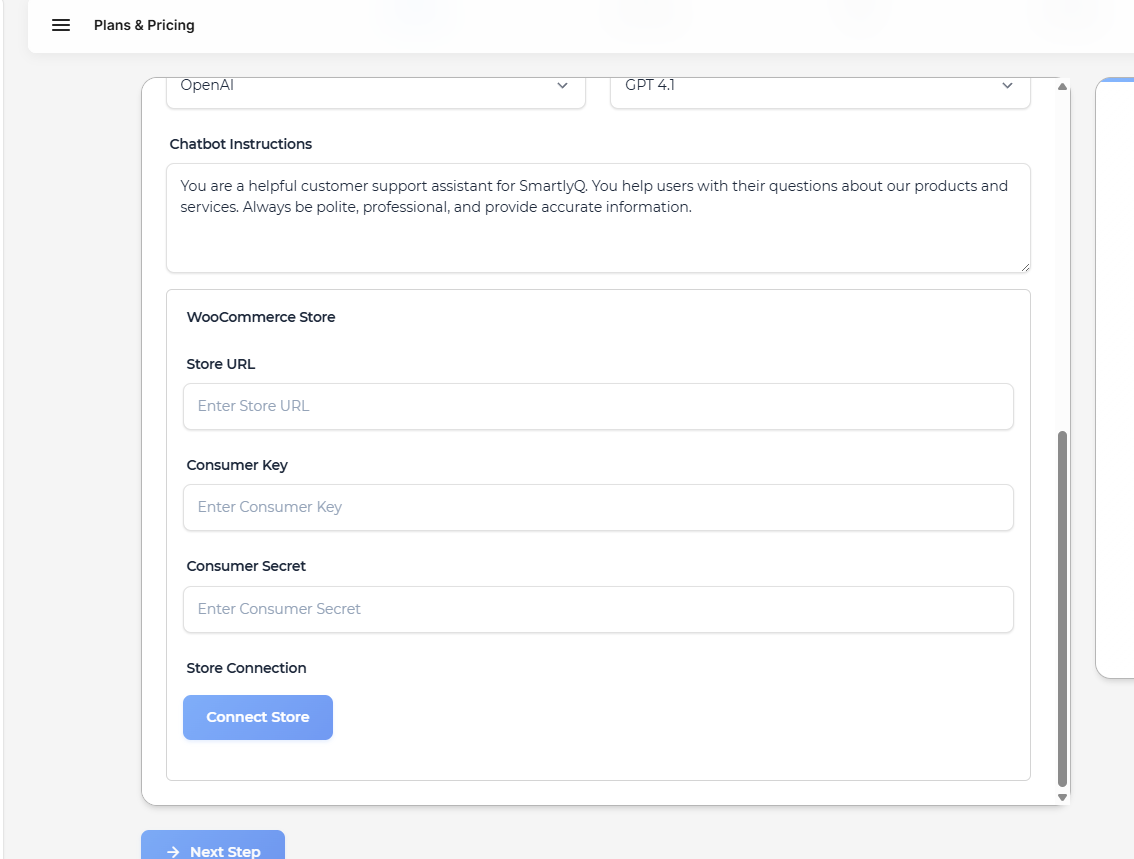
In order to connect the bot with your e-shop you will have to first generate "Consumer Key" and "Consumer Secret" keys from the admin area of your WordPress/WooCommerce site.
-How to generate required keys
Log in to your WordPress admin area of your e-shop. You will need to be logged in as an Admin type user or Shop Manager user.
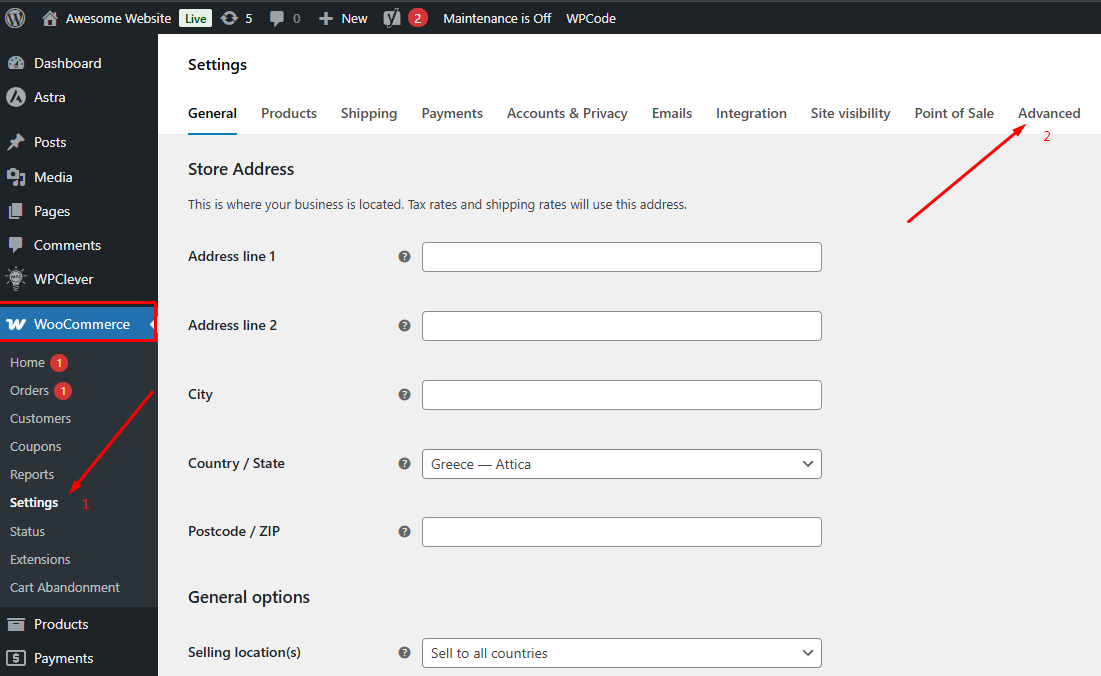
Navigate to WooCommerce > Settings, then select the "Advanced" tab:
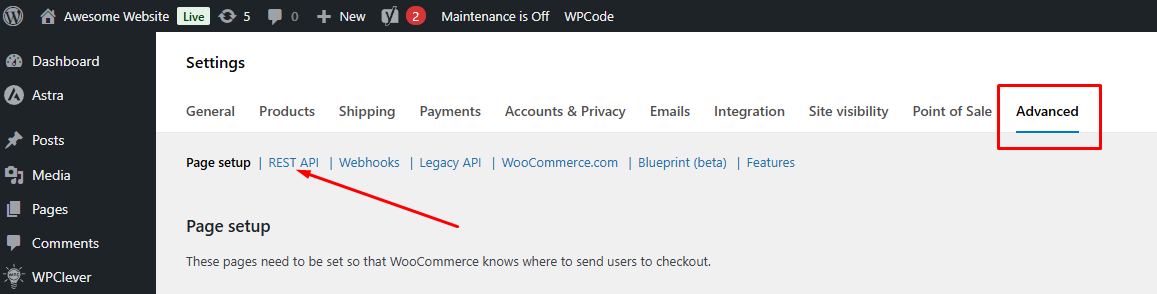
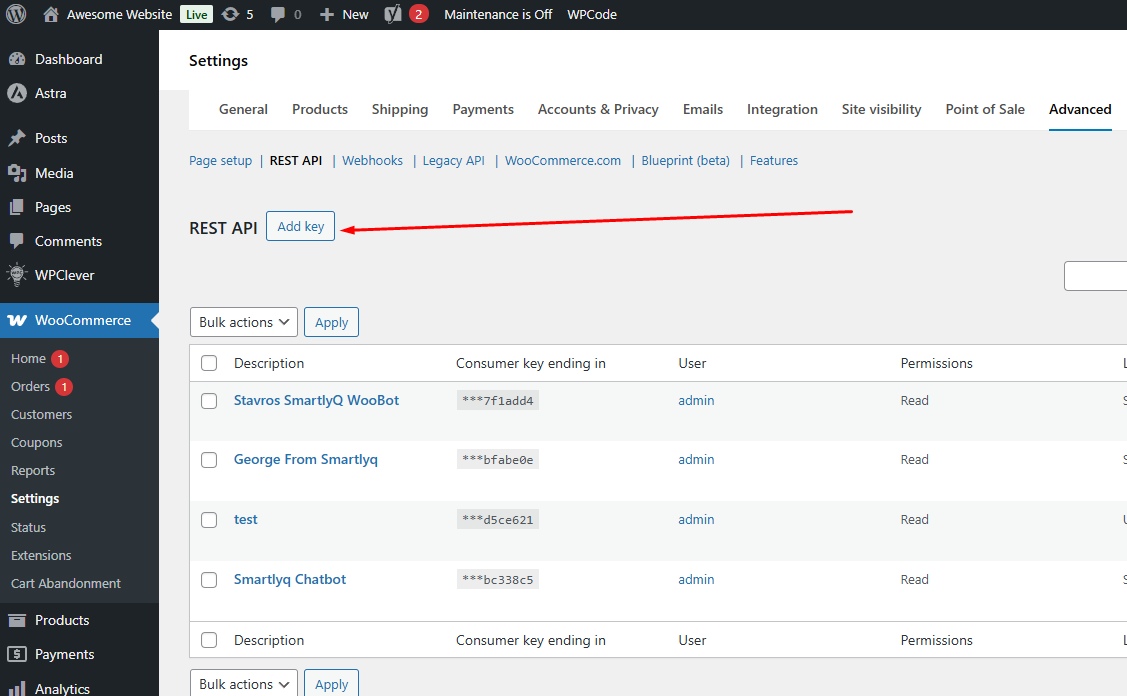
Once in the "Advanced" screen, select the "REST API" link, as shown below:
In the next screen, press the "Add key" button:
In the key creation page, type in:
- Description: A name for your key, so you can distinguish it from the others in the list.
- User: Select the User you would like to generate a key for in the dropdown
- Permissions: Select a level of access for this API key - For the Bot select Read only Access.
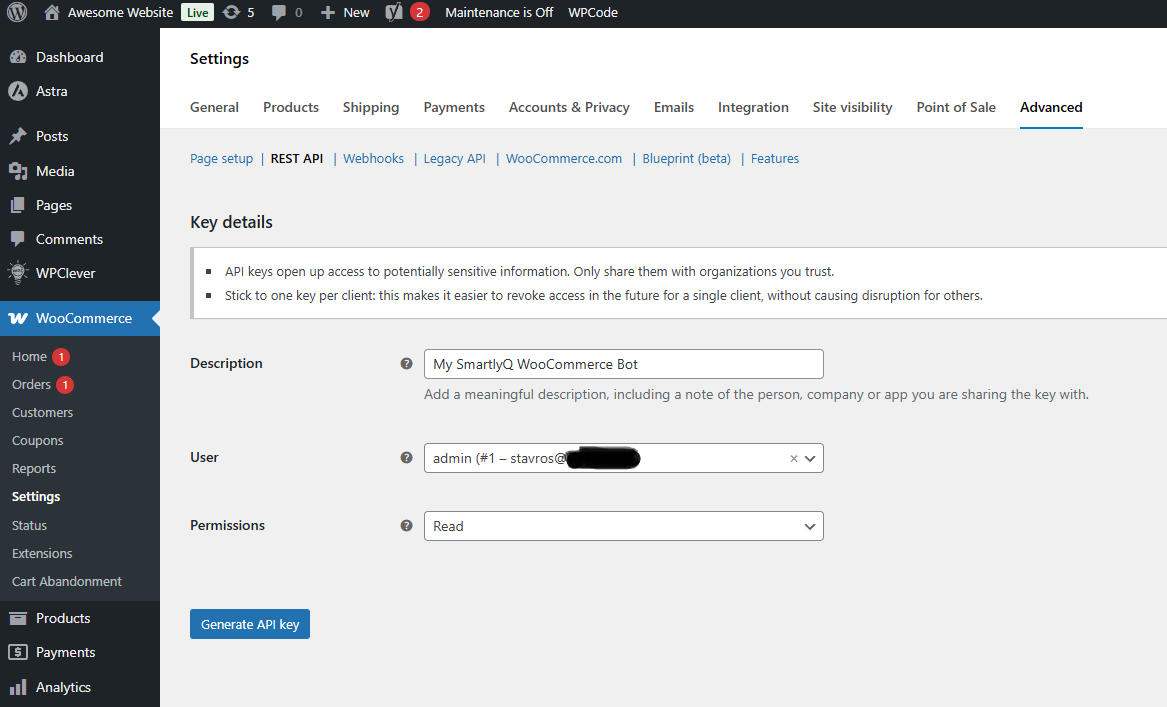
Select Generate API Key, and WooCommerce creates API keys for that user.
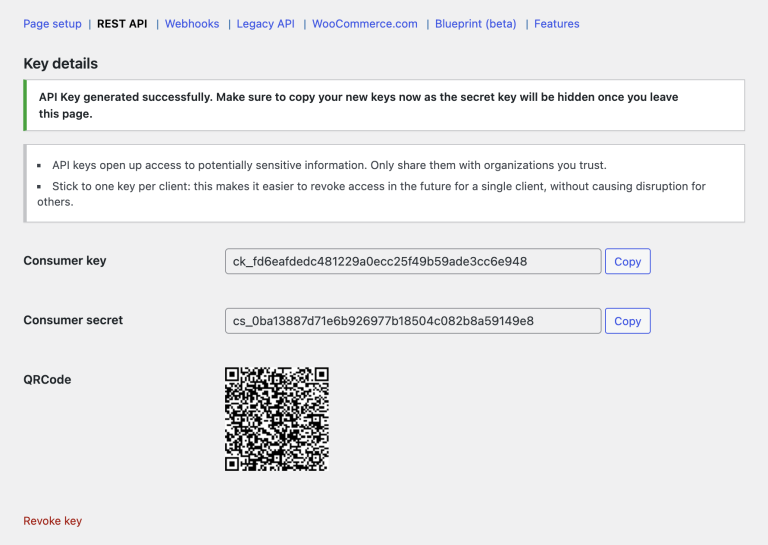
-Copy keys and paste into Bot fields
Now that you have the required keys, make sure to keep them somewhere safe, and let's go and paste them into the corresponding input fields in the bot. When done, press the "Connect Store" button.
If successful, you should see the success message "WooCommerce store connected successfully":
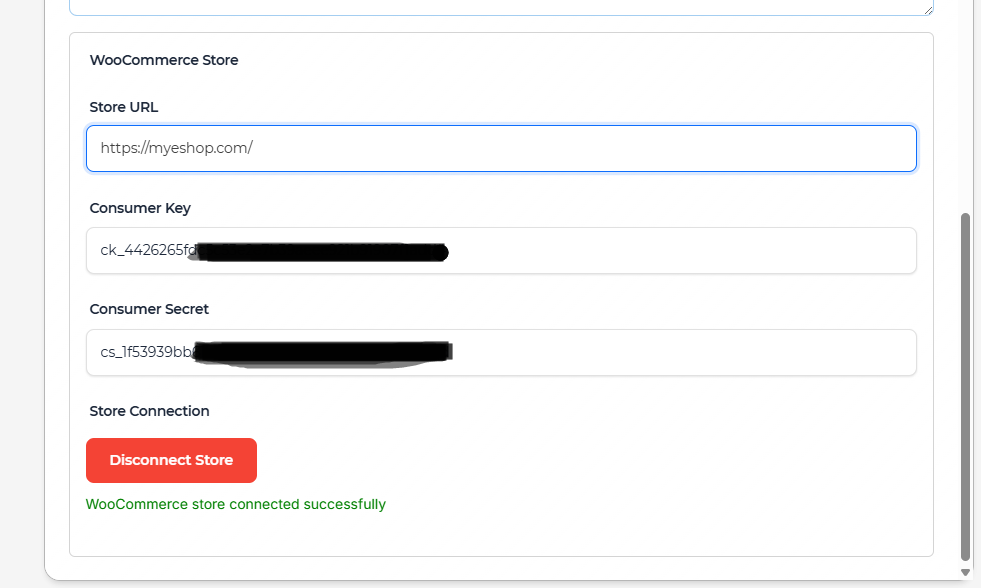
Note: To disconnect the store, simply press the "Disconnect Store" button.
When ready, press "Next Step" to proceed to the next step.
Step 2: Customize
In the second step, you will Customize Your Chatbot and Personalize its appearance to match your brand identity.
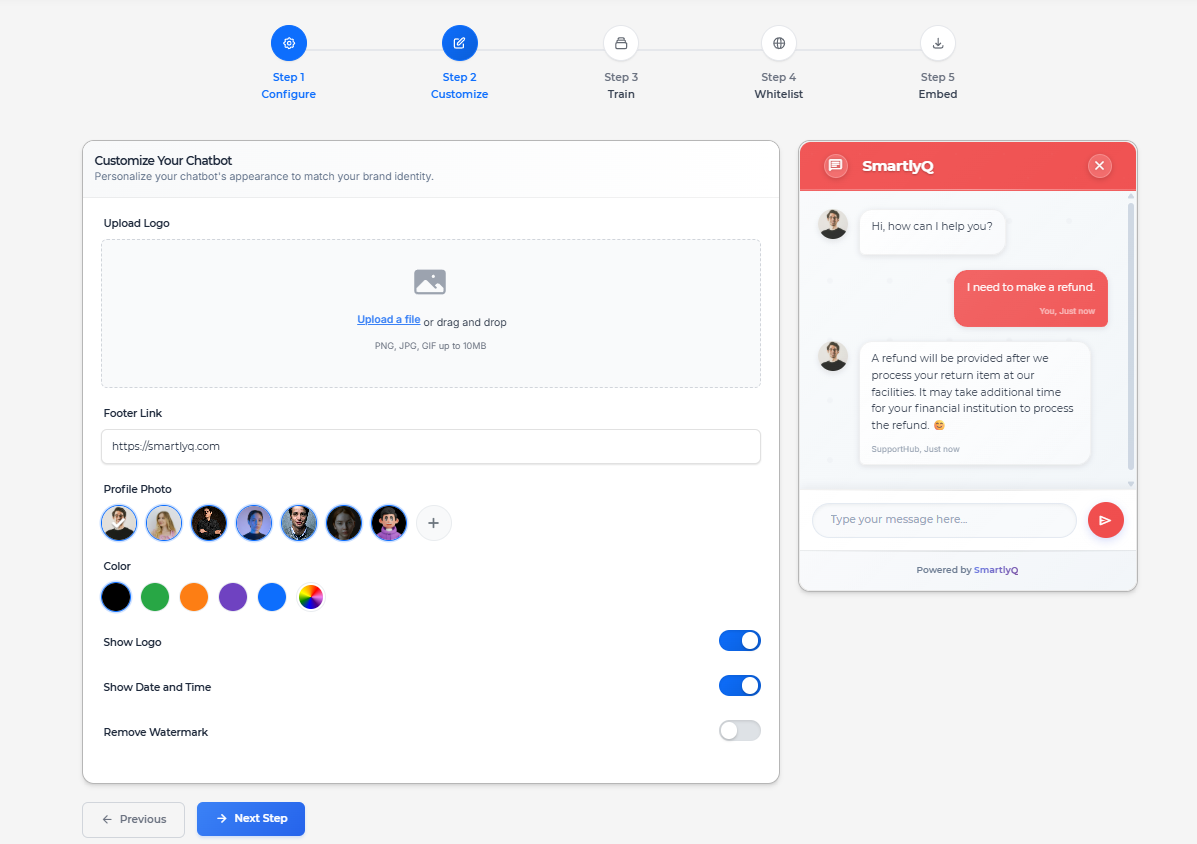
You can:
- Upload a Logo - will appear next to the Chatbot Title
- Add a Footer Link
- Choose or add a Profile Photo/Avatar
- Select a color for the chatbot window
- Choose to Show Logo
- Choose to Show Date and Time under each message
- Remove the "Powered by SmartlyQ" watermark
Note: On the right side, you can see a preview of your chatbot and can interact with the bubble to preview your changes in real time.
When ready, press "Next Step" to proceed to the next step.
Step 3: Customize
In the third step, you will Train Your Chatbot by providing training data from various sources.
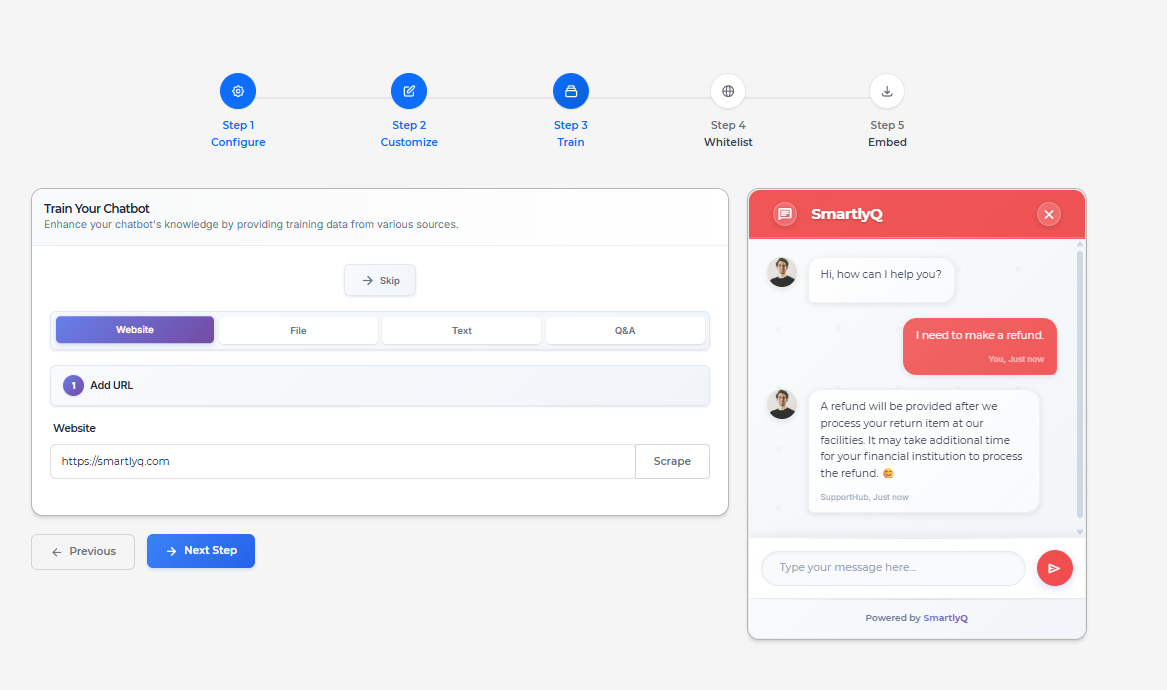
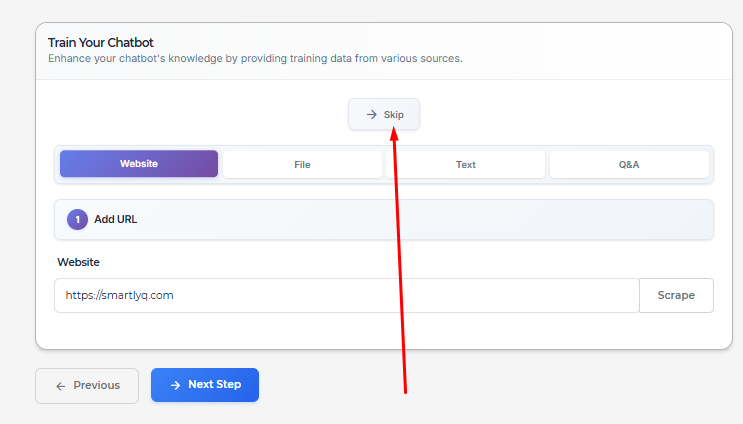
Note: You can also skip this step altogether if you want to, by simply pressing the button "Skip" at the top.
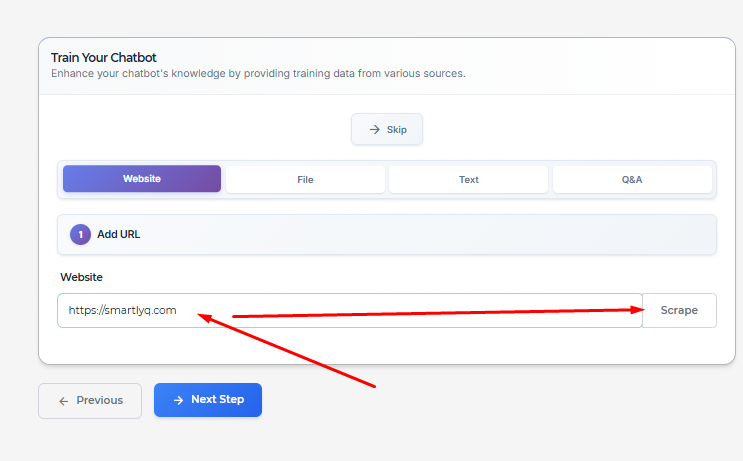
You can train your bot using 4 methods:
- Website Scraping
- File Upload
- Text Prompt
- Create Various Q&As
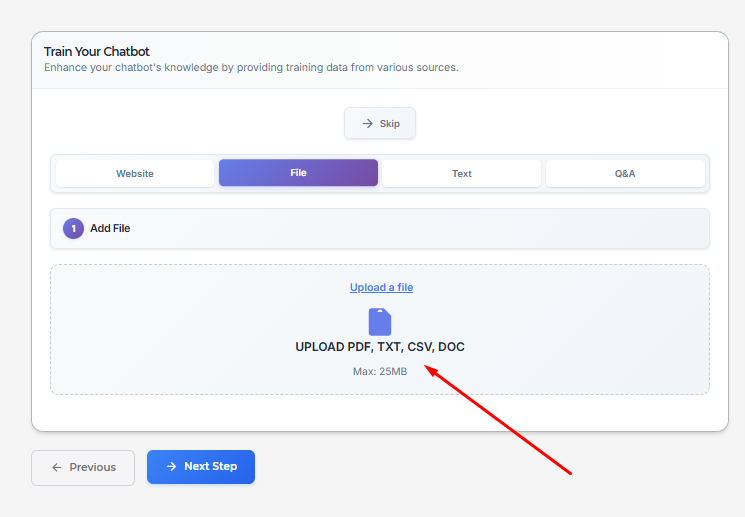
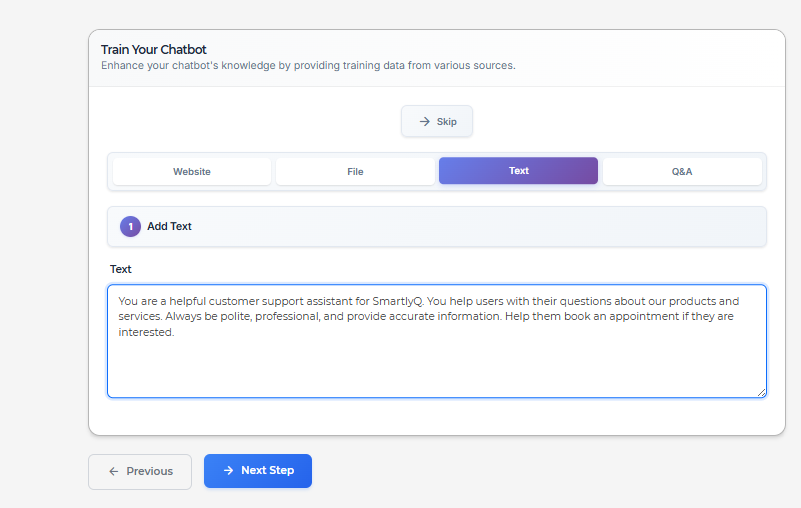
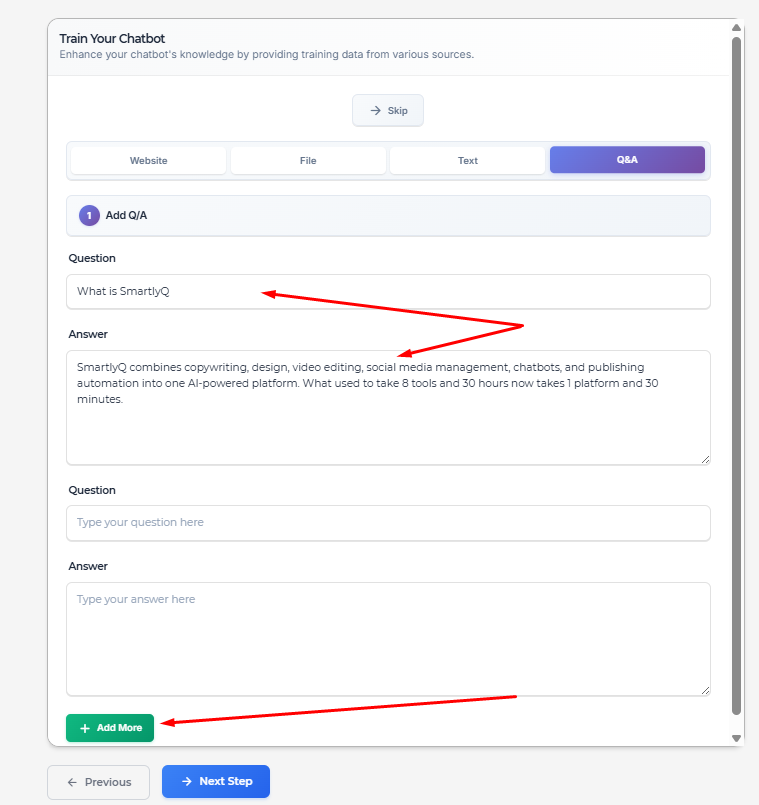
When ready, press "Next Step" to proceed to the next step.
Step 4: Whitelist
In the fourth step, you will specify which domains are allowed to access and interact with your chatbot.
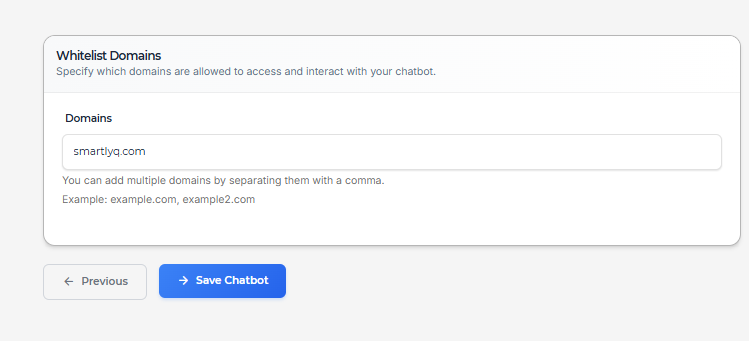
Type your domain. You can add multiple domains by separating them with a comma, eg, example.com, example2.com, and press "Save Chatbot" to finalize the chatbot and generate an embed script. Please wait while the chatbot is being saved.
Step 5: Embed
In the final step, you will get an embed script so you can embed the chatbot on your website(s). Make sure that the website(s) you embed it in match the whitelisted domains you added in Step 4!
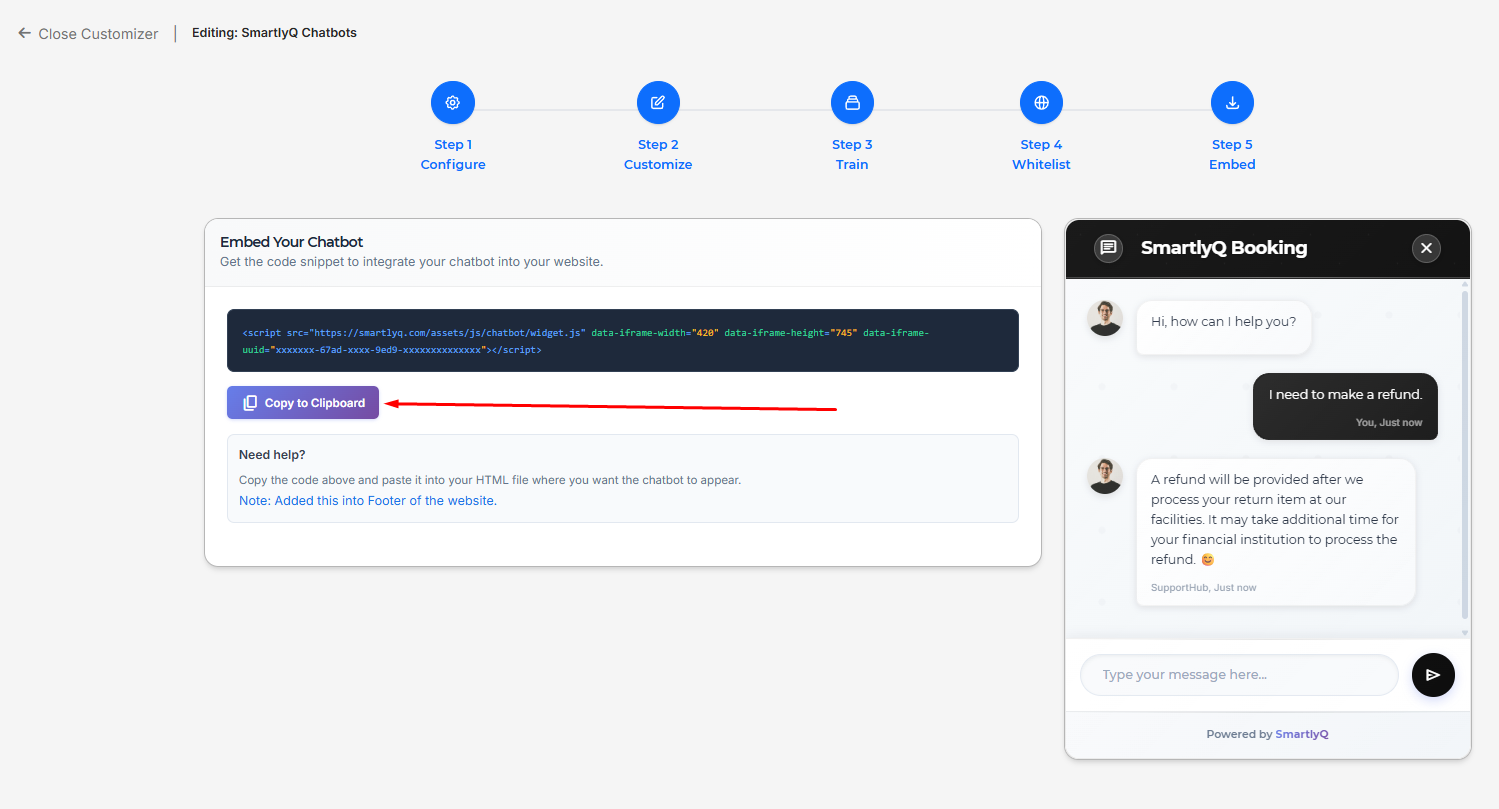
Press the "Copy to Clipboard" button to copy it to your clipboard, and then you can paste it into your website(s) of your choice.
Note: Make sure you embed it either in the <body> tag or the <footer> of your website(s).