How to use the Image Generator
Welcome to the SmartlyQ Image Generator! This guide will walk you through the features and functionalities of our Image Generator tool. With this tool, you can create stunning images based on the inputs you provide. You can also create stunning Ad Images!
Let’s dive into how to effectively use the Image Generator.
Overview
The SmartlyQ Image Generator allows users to create custom images by specifying various parameters. The primary inputs for the Image Generator are:
- Prompt: A textual description of what you want the image to depict.
- Style: The artistic style you want to apply to the image (e.g., realistic, abstract, anime).
- Aspect ratio: Choose the aspet ratio of the generated image. Options include Square, Portrait and Landscape.
- Model: The AI Model that will generate the image.
How to Use the Image Generator
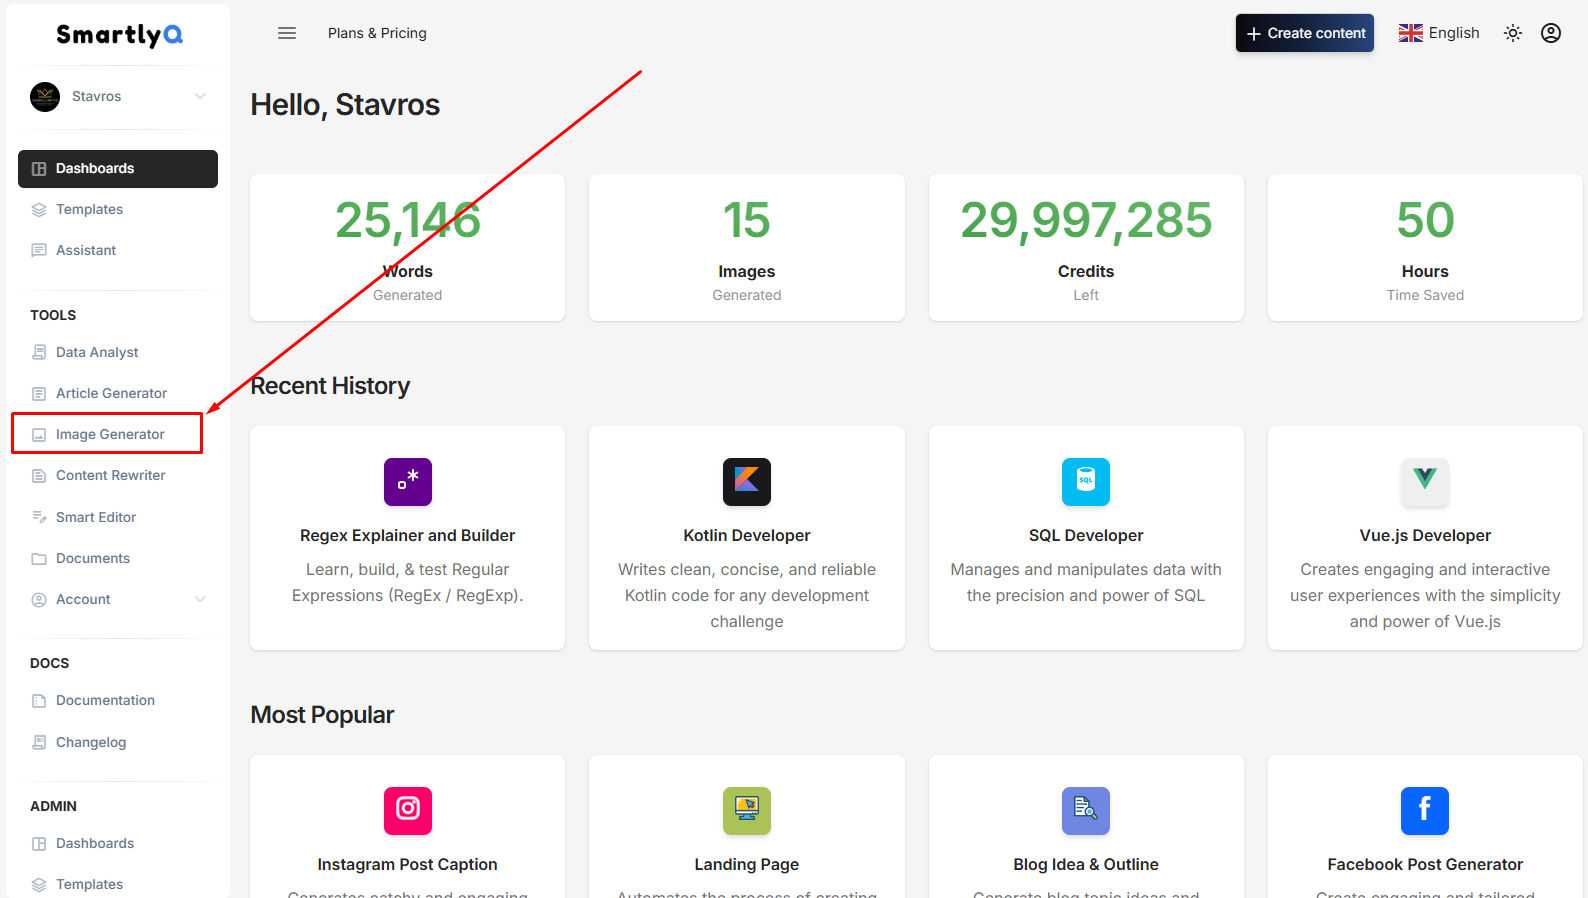
Step 1: Access the Image Generator
- Log into your SmartlyQ account.
- Navigate to the TOOLS section and select the "Image Generator" from the dashboard.
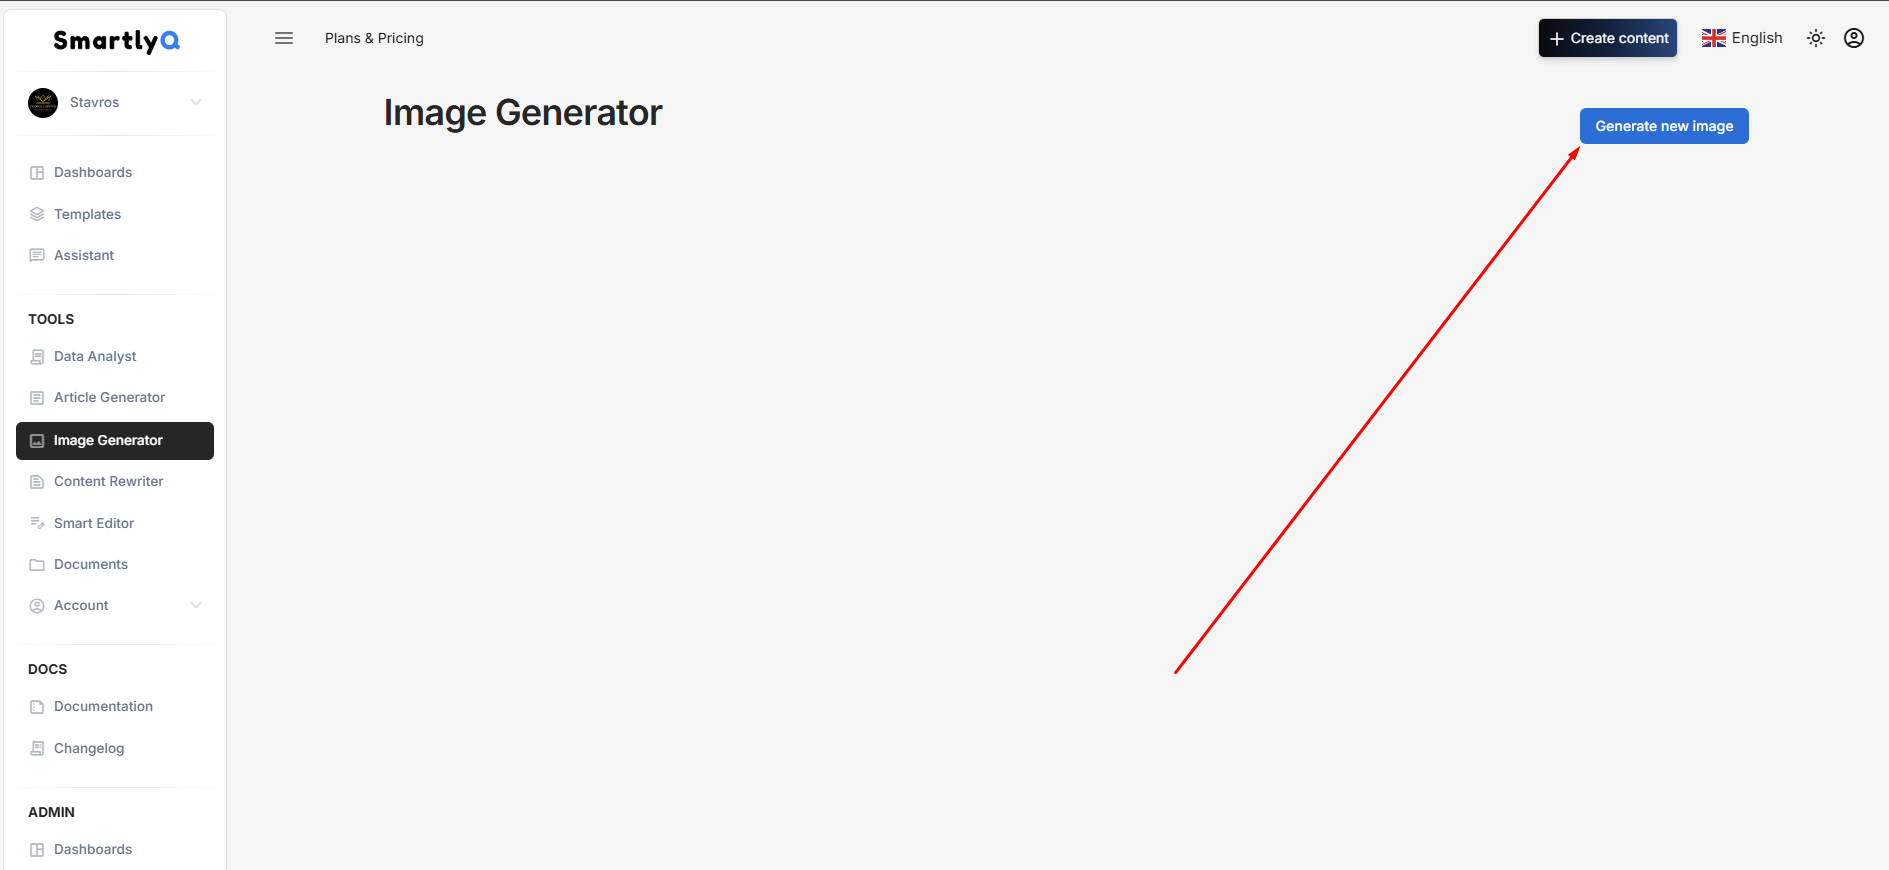
Step 2: Input Parameters
If you have already generated some images in the past, you will see their thumbnails here. Click on the "Generate new image" button to create a new image.
A side panel will open from the right side to allow you to fill in your inputs. Select the tab that says "Image":
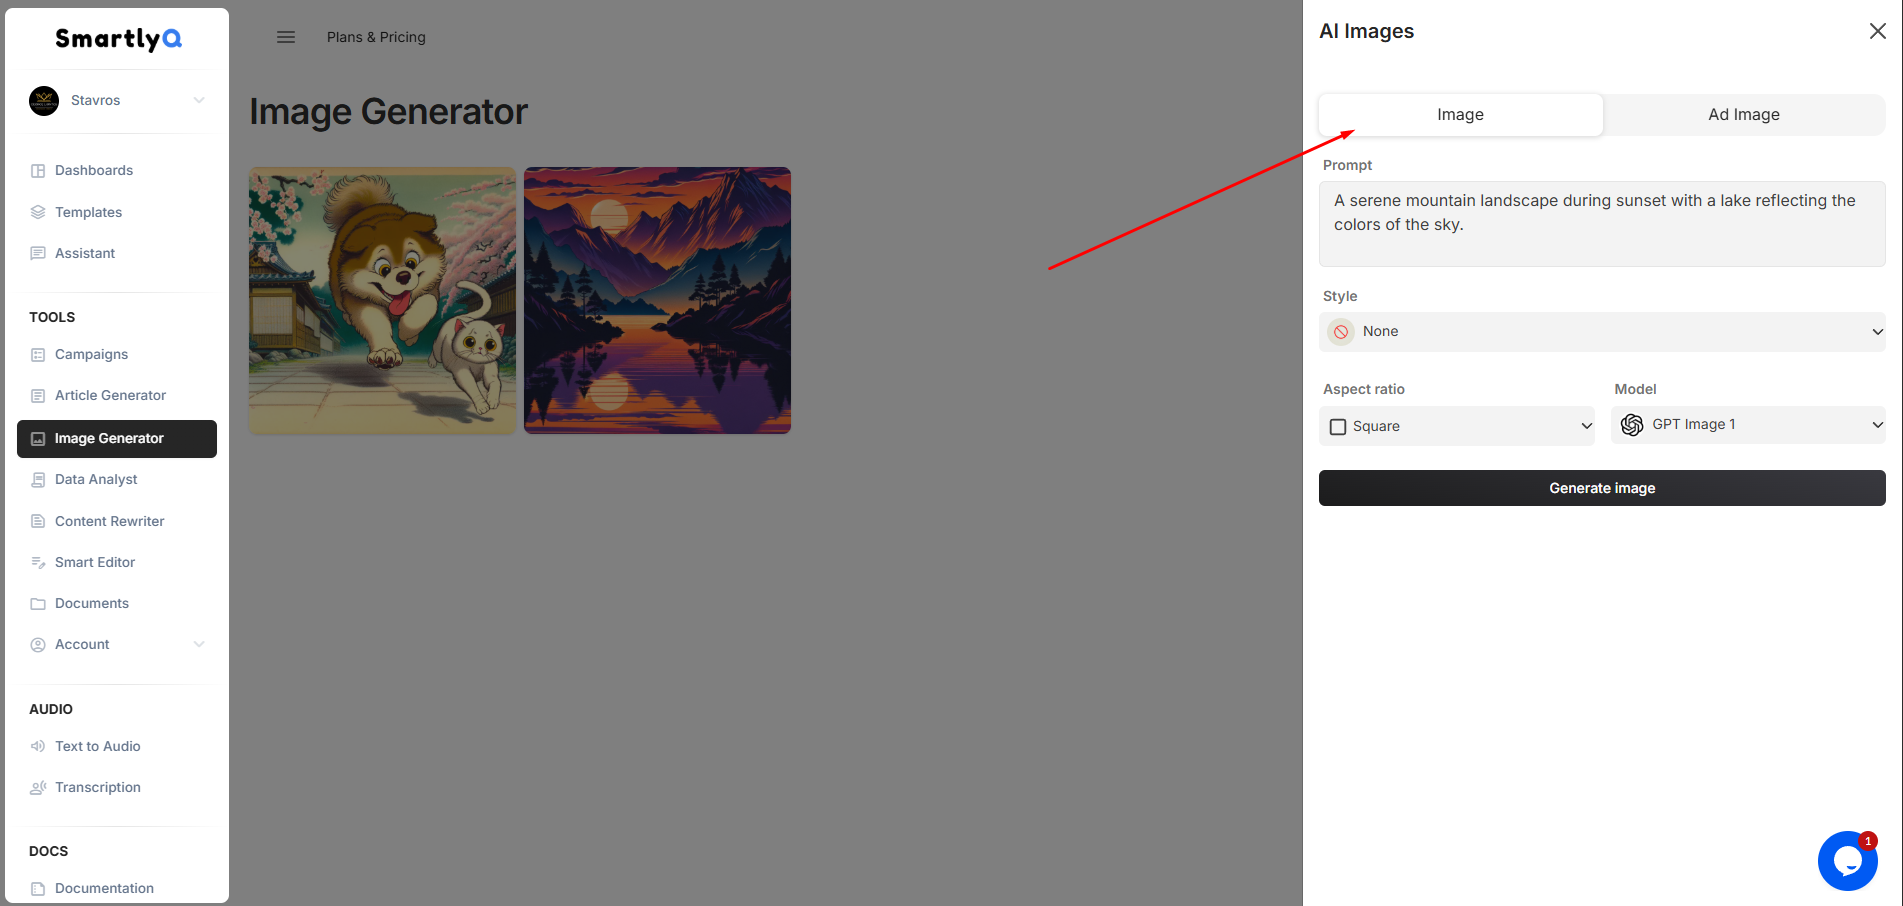
1. Promt
- Provide a clear and detailed description of the image you want to generate.
- Example: “A serene mountain landscape during sunset with a lake reflecting the colors of the sky.”
2. Style
- Select the desired style from the dropdown menu or input field.
- Example styles include:
- Photography
- Texture
- Anime
- Pixel Art
3. Select Aspect Ratio
Choose the aspect ratio of your image. Examples include:
- Square
- Portrait
- Landscape
4. Select AI Model
- Choose the AI model that will generate your image.
Step 3: Generate the Image
Once you have filled in all the inputs, click on the “Generate image” button. The system will process your request and create an image based on the parameters you provided.
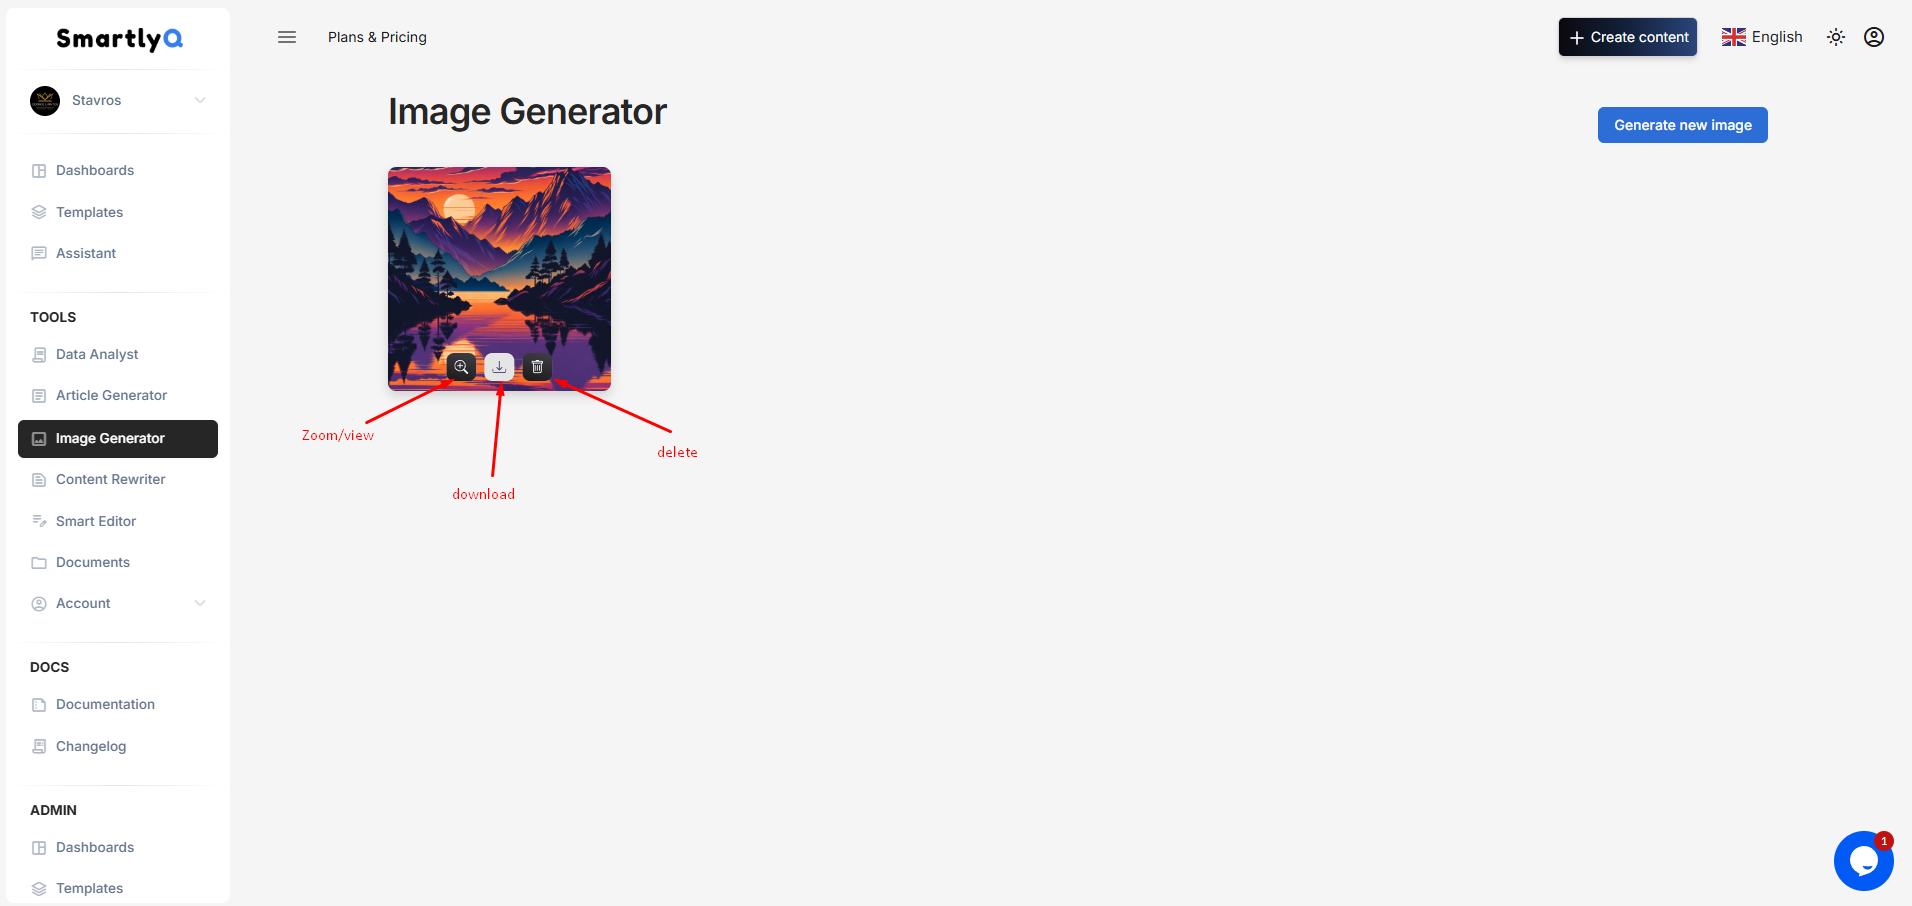
Step 4: Review and Download
- After the image is generated, it will be displayed on the screen.
- You can review the image to see if it meets your expectations.
- If you’re satisfied, click the “Download” button to save the image to your device.
- You can also delete each generated image if you no longer wish to keep it.
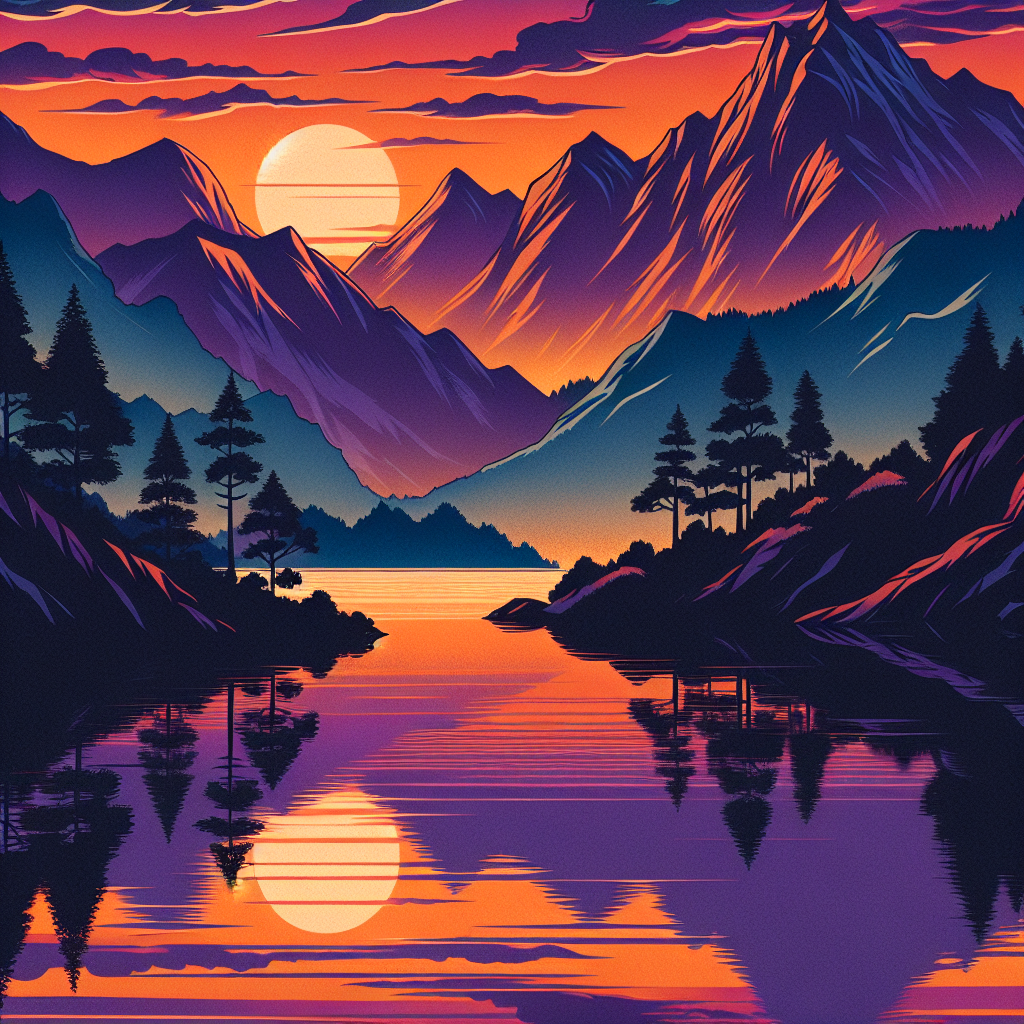
Here is an example from the following parameters:
- Description: A serene mountain landscape during sunset with a lake reflecting the colors of the sky.
- Style: Anime
- Model: DALL-E
How to Use the Ad Image Generator
Follow the guide above until "Step 2: Input Parameters". On the side panel that opens from the right side select the tab that says "Ad Image":
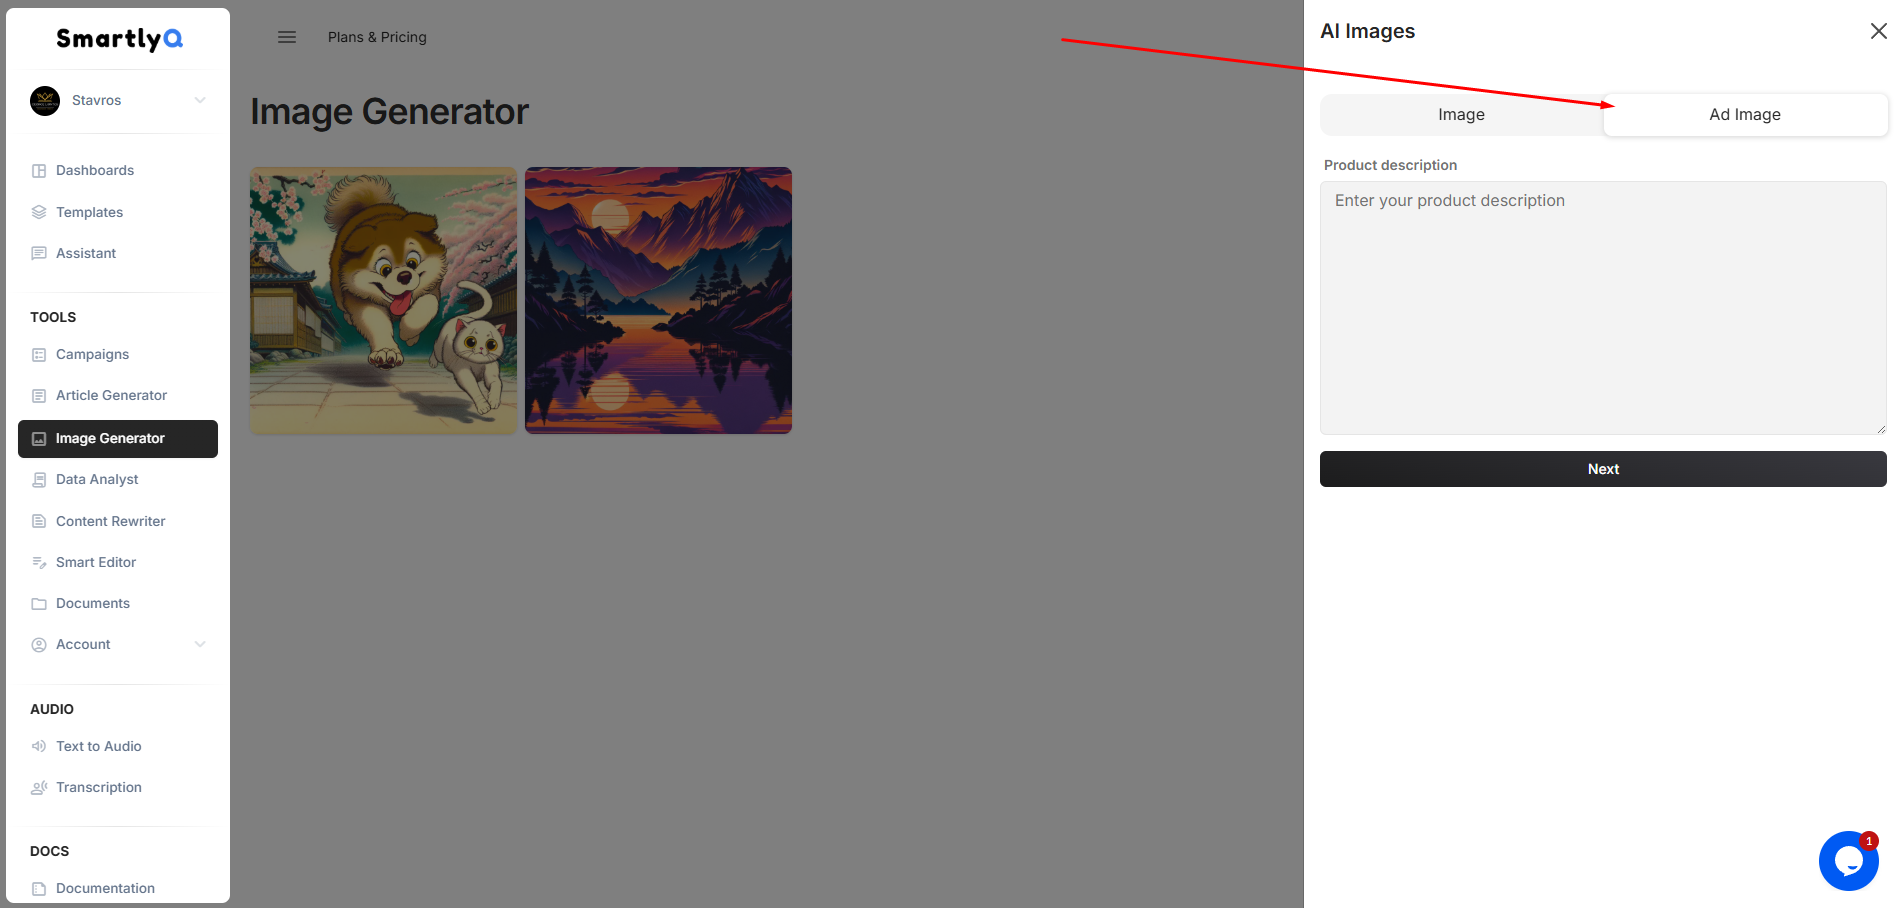
In the provided field "Product description", enter your prodct description for the Ad Image generator to produce your Ad Image
Let's try the following description for example, about a "Evergreen Smart Plant Pot":
"A sleek, minimalist self-watering plant pot made from recycled ocean plastic. The pot is a calming matte forest green, with subtle, textured ripples reminiscent of natural wood grain. Inside, a vibrant, healthy monstera plant flourishes. The overall image should evoke a sense of modern sustainability, bringing nature indoors effortlessly. Think clean lines, natural light, and a touch of serene greenery in a contemporary home setting."
When ready with your description, hit the "Next" button.

The generator will produce 4 text variations for you and you will be able to select the Aspect ratio as well as the AI Model to generate the final Ad Images.
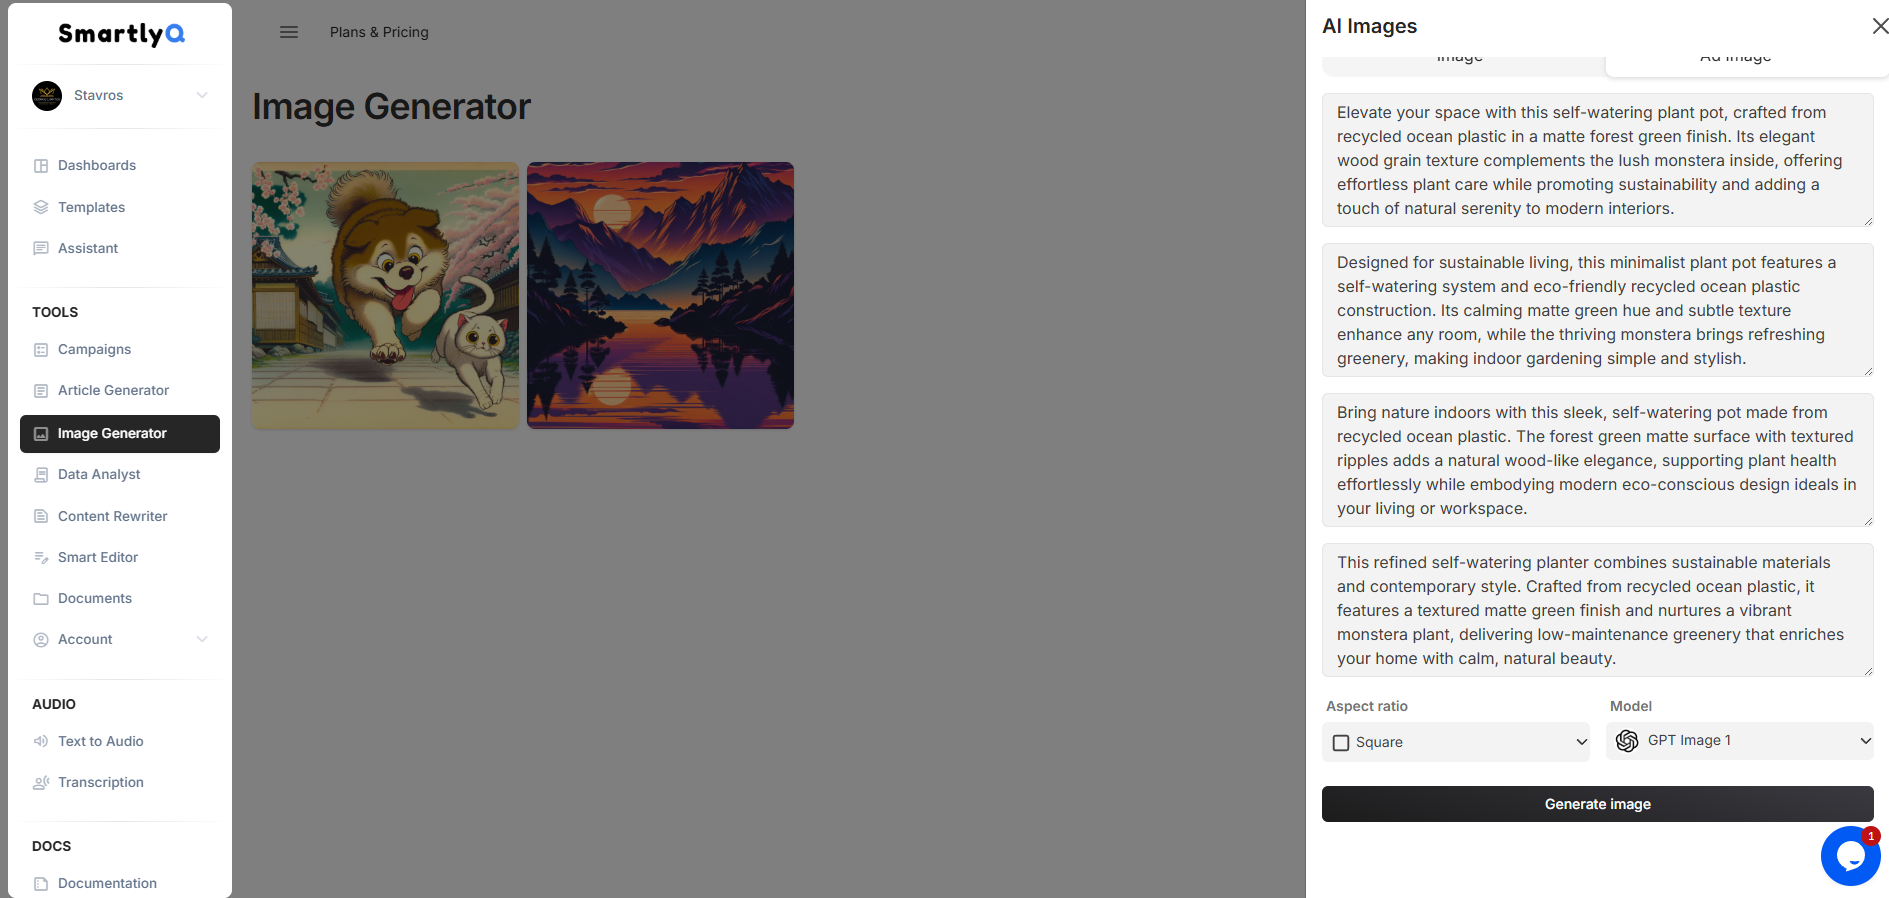
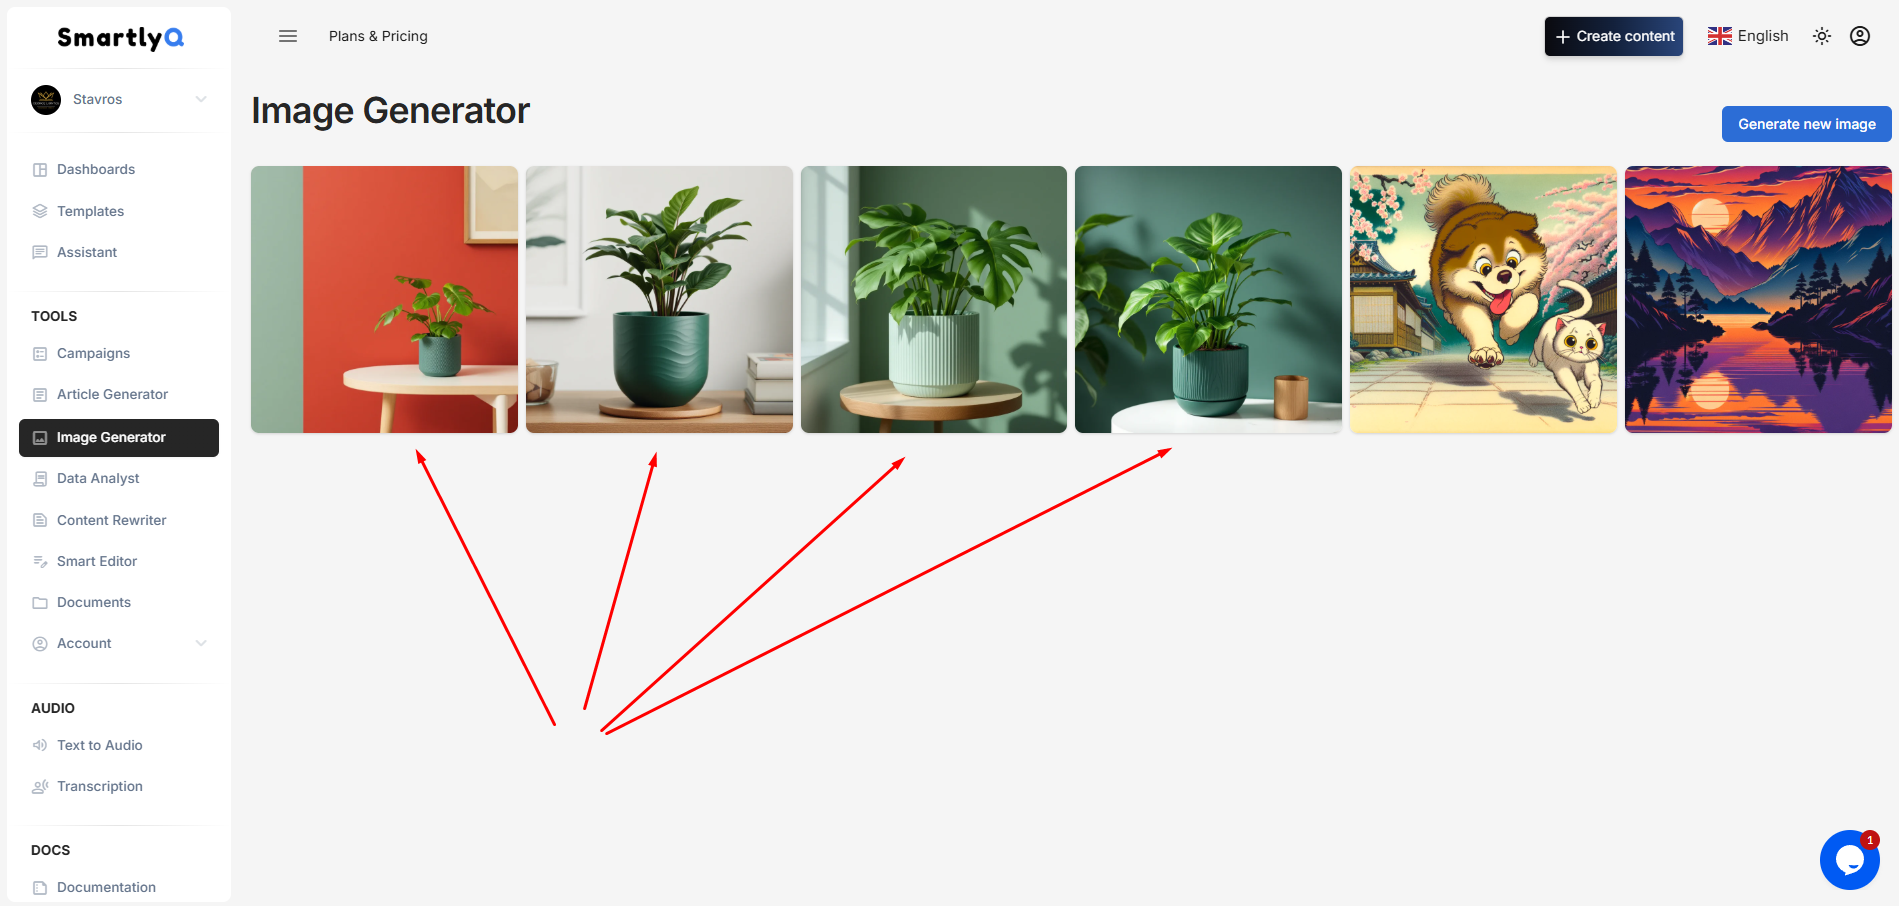
When ready, press the "Generate Image" button and allow the generator a few moments to generate 4 Ad Image variations for you.
Tips for Best Results
- Be as descriptive as possible in the Description field to guide the generator effectively.
- If the generated image isn’t quite what you expected, try making slight adjustments to your inputs and regenerate the image.
You can also view the video version of the above tutorial here: