SmartlyQ WordPress Integration
Connect your WordPress site and post generated articles all in one click!
Introduction
Easily integrate your WordPress site with SmartlyQ and start posting articles generated through the Article Generator with just a few simple moves!
Folow our in depth below guide to find out how to do it!
Step 1: Generate a WordPress Application Password
In order to connect your WordPress site to SmartlyQ, you first need to generate an Application Password using one of your site's admin users. You should pick an admin user profile as that will be the one posting the articles on your site (meaning they would be the post's author).
-
Login to your admin dashboard as the preferred admin user and navigate to your user profile/edit profile.
-
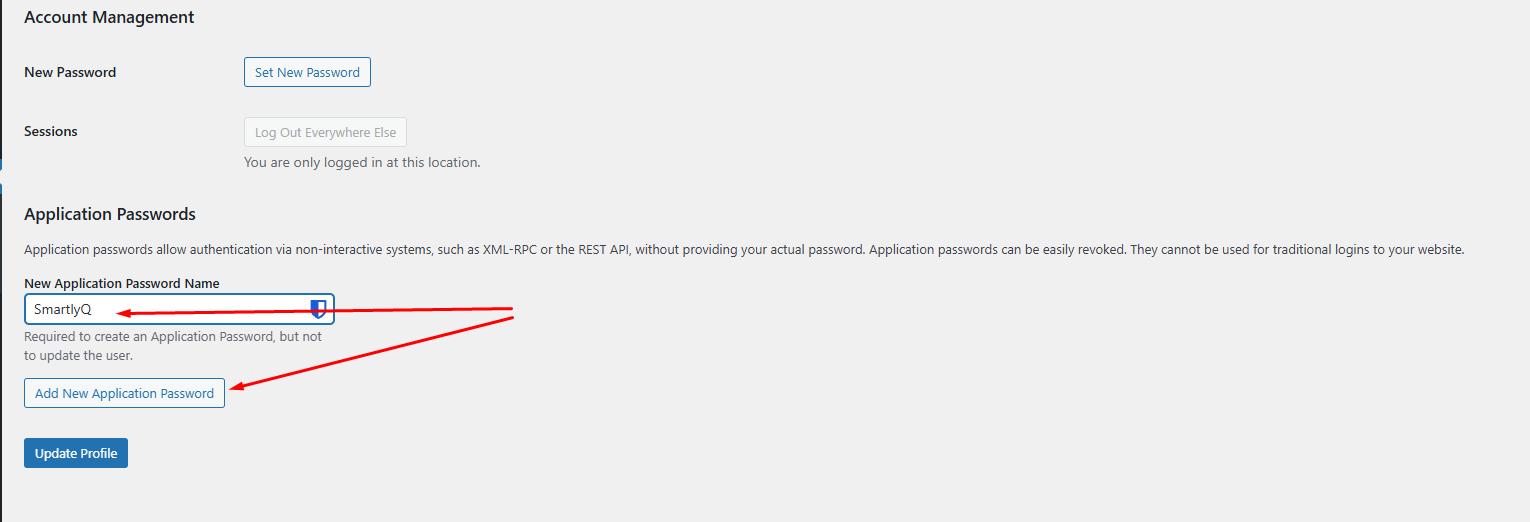
Scroll down to where you can see the "Application Passwords" section. Fill out a name for your application and then hit the "Add New Application Password" button
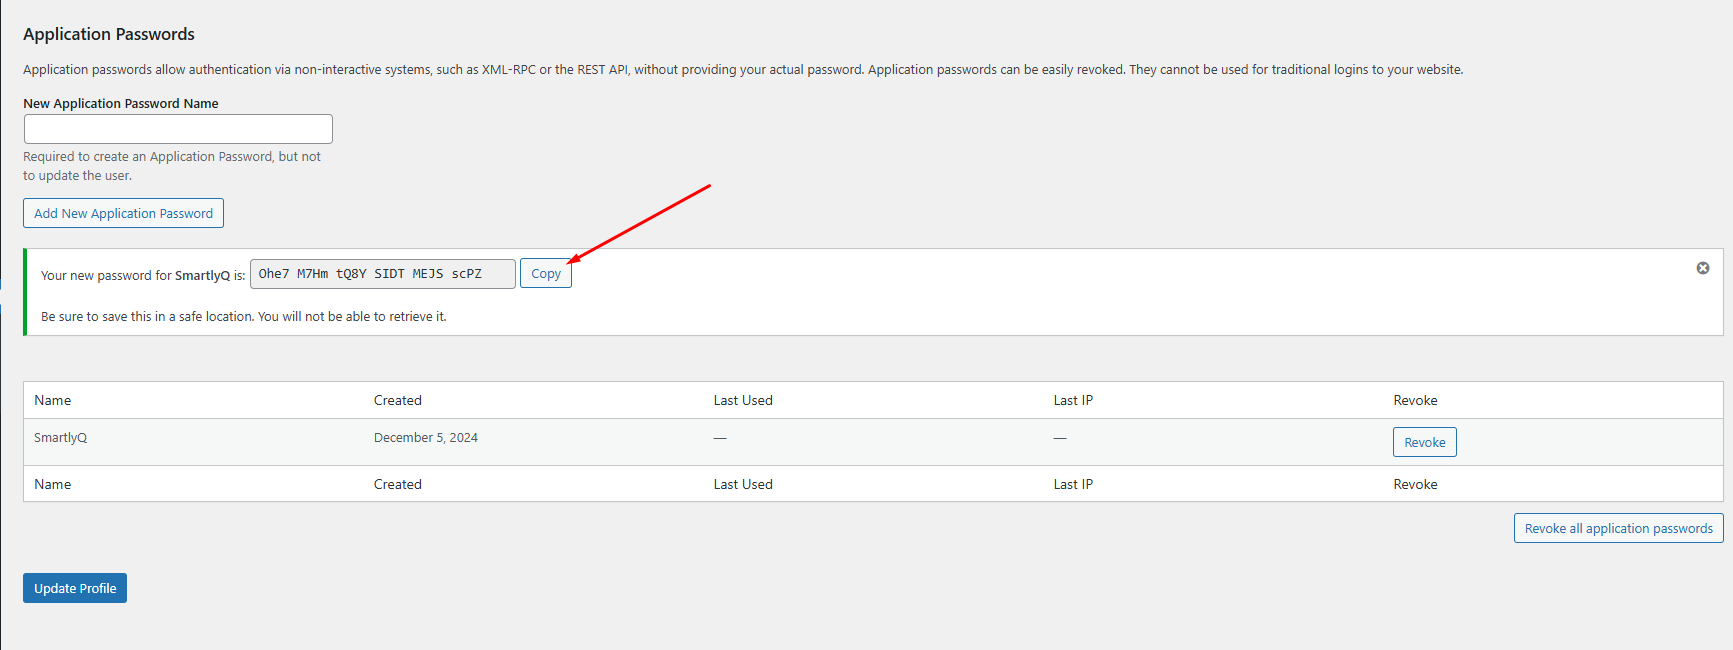
You will see your newly created application password. Make sure to copy it and store it somewhere safe. Also make sure to copy and store the profile's "Username".
Step 2: Enter Credentials in SmartlyQ
We now need to insert the newly generated credentials in SmartlyQ.
1. Log into SmartlyQ:
- Go to Smartlyq and log in to your account.
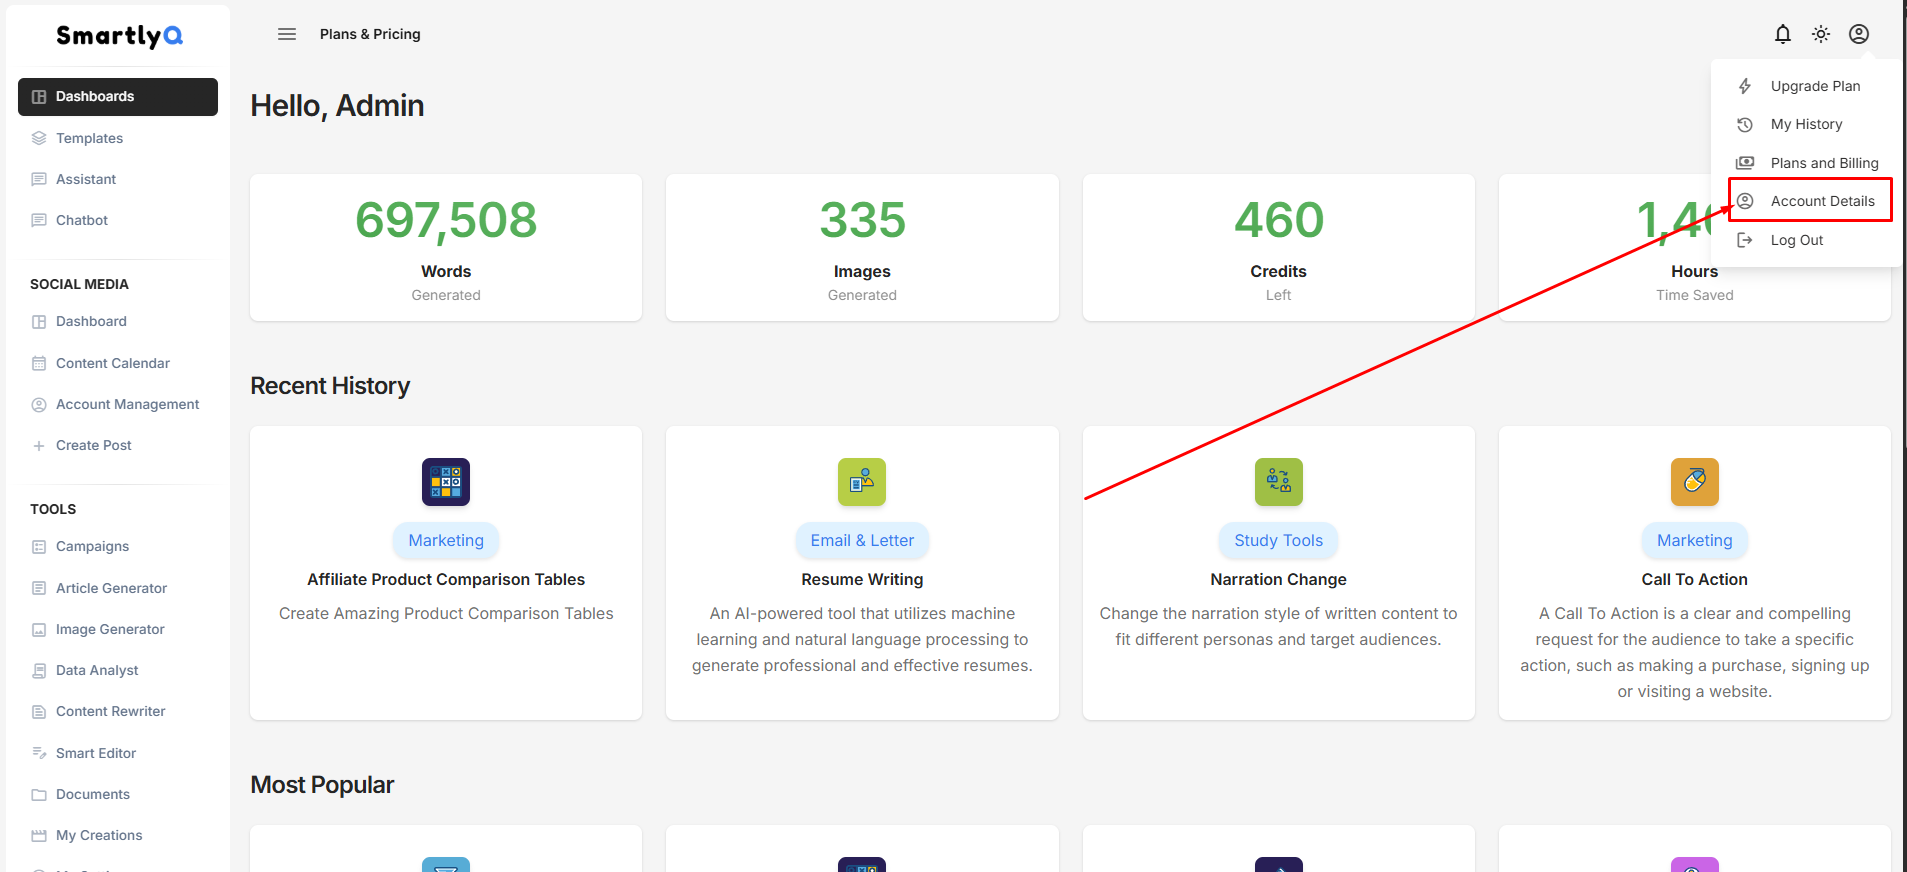
2. Navigate to Avatar Icon > Account Details**:**
- Look for the Avatar icon on the top right corner. Click on it and select the "Account Details" option..
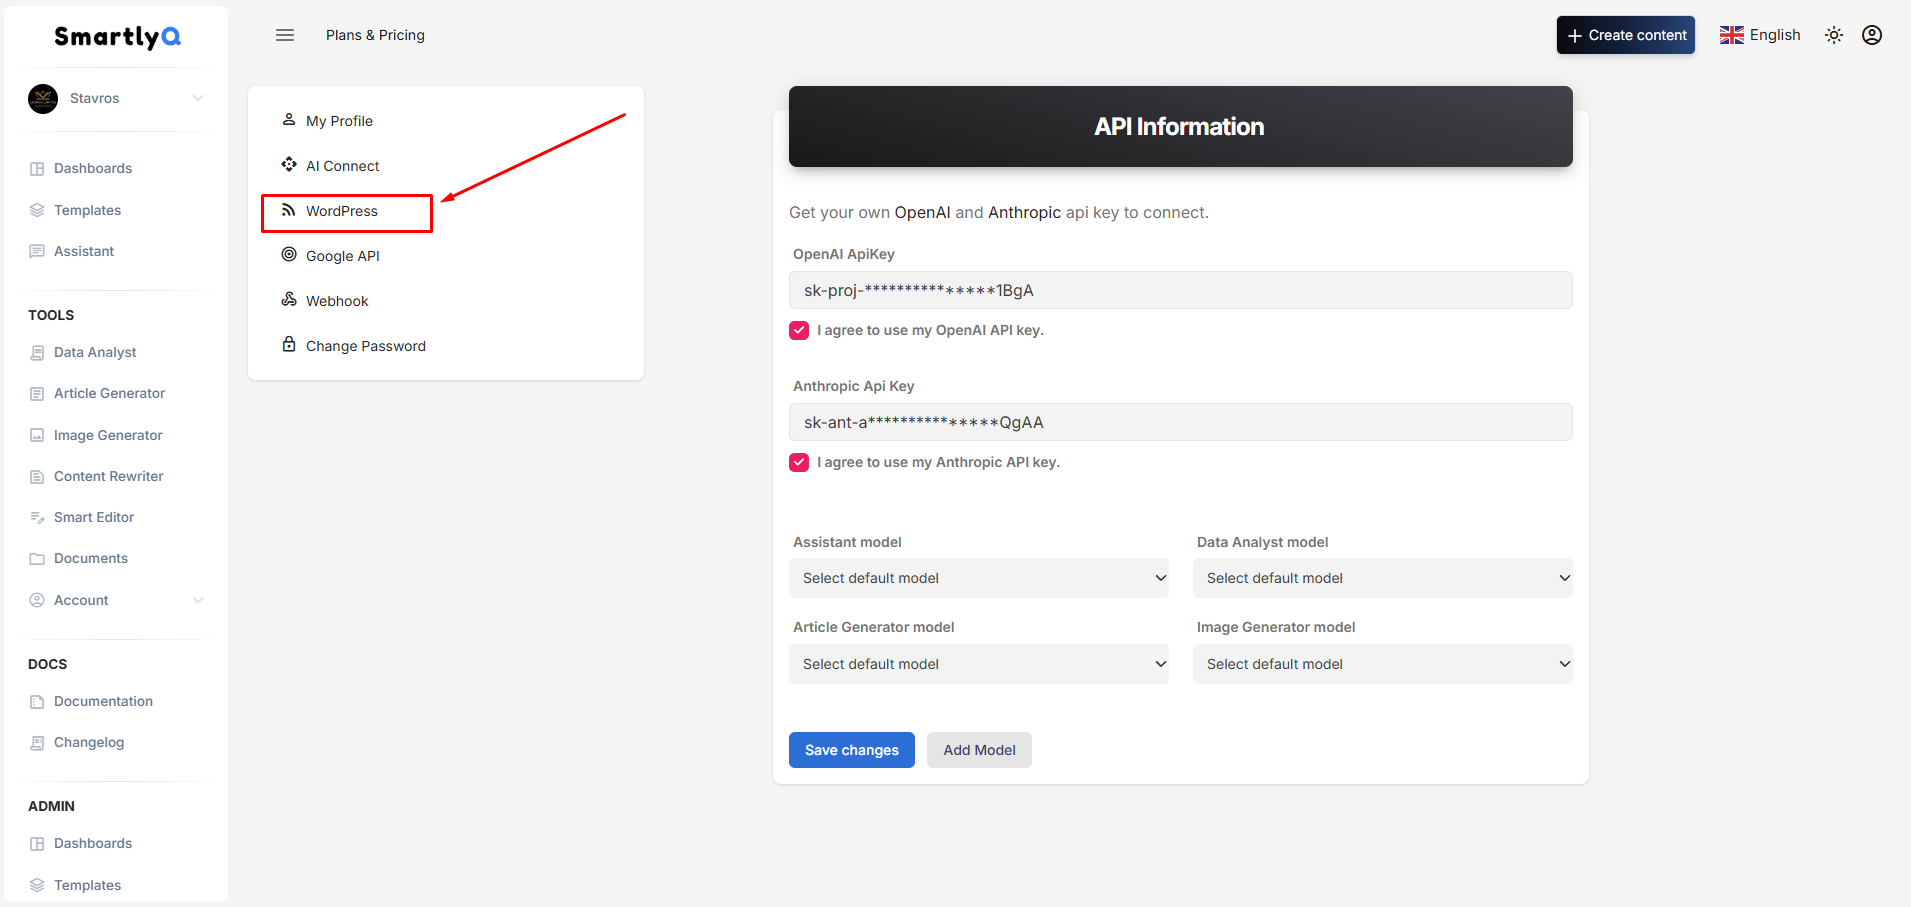
- In the next screen select “WordPress” from the left hand menu.
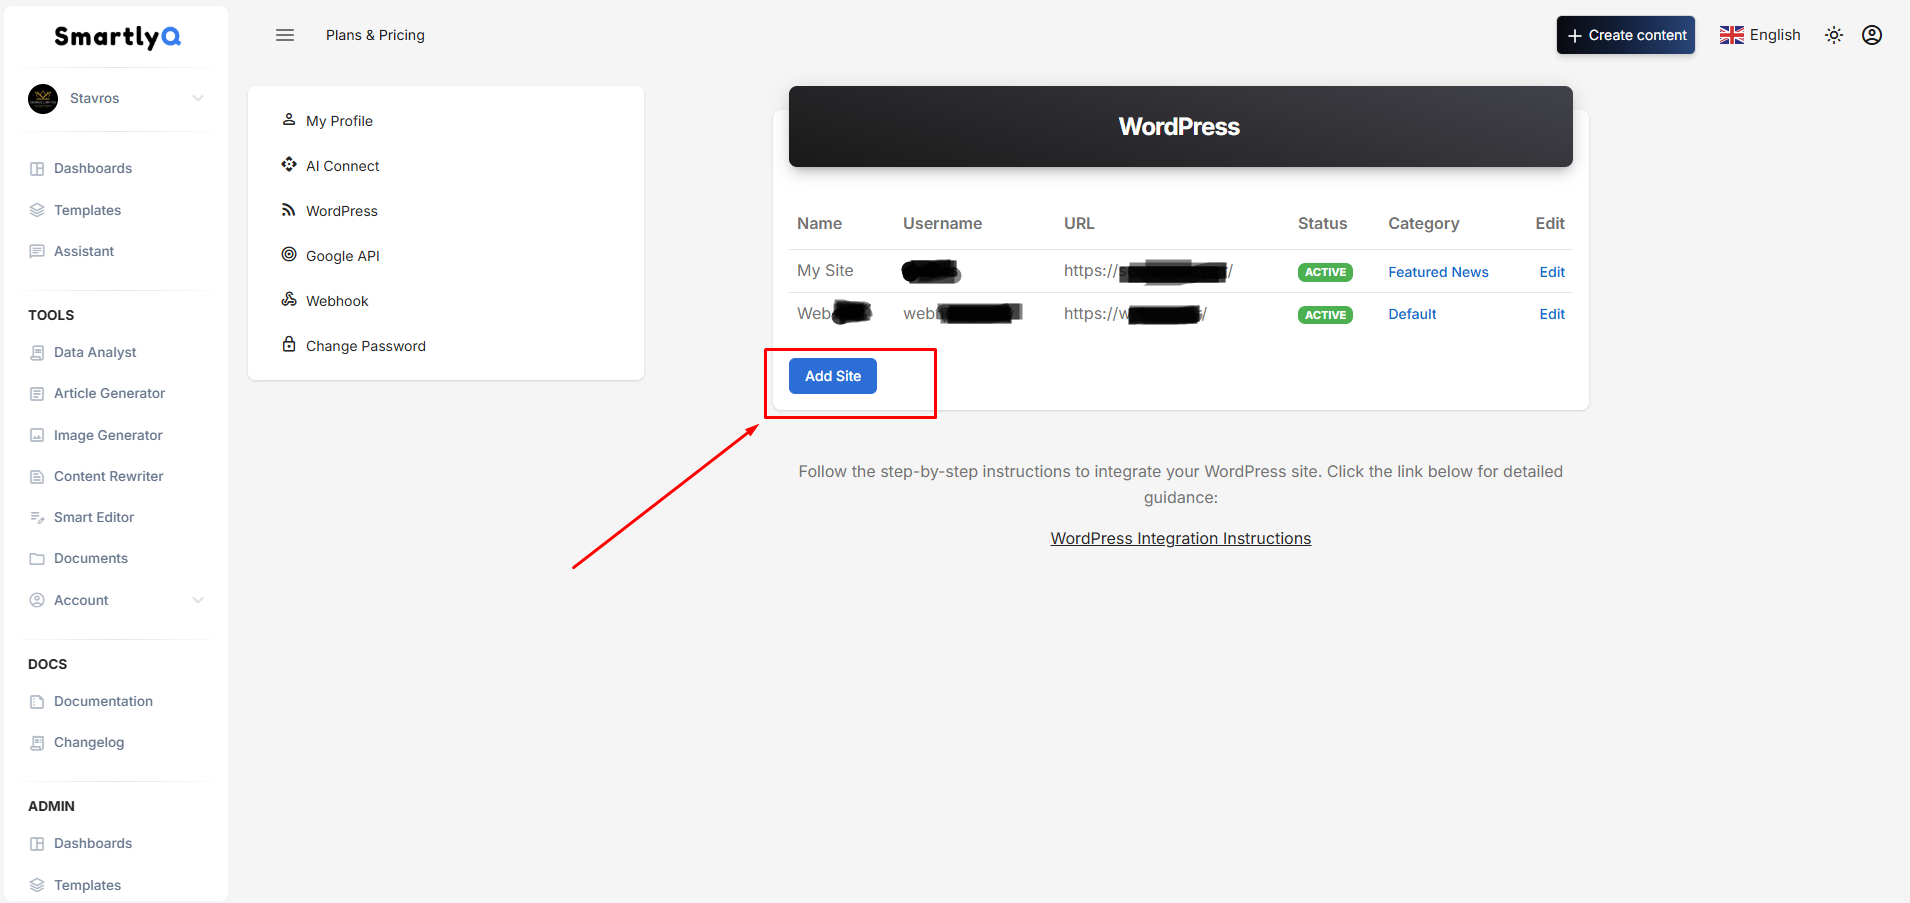
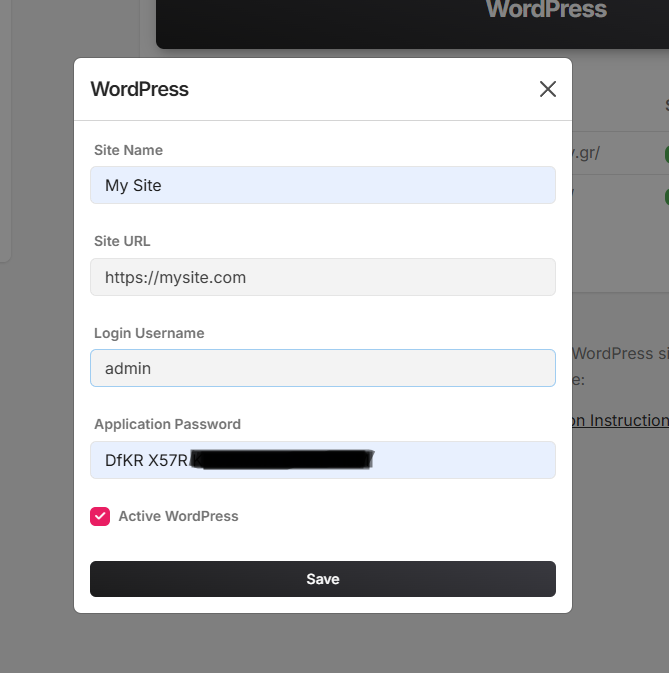
- Press the "Add Site" button
- Enter Site name (So you can recognize it if you have multiple integrations)
- Enter site URL (eg https://mysite.com/)
- Enter profile username that we created the Application Password on
- Enter the Application Password that we created in Step 1
- Also, make sure to check the "Active WordPress" checkbox, to activate the integration
- When done, click "Save" to finish.
You should see something like this:
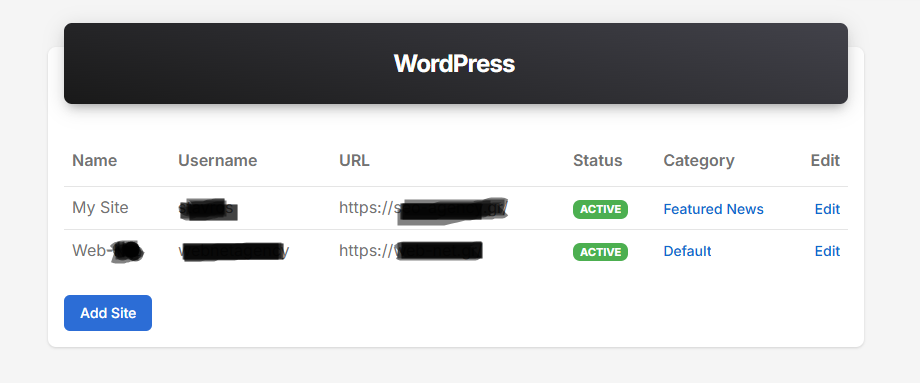
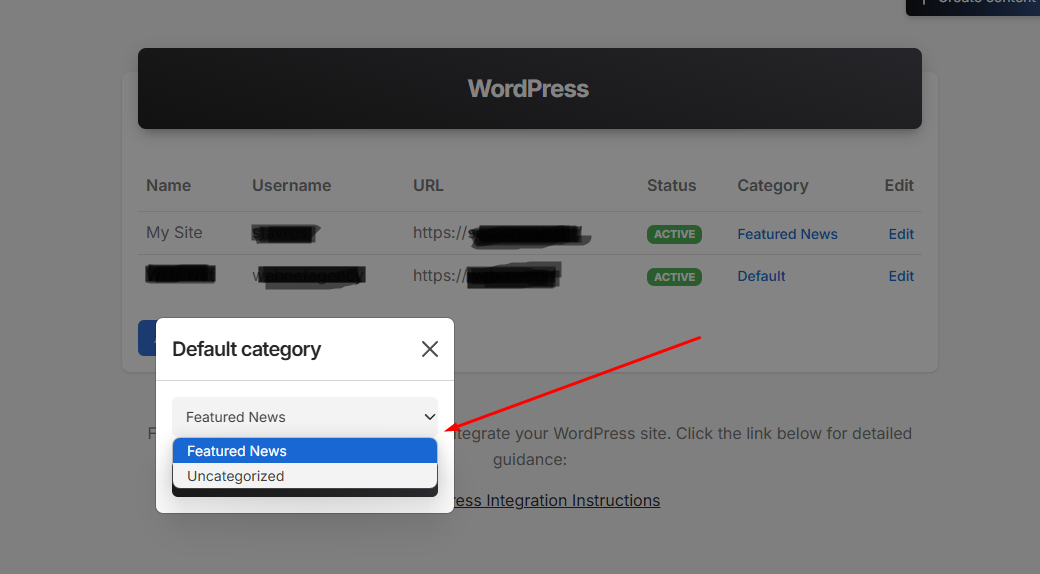
You can also change in which category your articles will be posted by default.
Category will be set to "Default" at first (This will be your default category in your WordPress site, for example it may be "Uncategorized"). You may click on it and select a default category of your choosing, for SmartlyQ to post your articles in.
Step 3: Create your article using the "Article Generator"
Create the article of your choice using SmartlyQ's powerful Article Generator. Please visit the following article if you are not familiar how to do so: How to Use the Article Generator
If you also wish to insert images by integrating your own Google Programmable Search Engine or also insert related YouTube videos, you may also consult the following articles as well:
- How to integrate your Google API key with SmartlyQ
- How to integrate your YouTube API key with SmartlyQ
Step 4: Post your article on your WordPress site
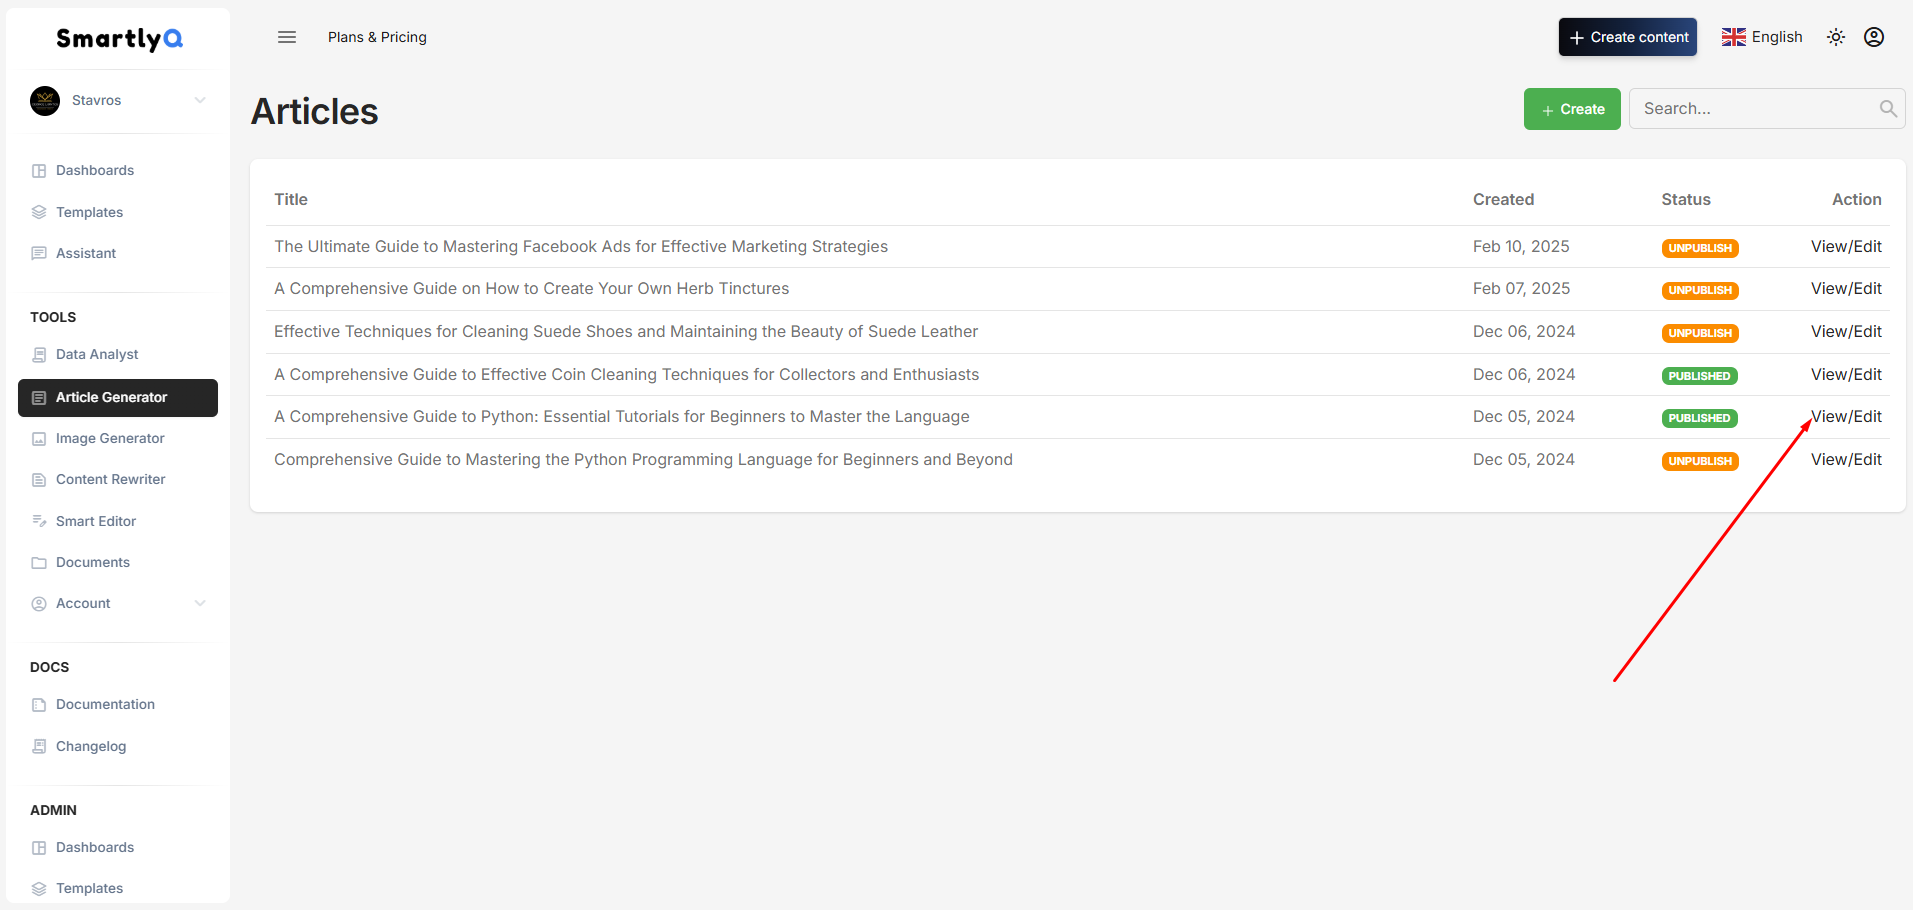
Now that you have your content, you're ready to post it on your WordPress site. Let's find an article to publish through the Article Generator tool.
First, navigate to the "Article Generator", under the TOOLS heading, in the left hand menu. Click on "Article Generator" to get a list of all your created articles in SmartlyQ. Find the article you want and press the "View/Edit" link on the right side:
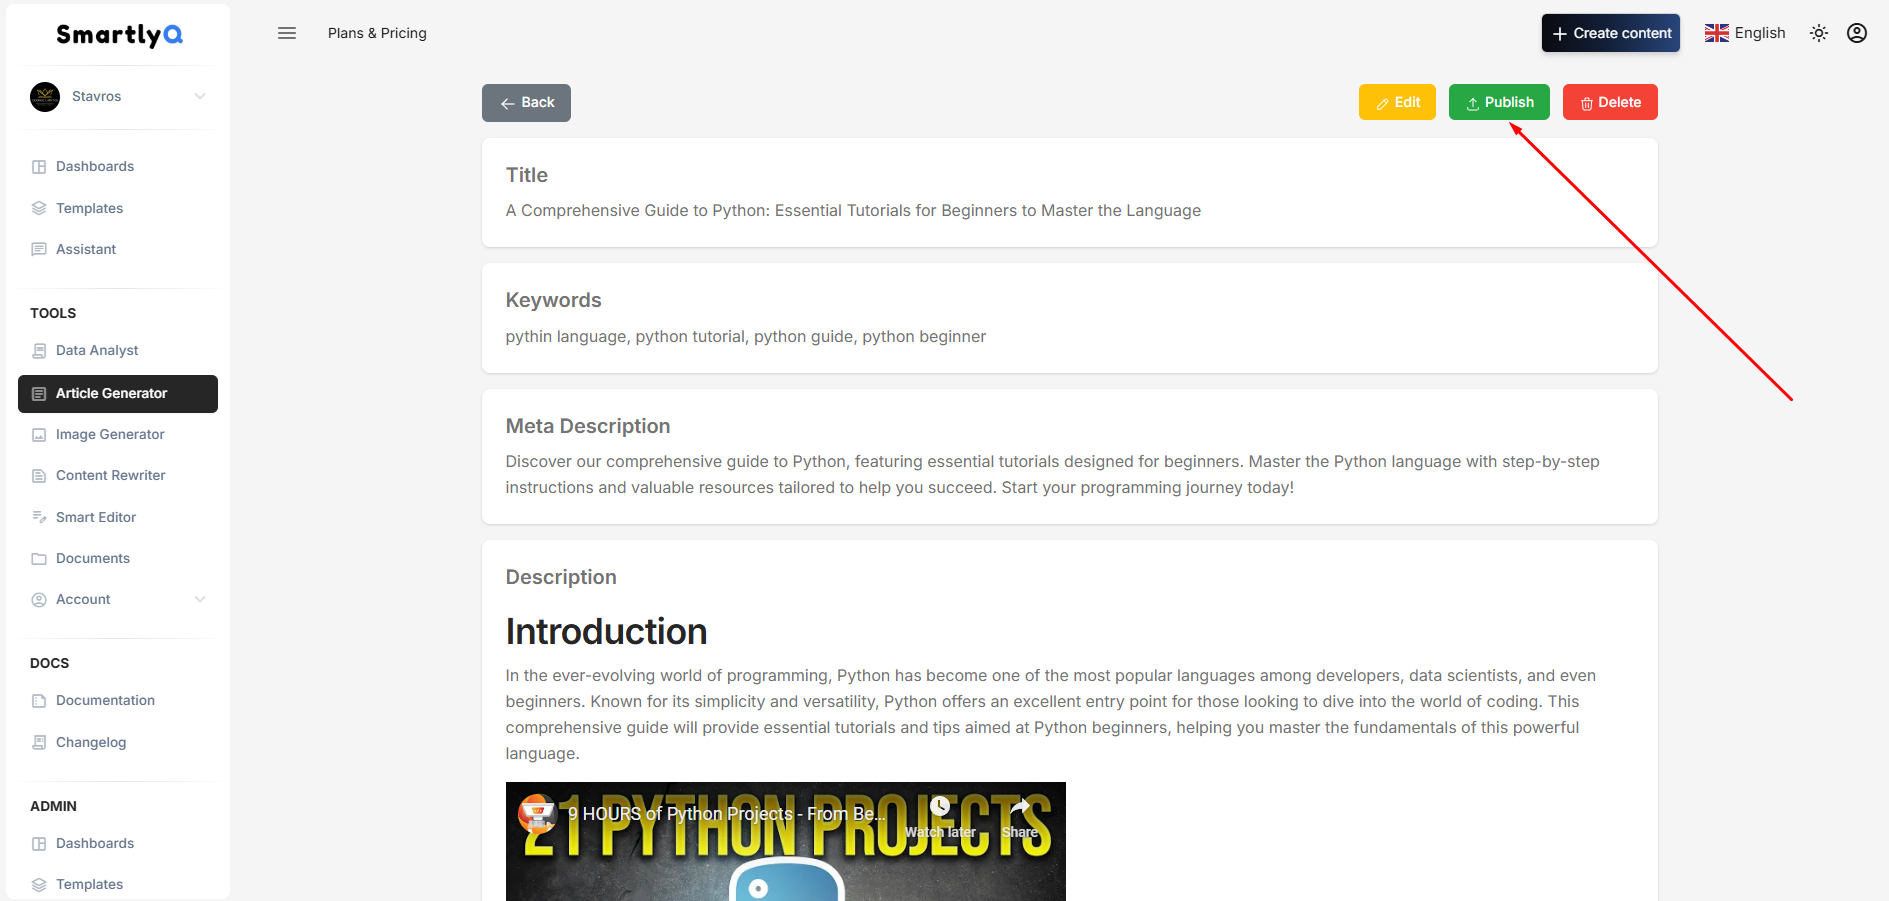
Once you are inside the article, you will see a "Publish" button. Click on it and you will get a new window:
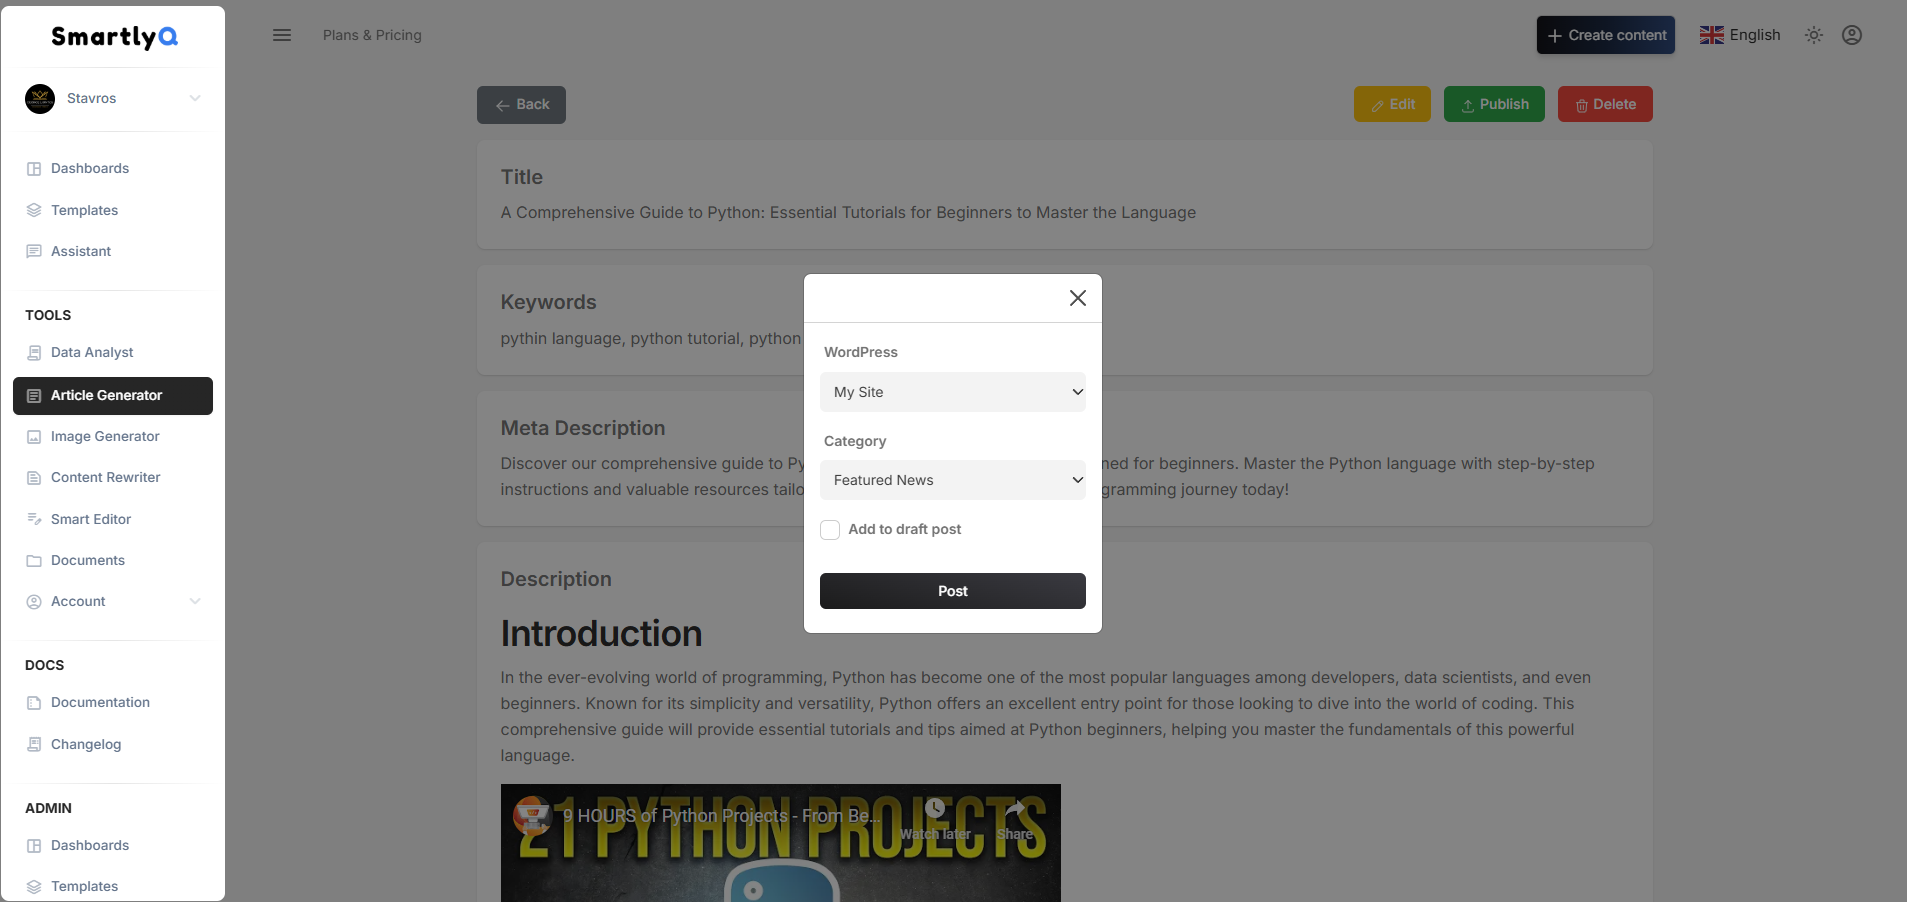
From the dropdown menu you may select any WordPress integration (if you have installed more than one) from the first dropdown box labeled "WordPress". Once you have done that, you can select a category from your article form the second dropdown box, labeled "Category".
You also have the option of posting the article in "Draft" status, so as it will not be visible to the public yet.
Once you're ready, press the "Post" button and wait until the article is posted
And that is it! Your article is now posted on your WordPress site in just a few clicks!
You can also view the video version of the above tutorial here: